DIY Friendship Bracelets: Three Creative Patterns for Your Inner Circle
Pick up a nostalgic craft and make personalized bracelets for your friends. This guide walks you through three designs: an embroidery thread heart, a beaded daisy chain, and a letter bead bracelet.
By Toby Hayes
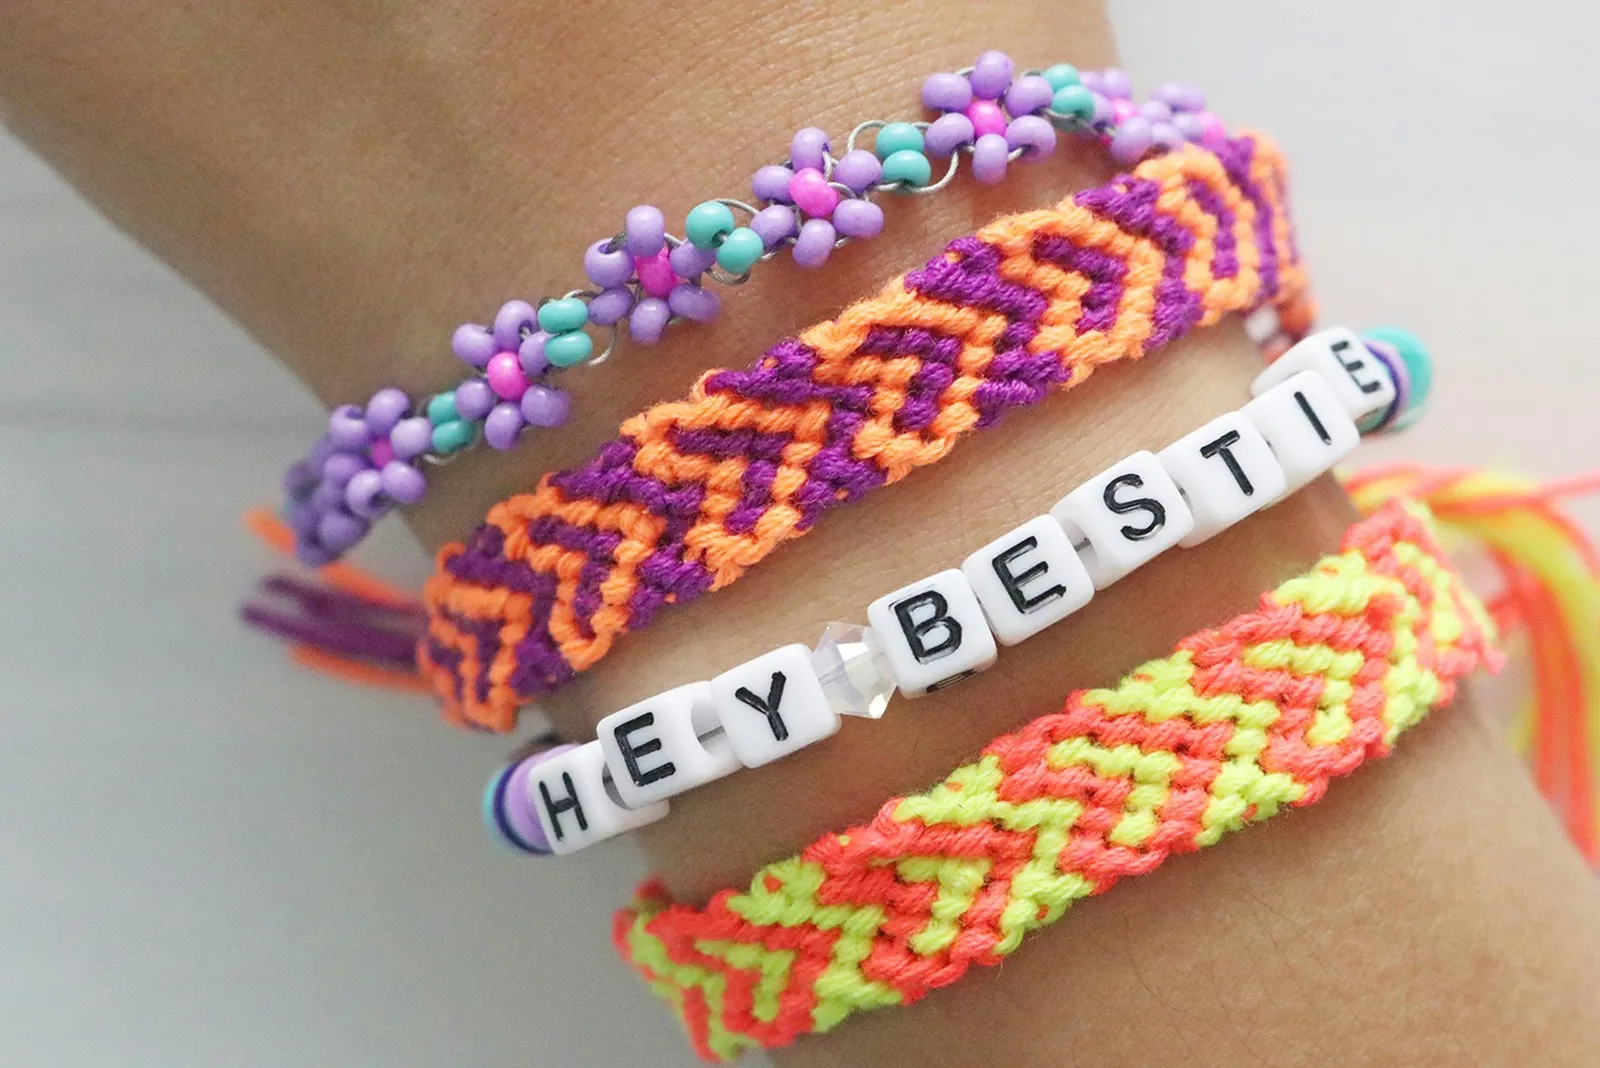
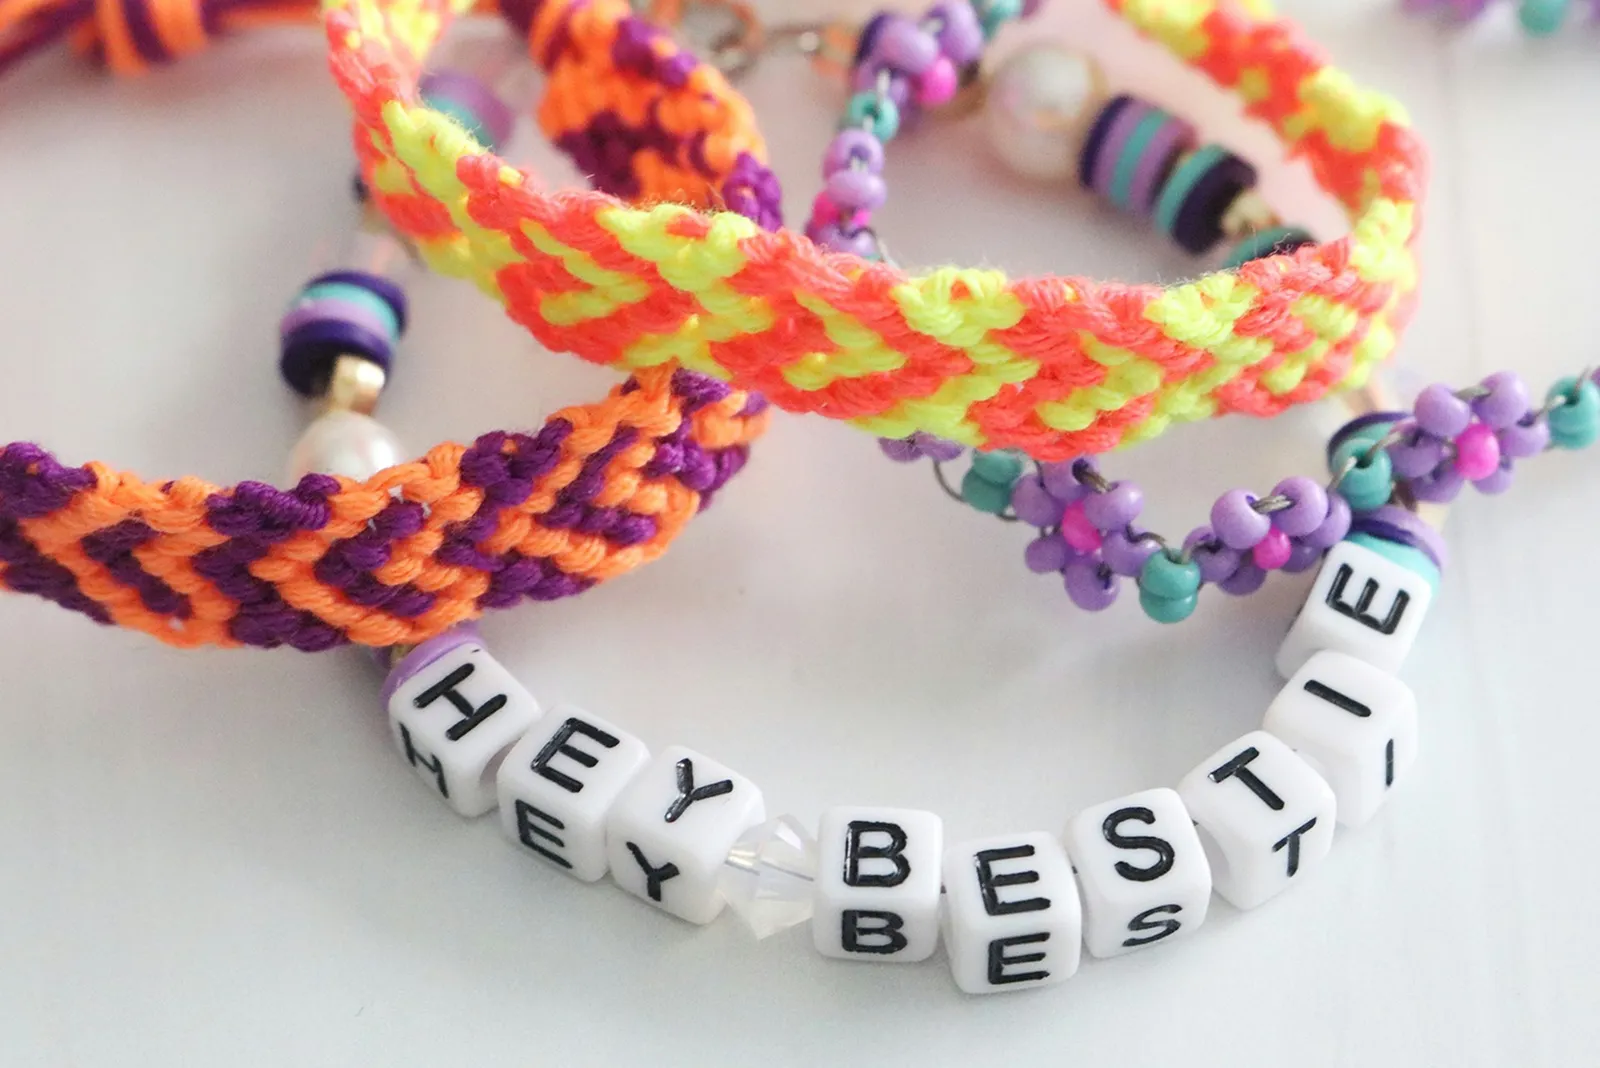
If you feel a pang of nostalgia for summer camp days, are caught up in the Taylor Swift friendship bracelet craze, or simply enjoy crafting your own accessories, this colorful DIY jewelry project is worth saving. We've put together three straightforward friendship bracelet tutorials that are both enjoyable and stylish: a heart design using embroidery floss, a daisy chain made of beads, and a classic letter bead bracelet.
For those who have never made a friendship bracelet before, this is a perfect chance to try your hand at this nostalgic craft. Once you've got the hang of it, you can create personalized bracelets for your close friends to mark birthdays, concerts, Valentine's Day, and countless other occasions.
Ready to make something special for your BFFs? Continue reading to learn how to make friendship bracelets and discover our best advice for finishing this simple craft project.
1. Embroidery Heart Friendship Bracelet
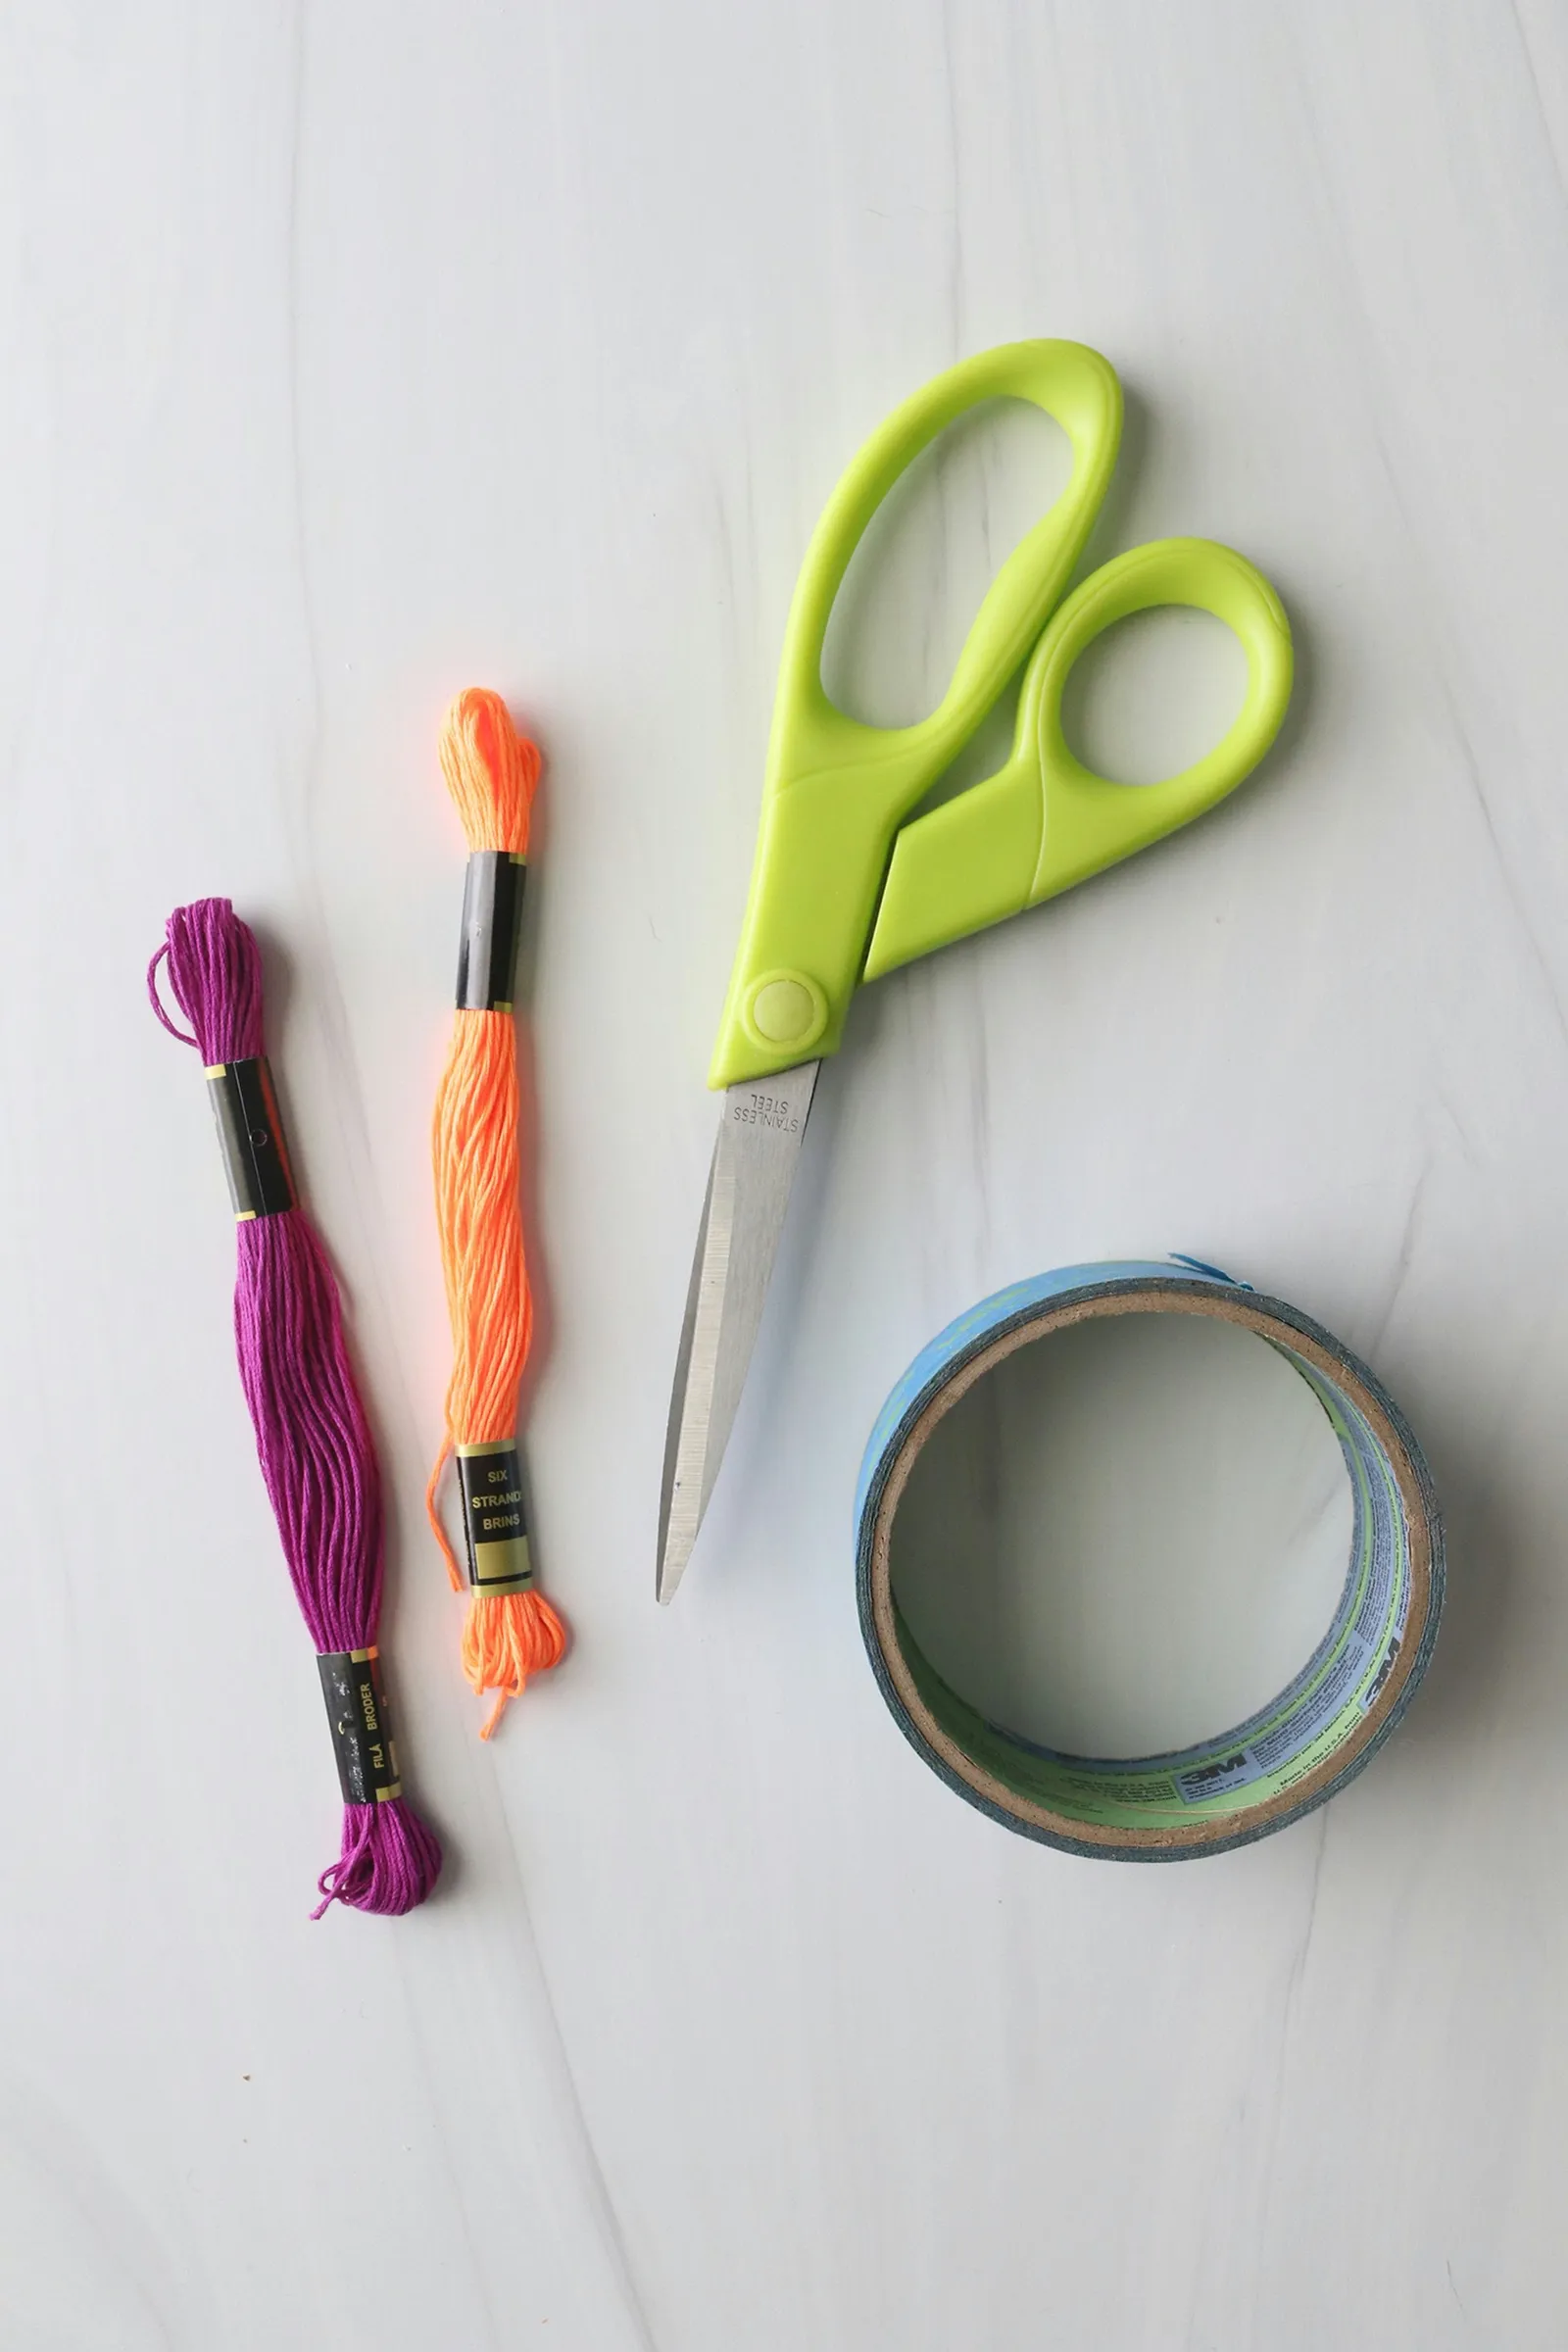
1. Prepare thread
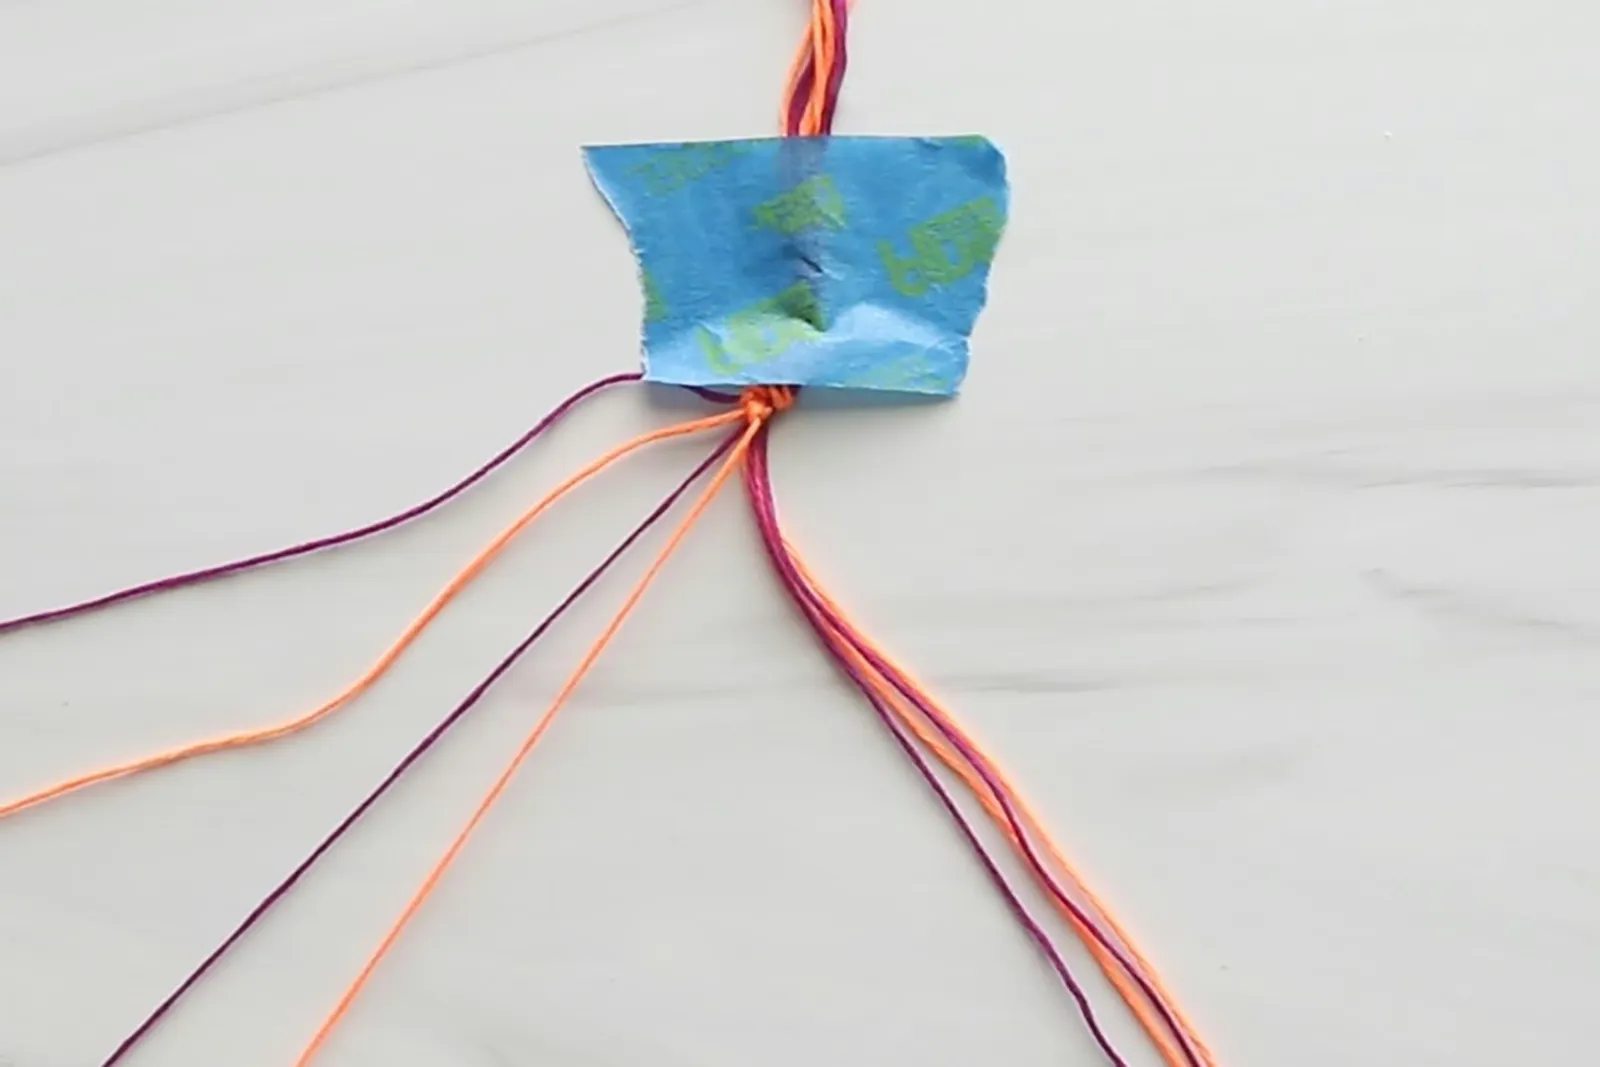
Cut four strands of each color, about 28 inches long, giving you eight strands total. Tie them together with a knot, leaving about 3 inches of excess thread.
Tape the bundle of thread to a flat surface. This will keep it steady as you work.
2. Make chevron rows
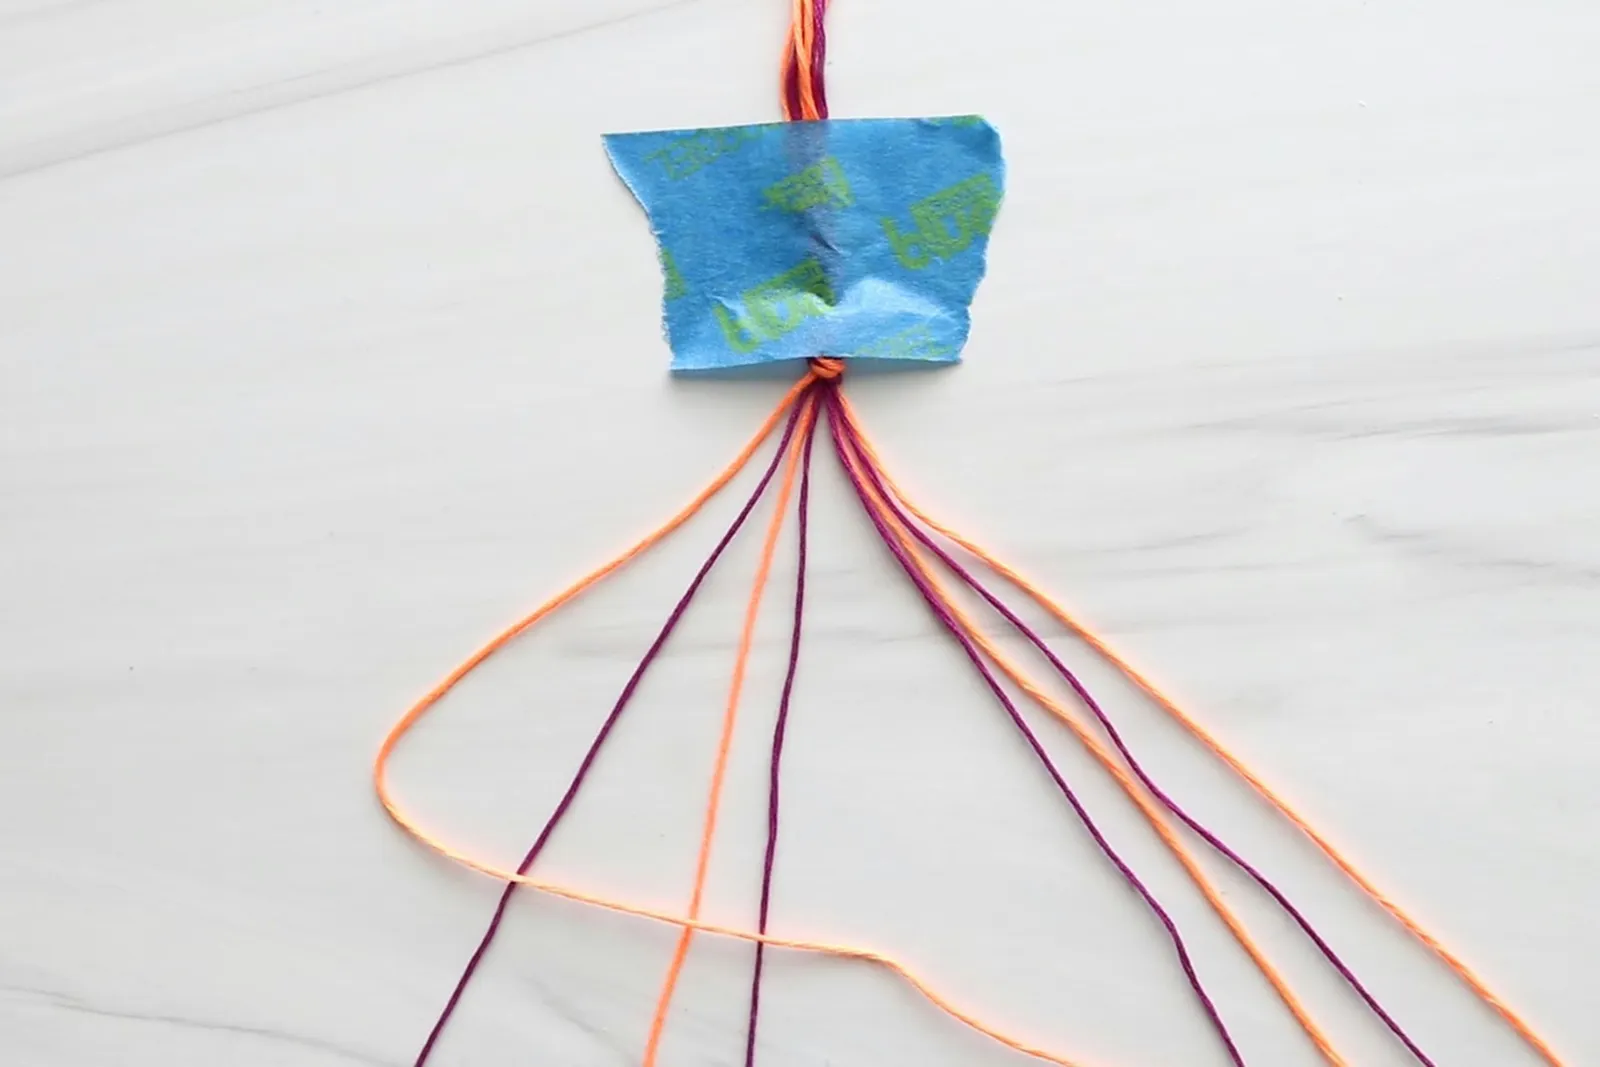
A heart pattern is made by alternating between two "normal" rows and two "special" rows. Normal rows consist of chevrons, or V-shaped rows.
3. Make two “special” rows
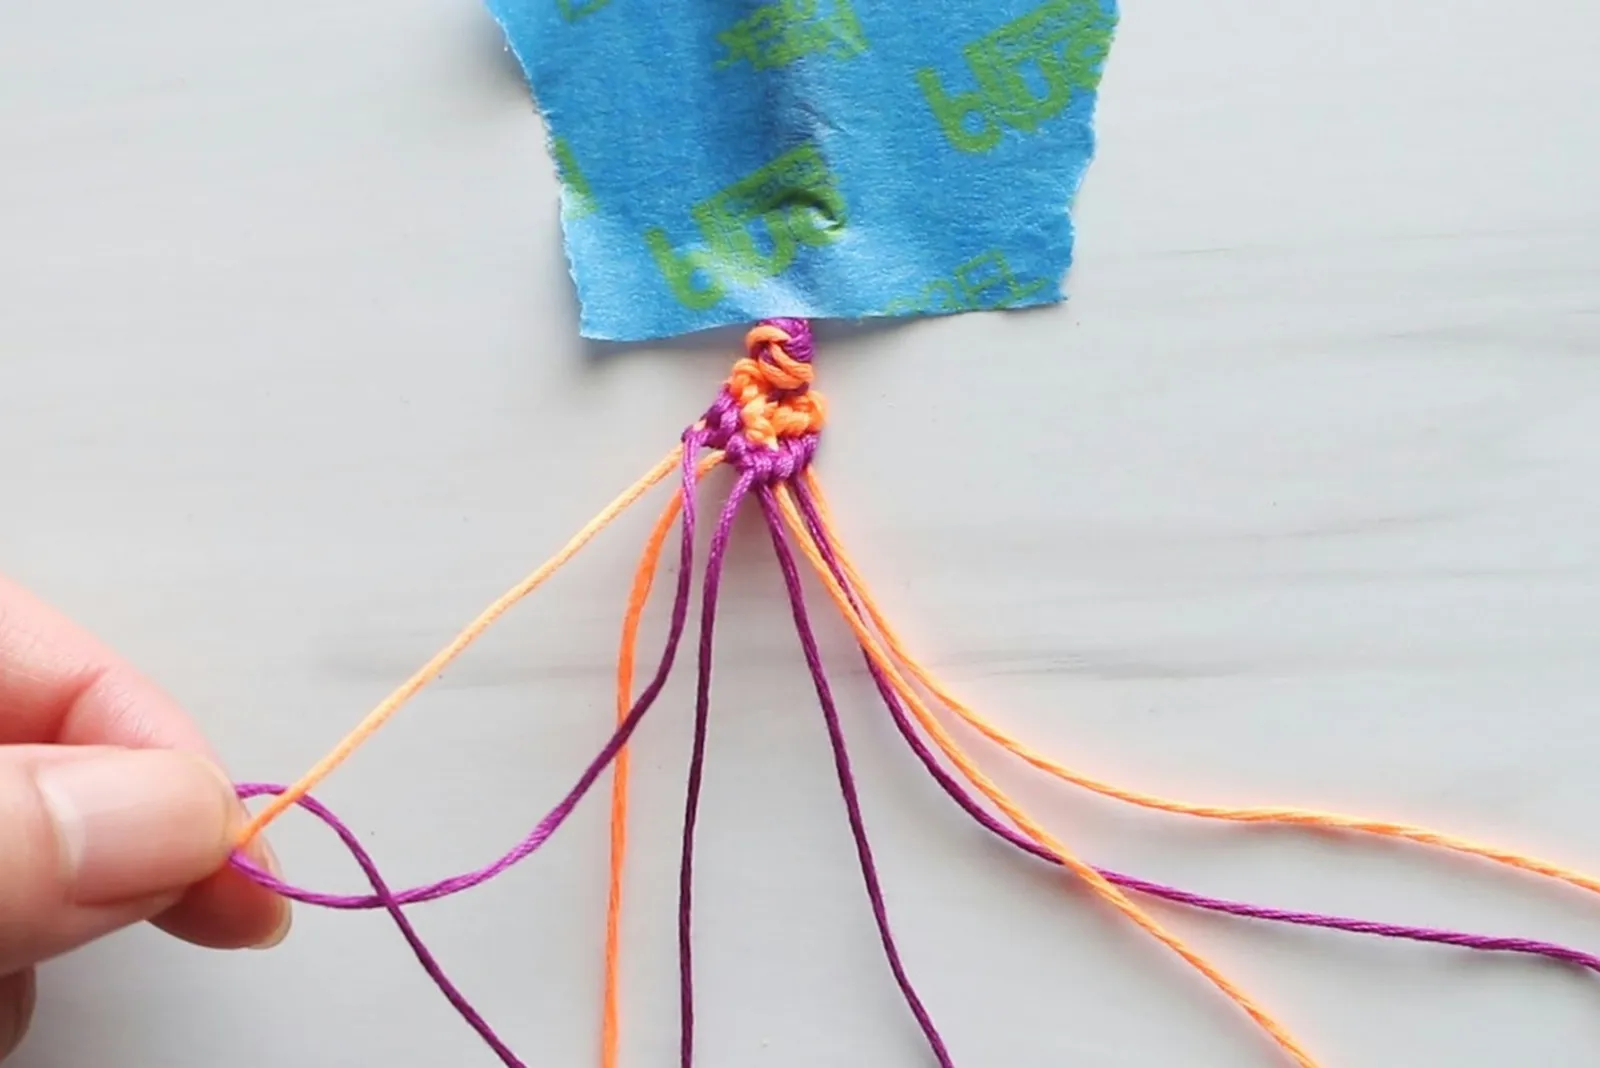
Before starting, make sure strands of embroidery floss are separated into two groups of four. Check that colors mirror each other on each side.
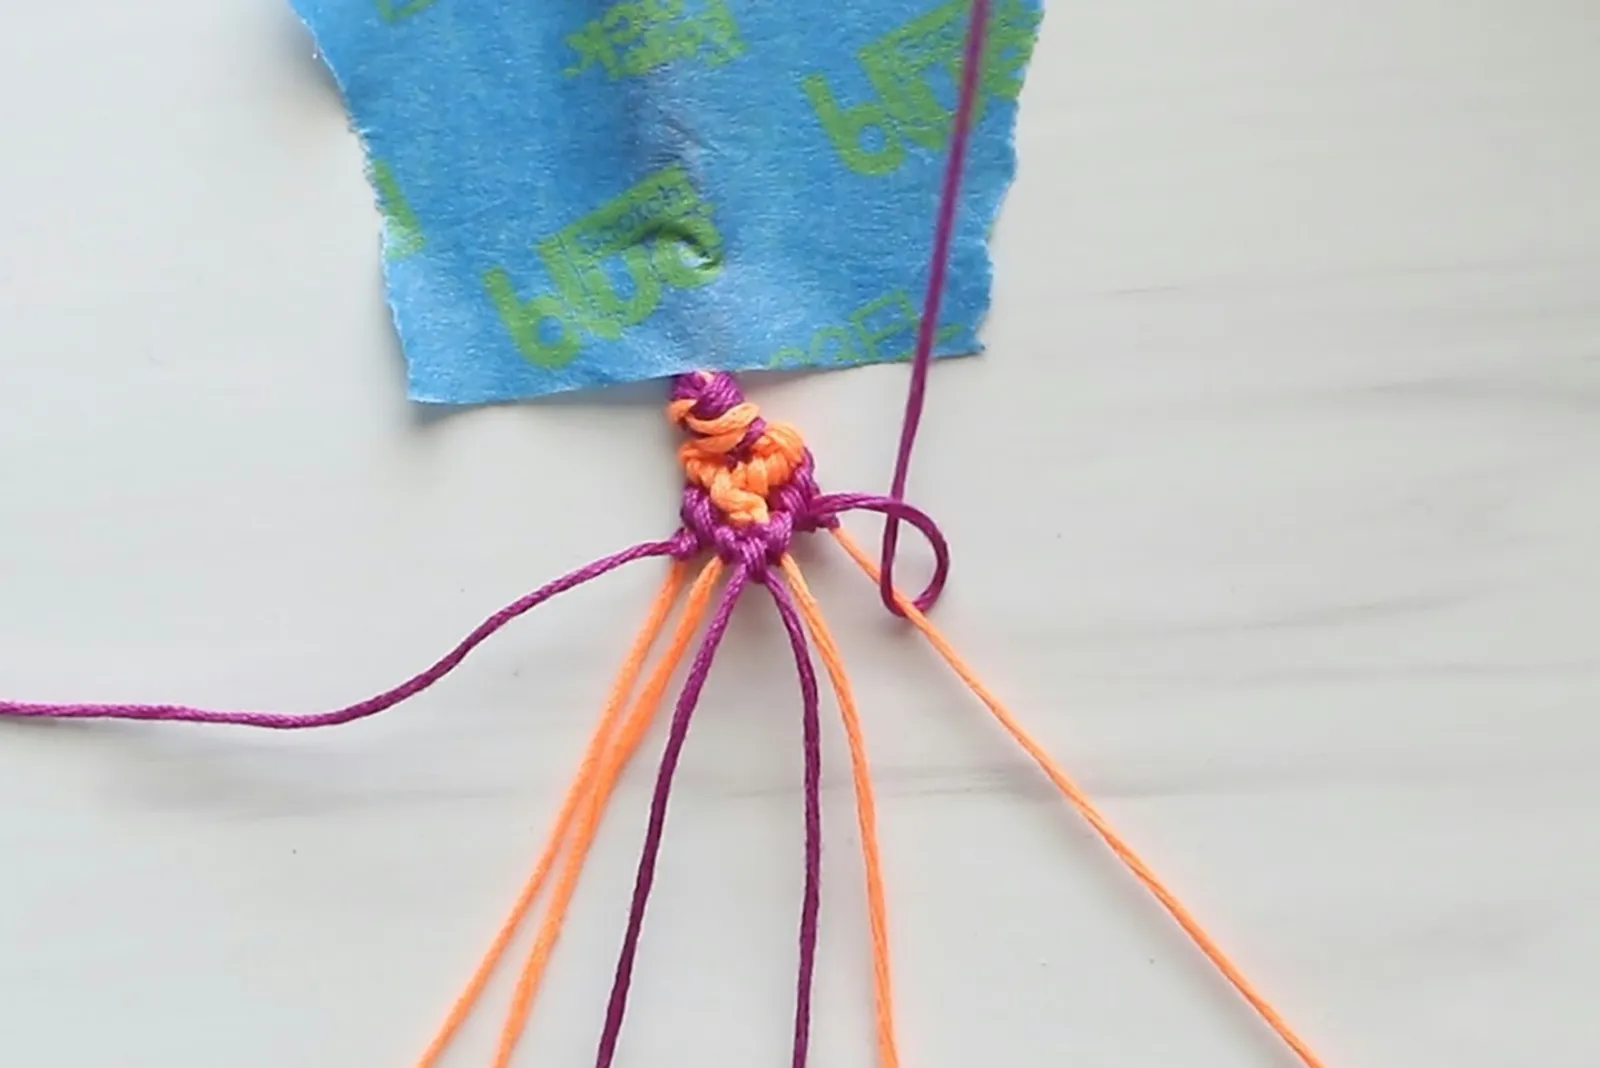
To start a "special" row, take second outermost left strand (shown here in purple). Make a backward knot around outermost strand (shown here in orange). Remember, knot twice!
On right side, take second to last strand (shown here in purple) and make a forward knot on last strand (shown here in orange).
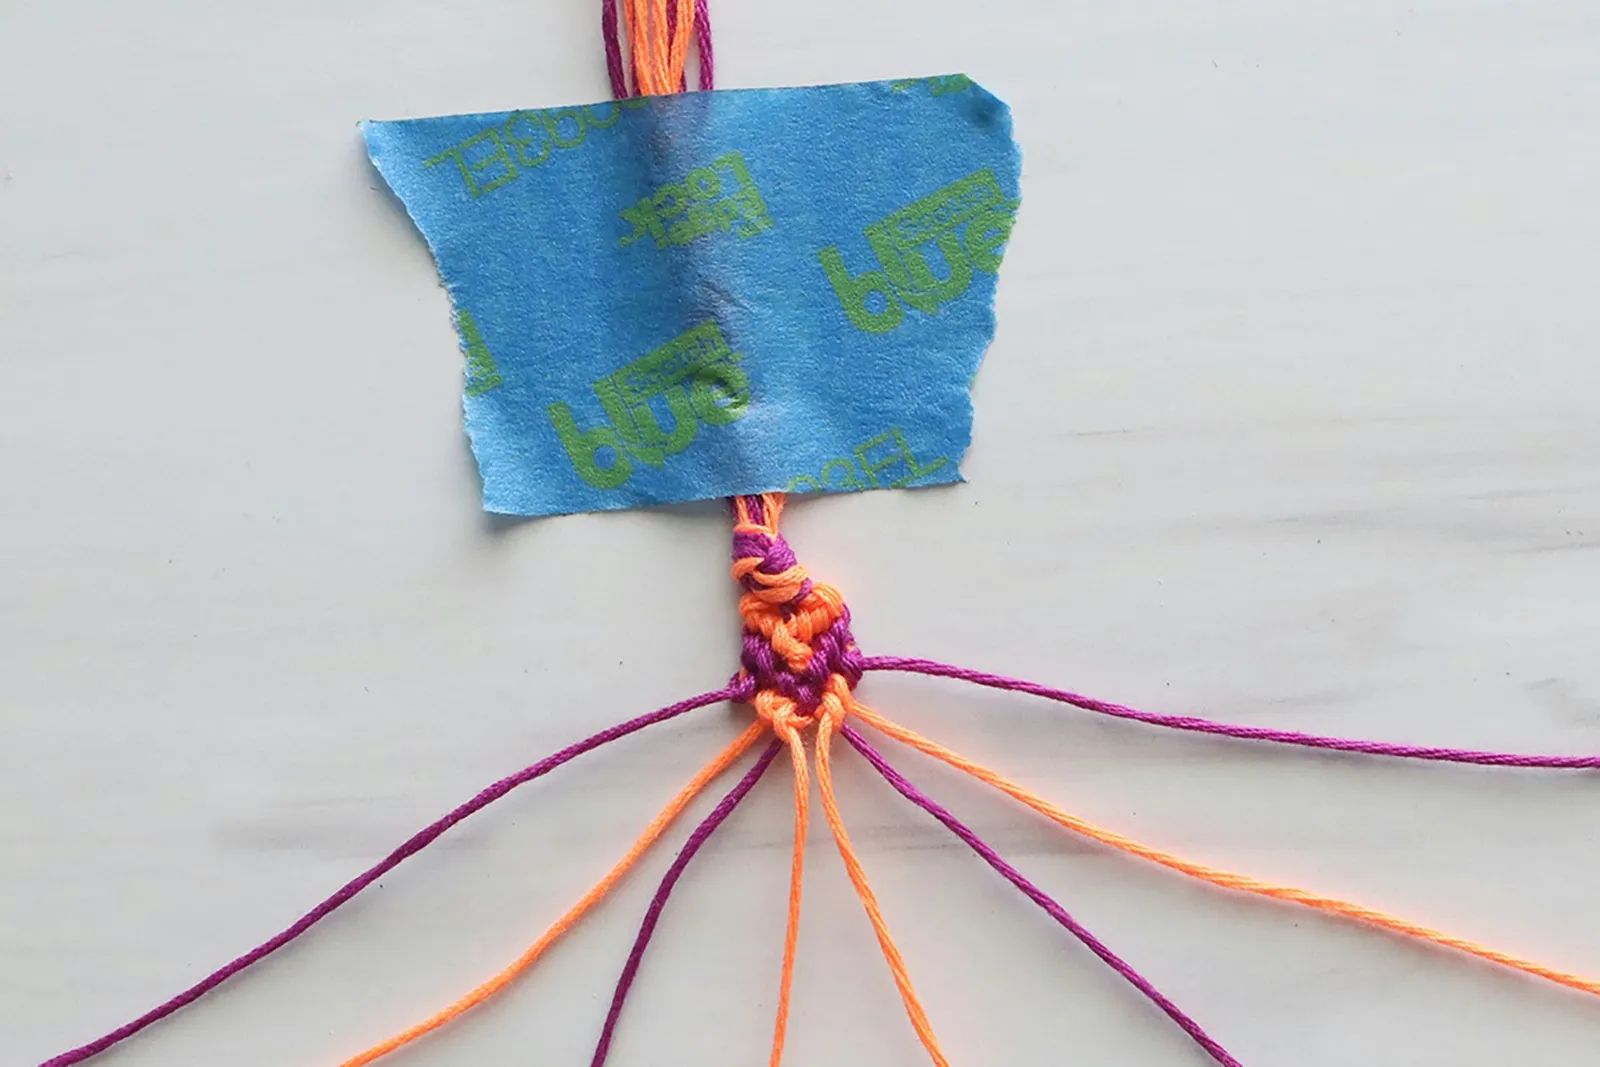
Next, tie knots between outer knots. On left side, take second strand and tie forward knots on next two strands until reaching middle.
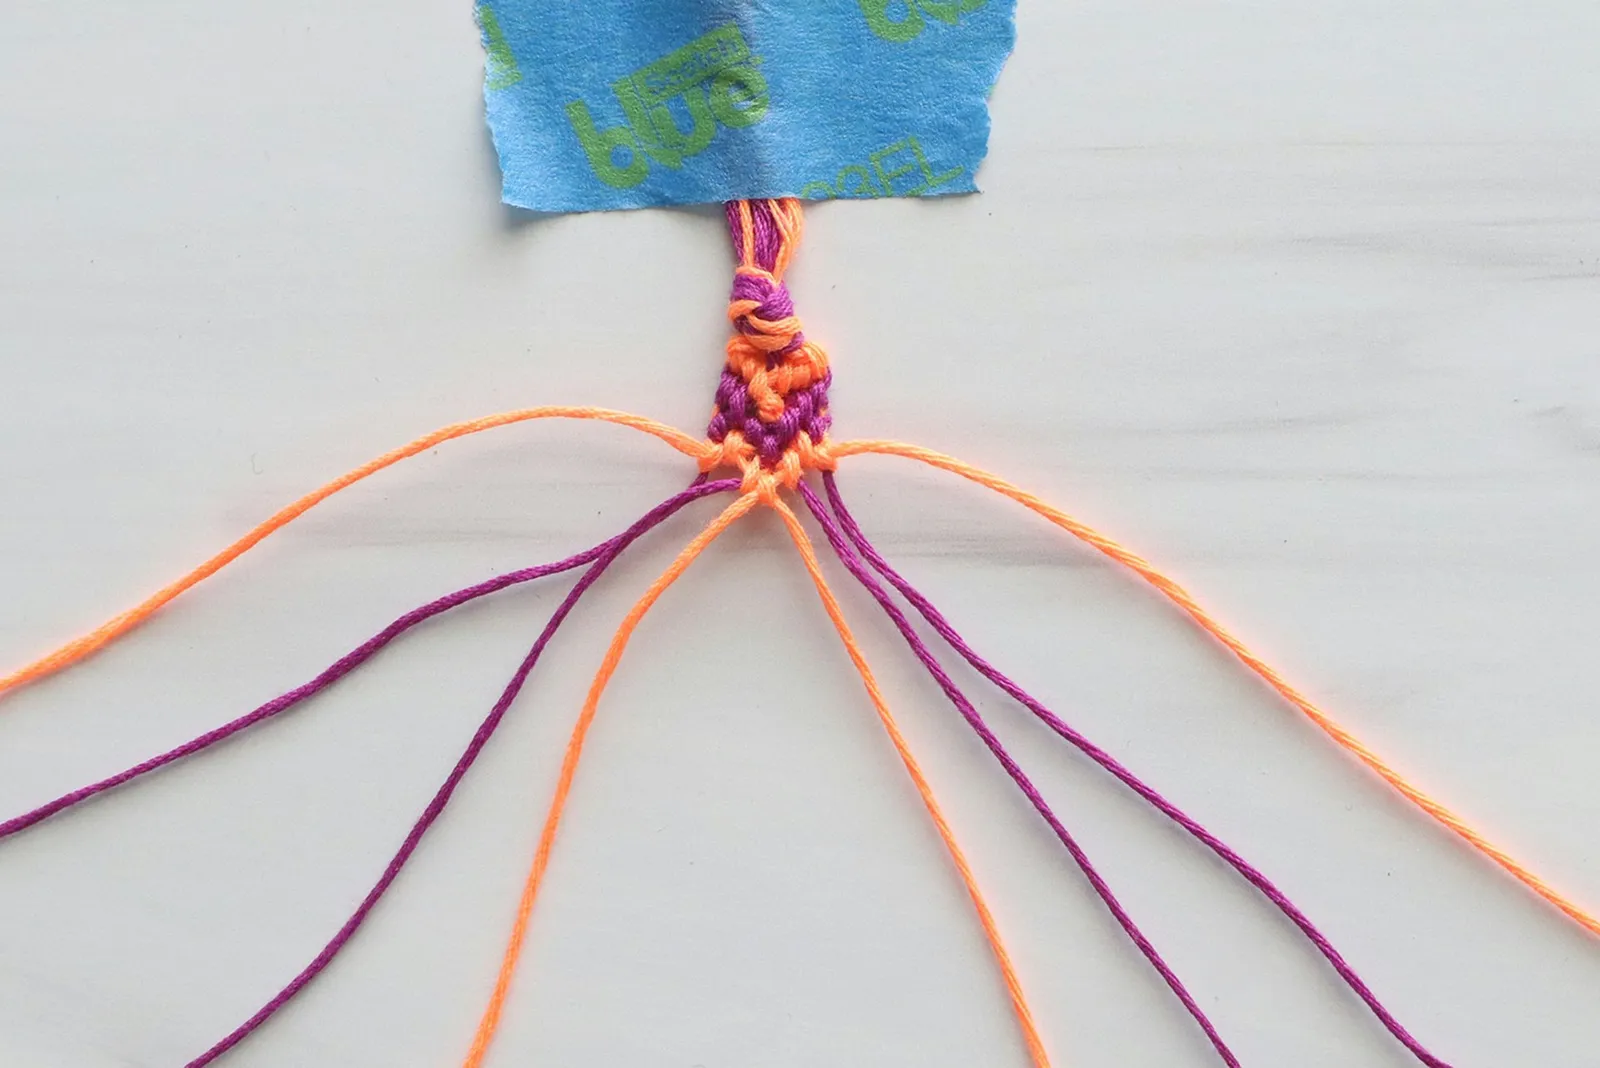
On left side, take second to last strand and tie backward knots until reaching middle. Again, you'll have two strands of same color in center.
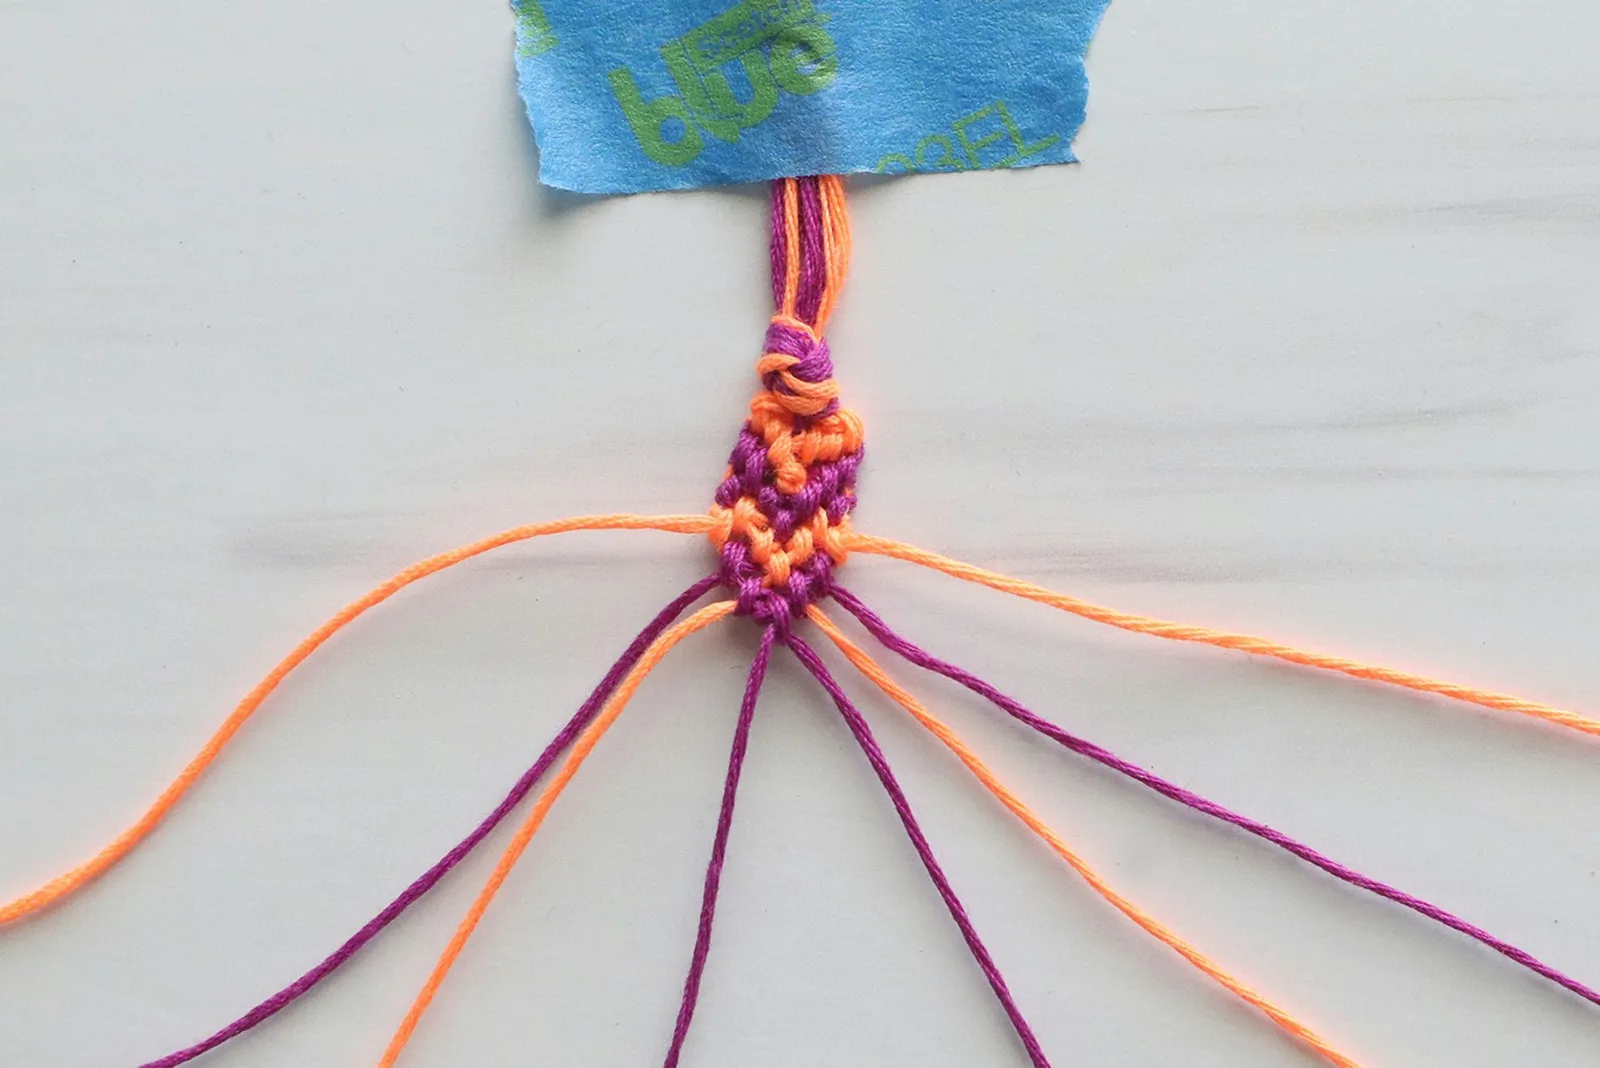
Take strand on right and tie a backward knot, which will connect it to strand of same color (fourth from left). Repeat another special row, starting with new outermost strands. It will be same as first special row but in opposite colors.
4. Continue pattern
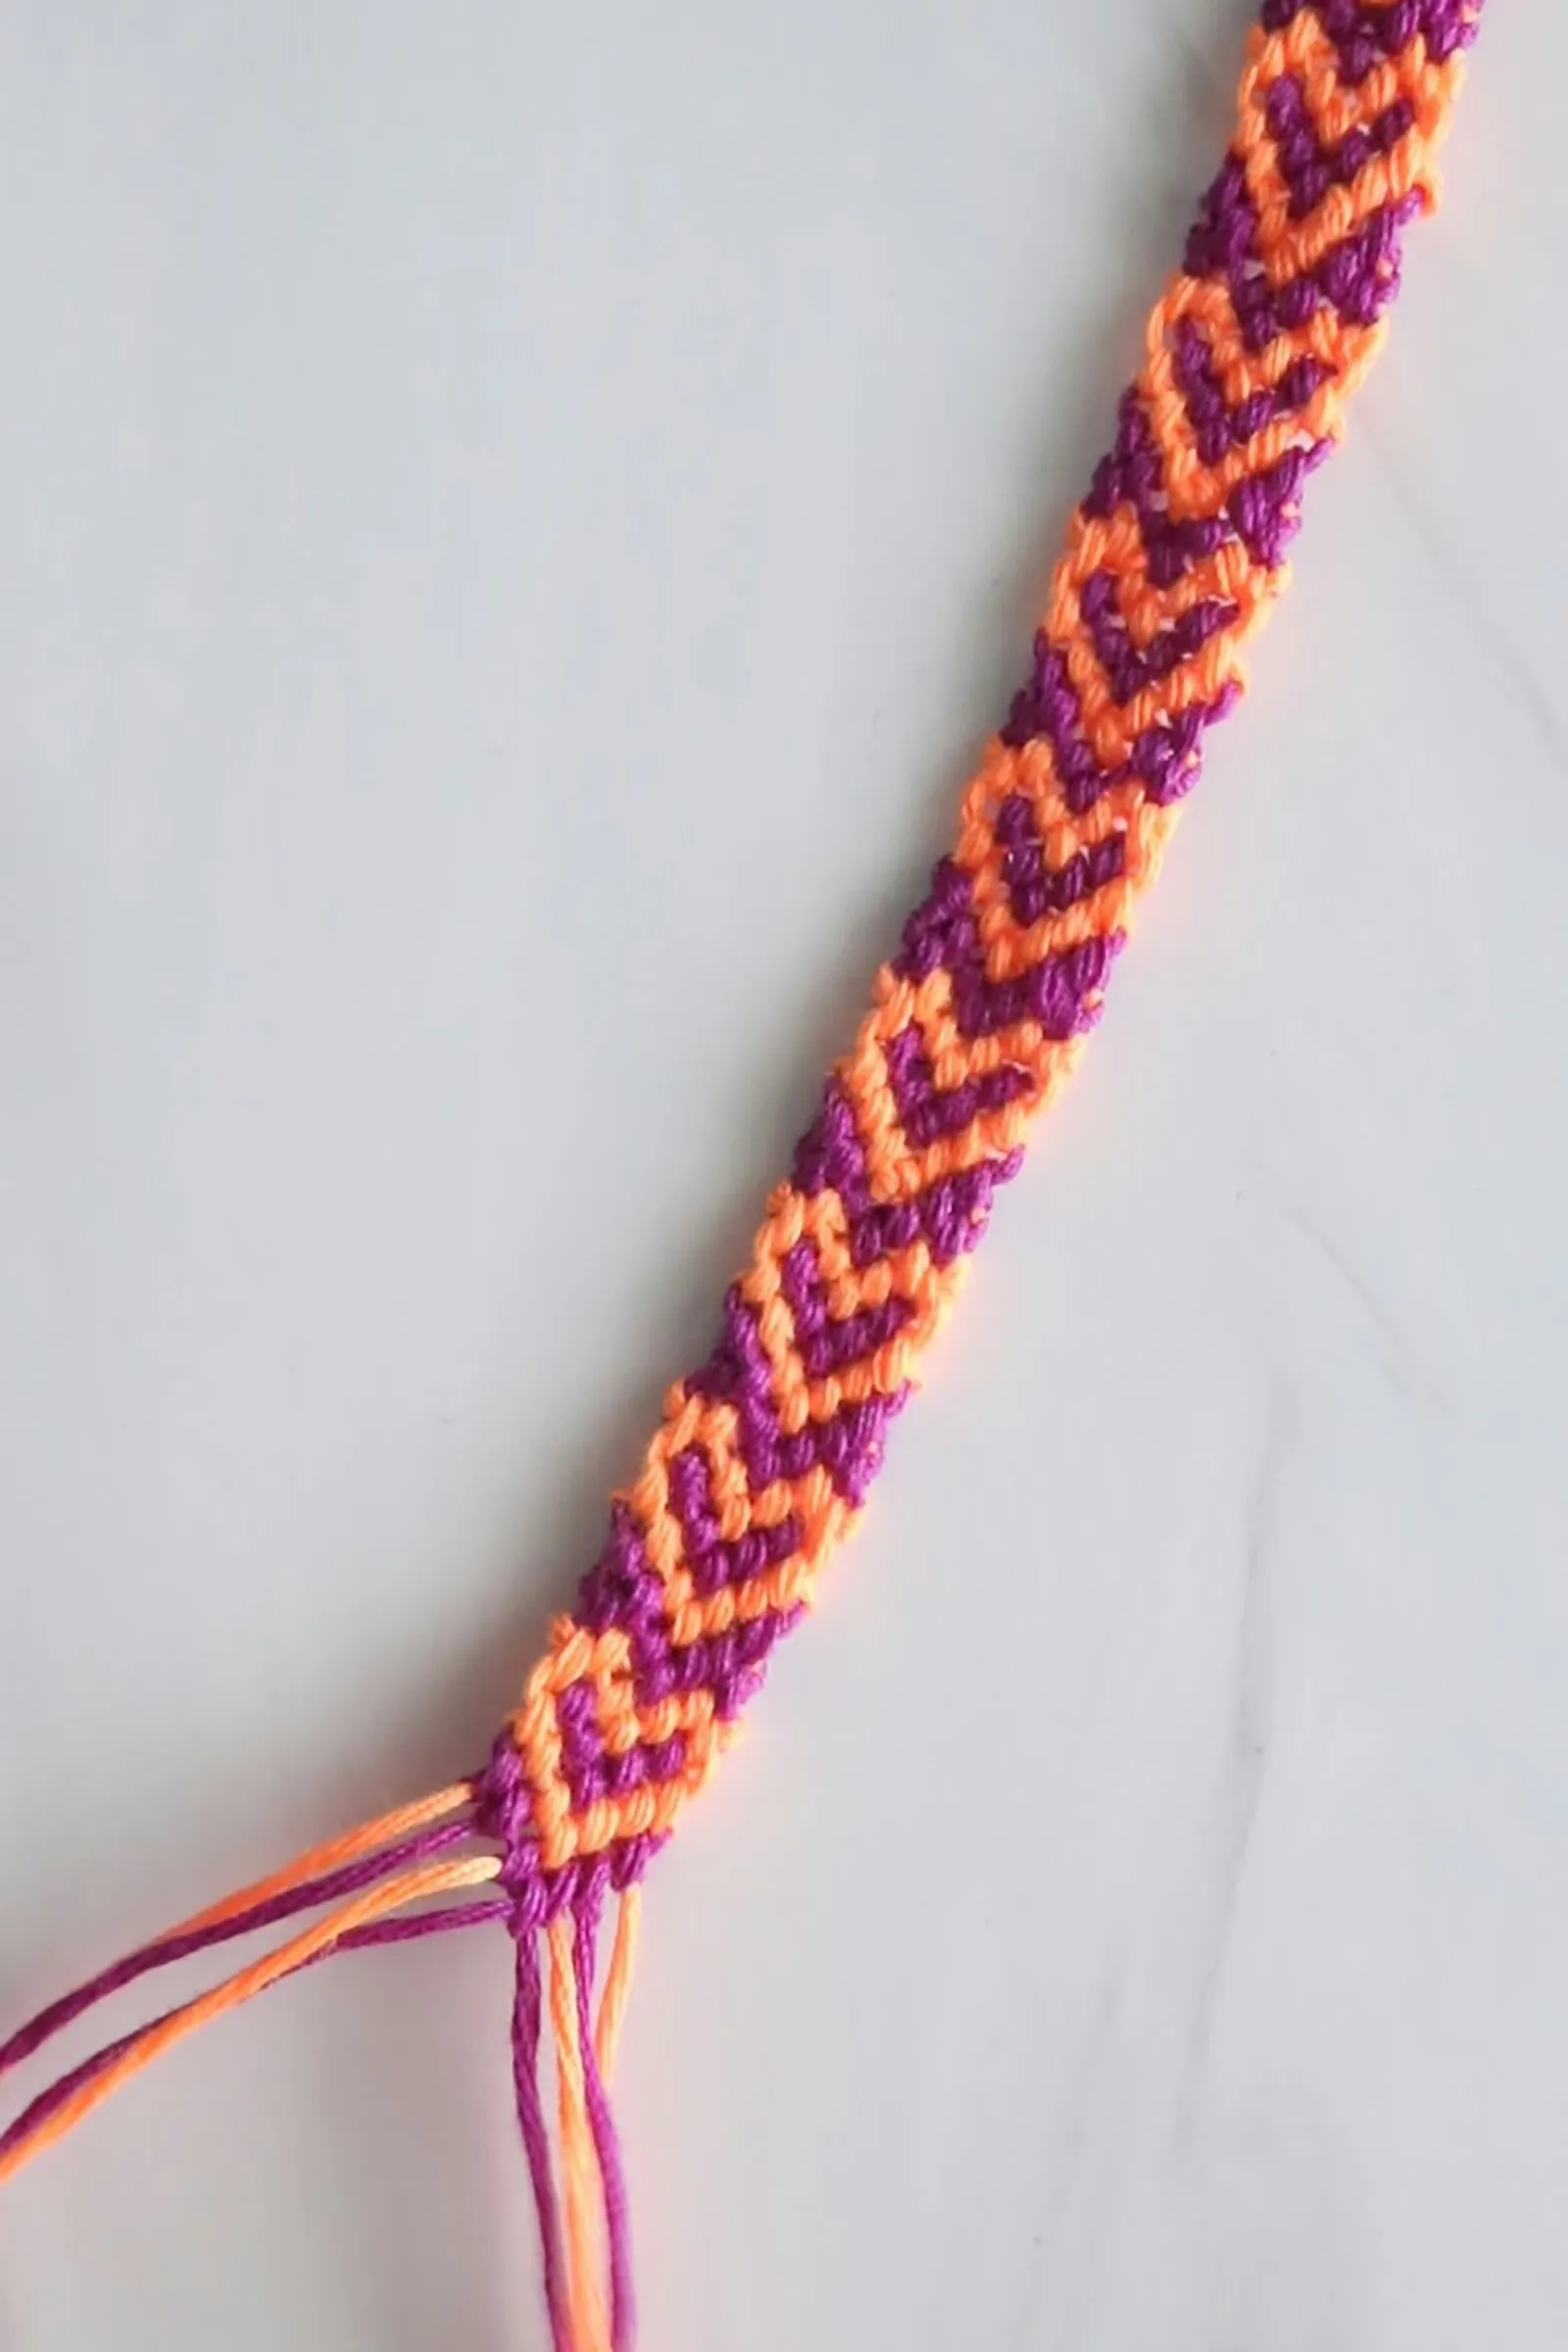
Make another two normal rows, which will "close up" the heart shape. Follow with two special rows, two normal rows, two special rows, etc. As you continue this sequence, heart pattern will eventually reveal itself.
5. Tie ends
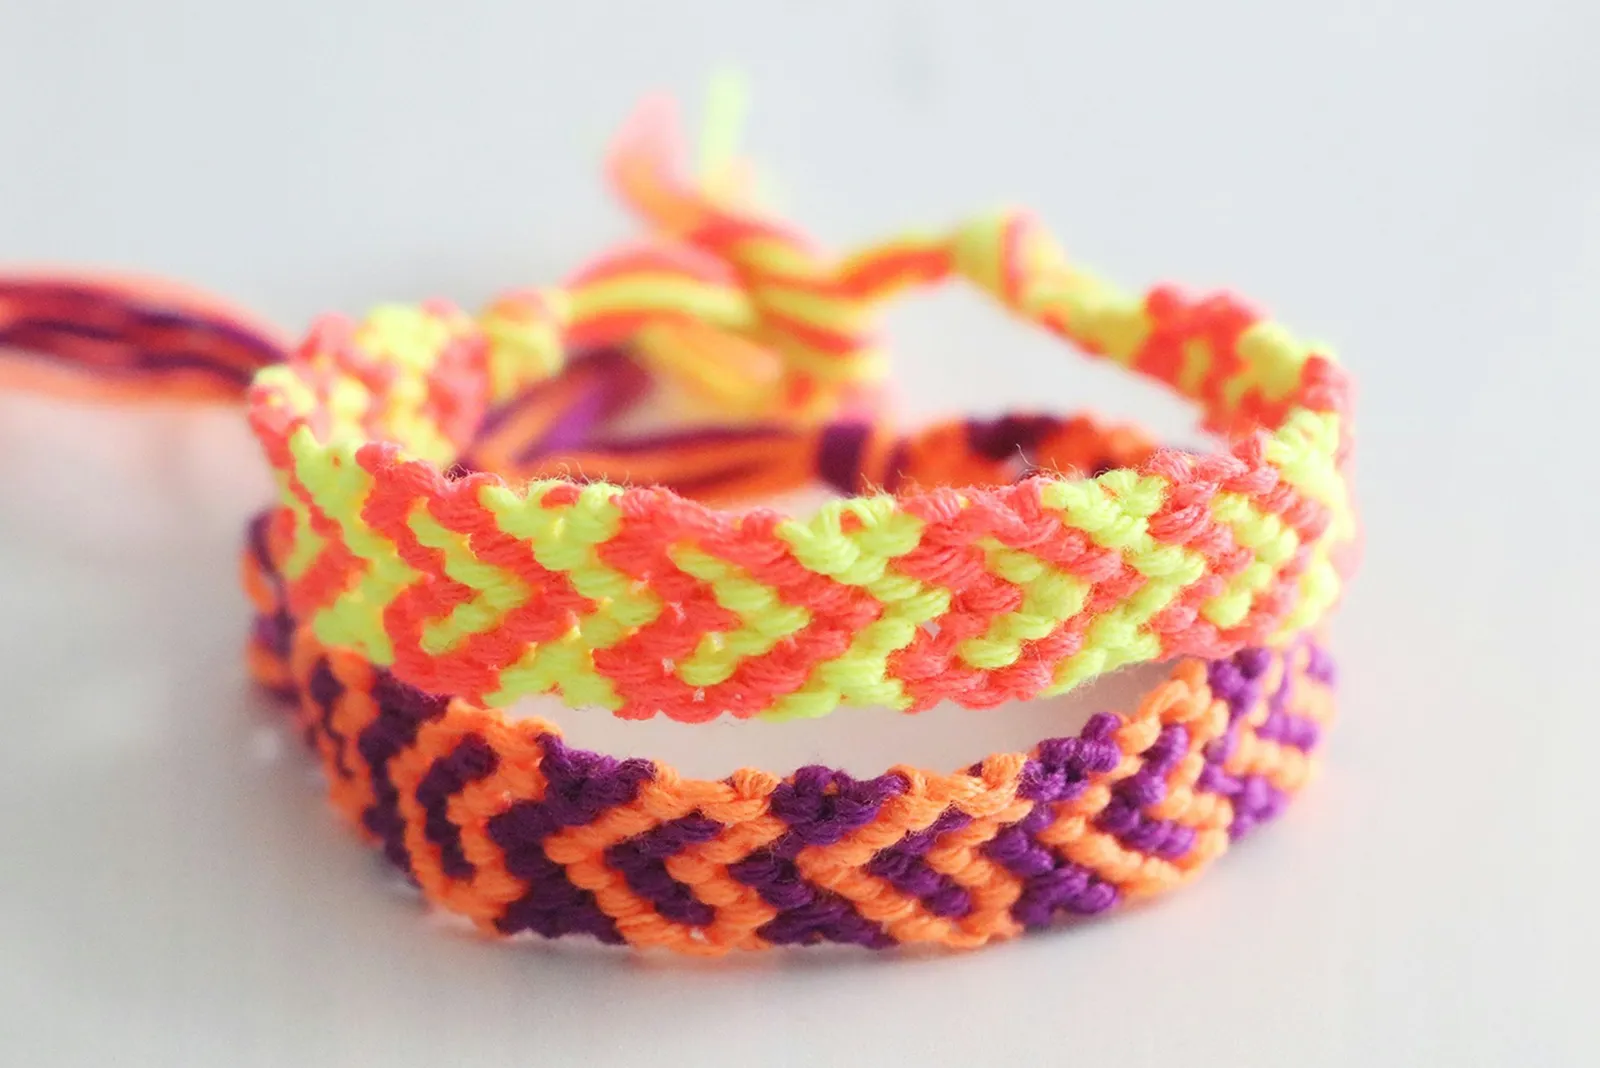
Repeat until bracelet is long enough for your preference. Then, tie ends and trim thread as needed. Make another bracelet with same (or different) colors and these DIY friendship bracelets are ready for you and your bestie!
2. Beaded Daisy Chain Bracelet
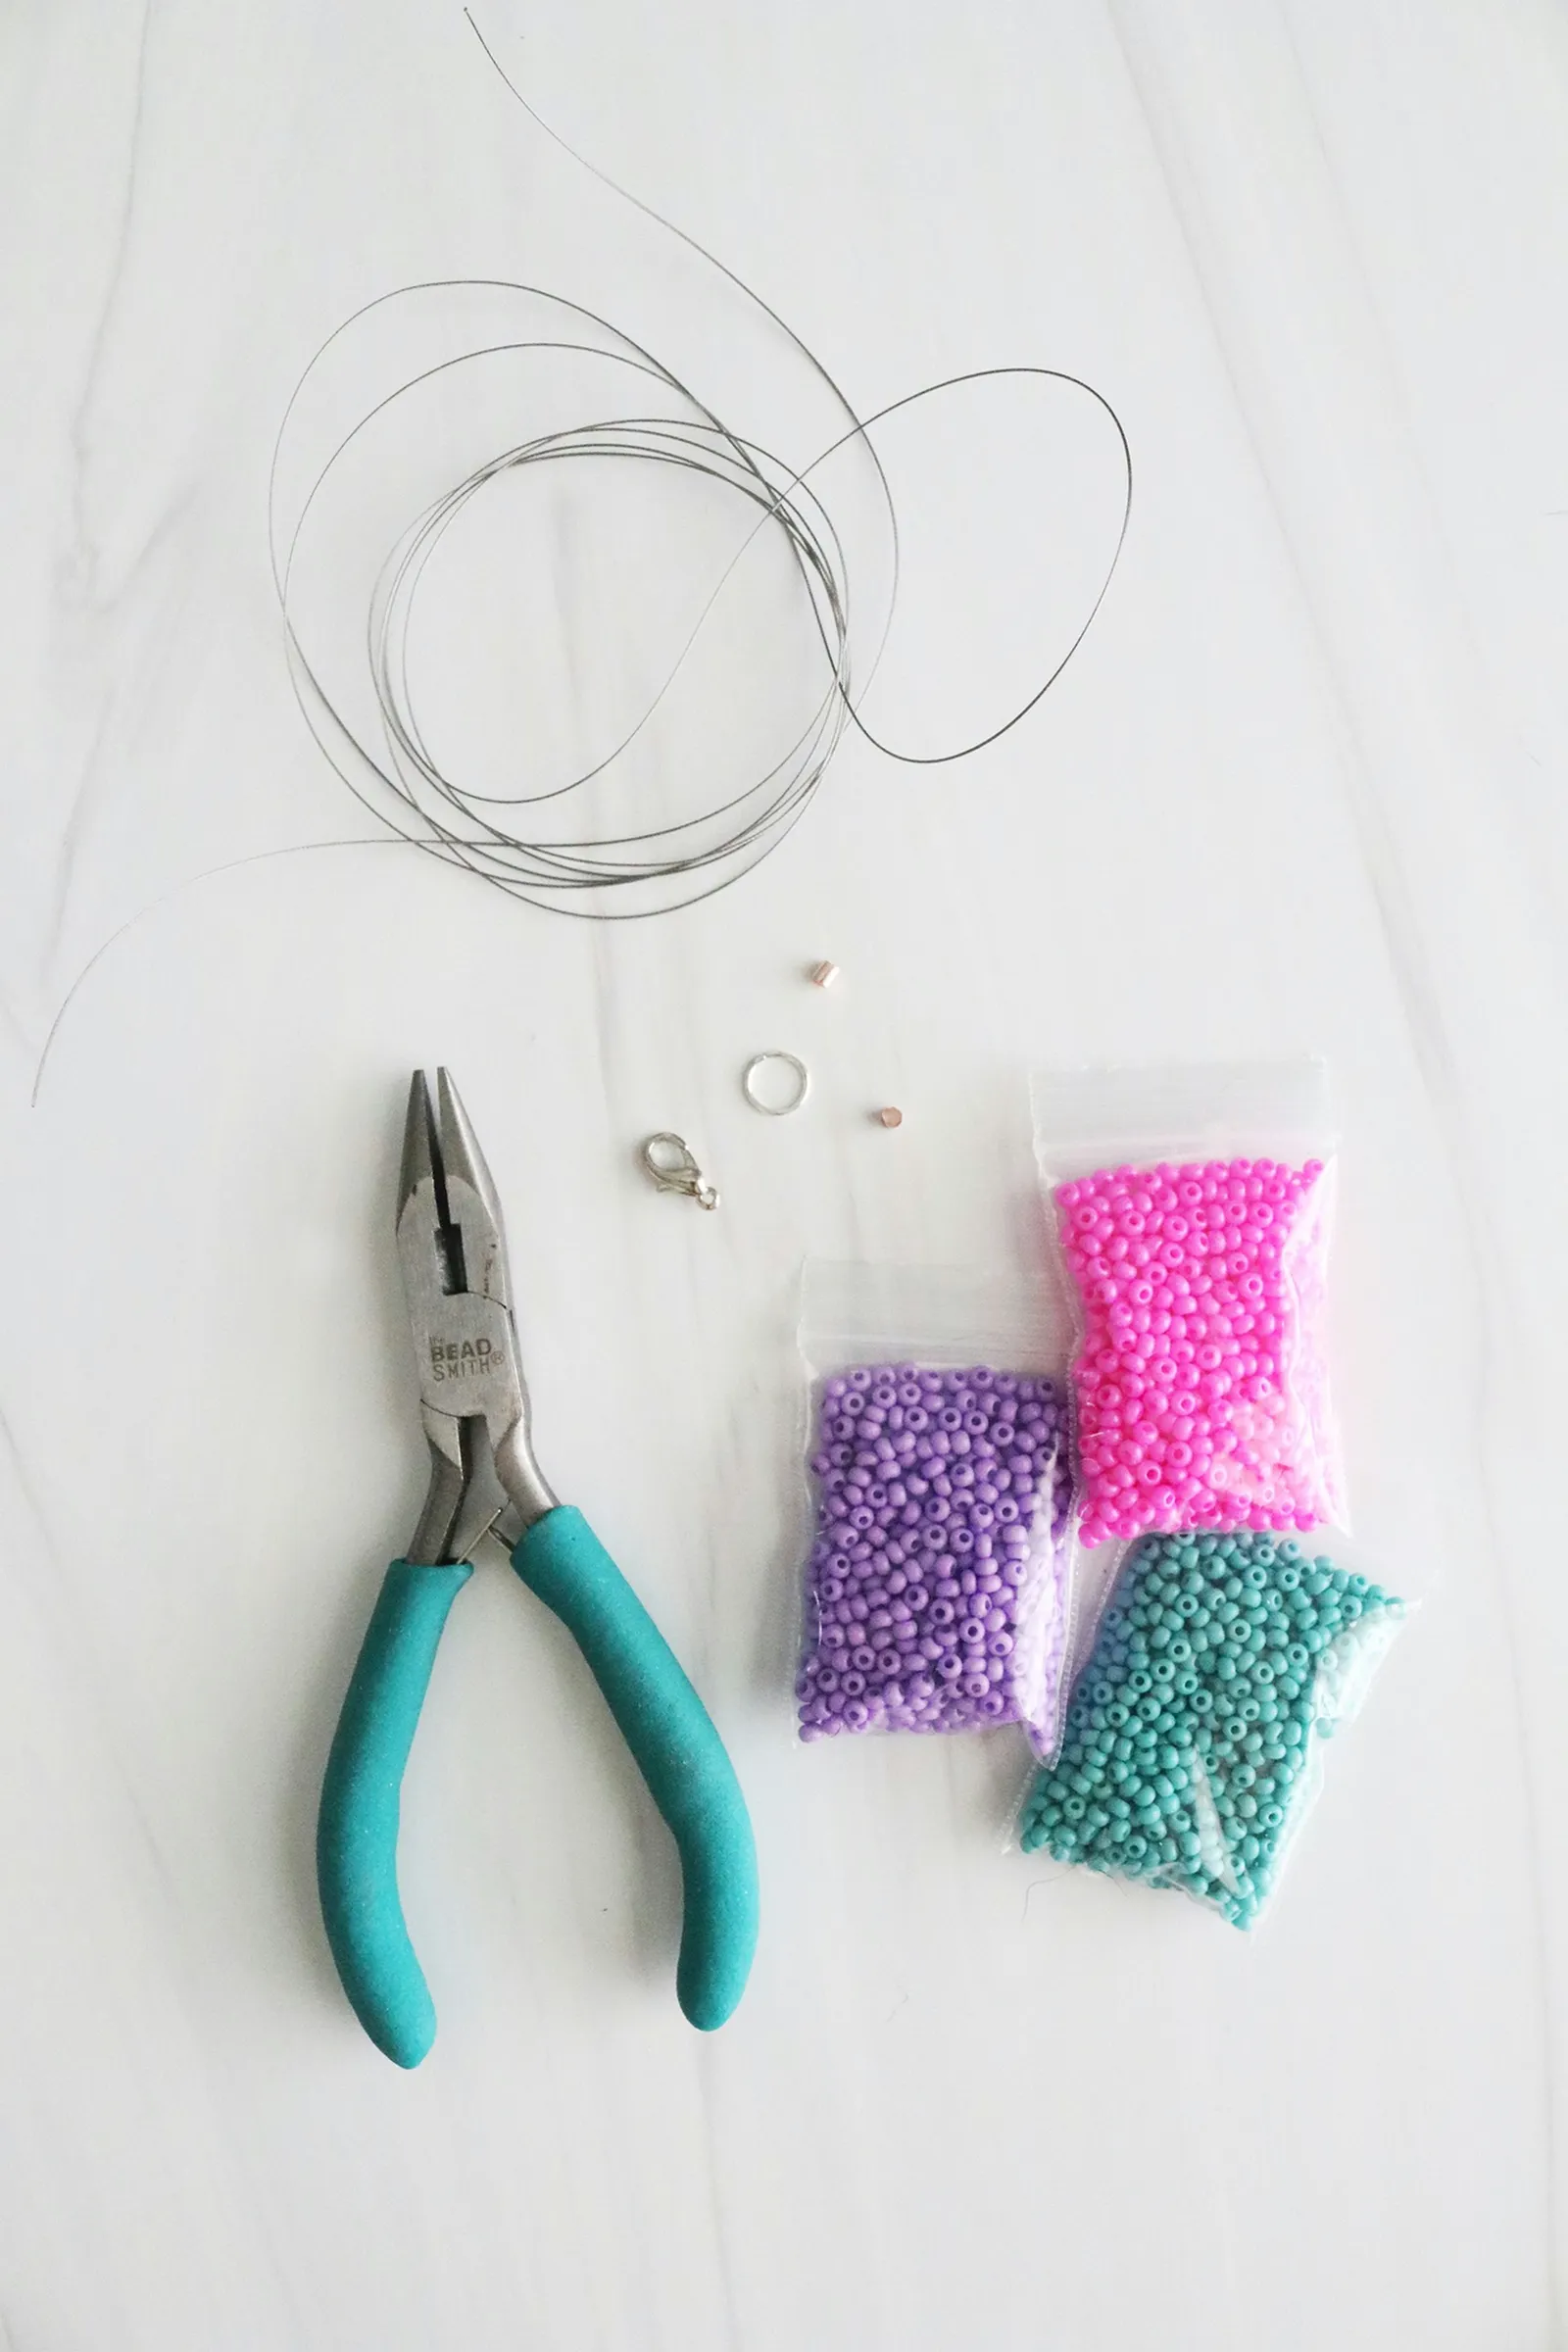
1. Prepare cord
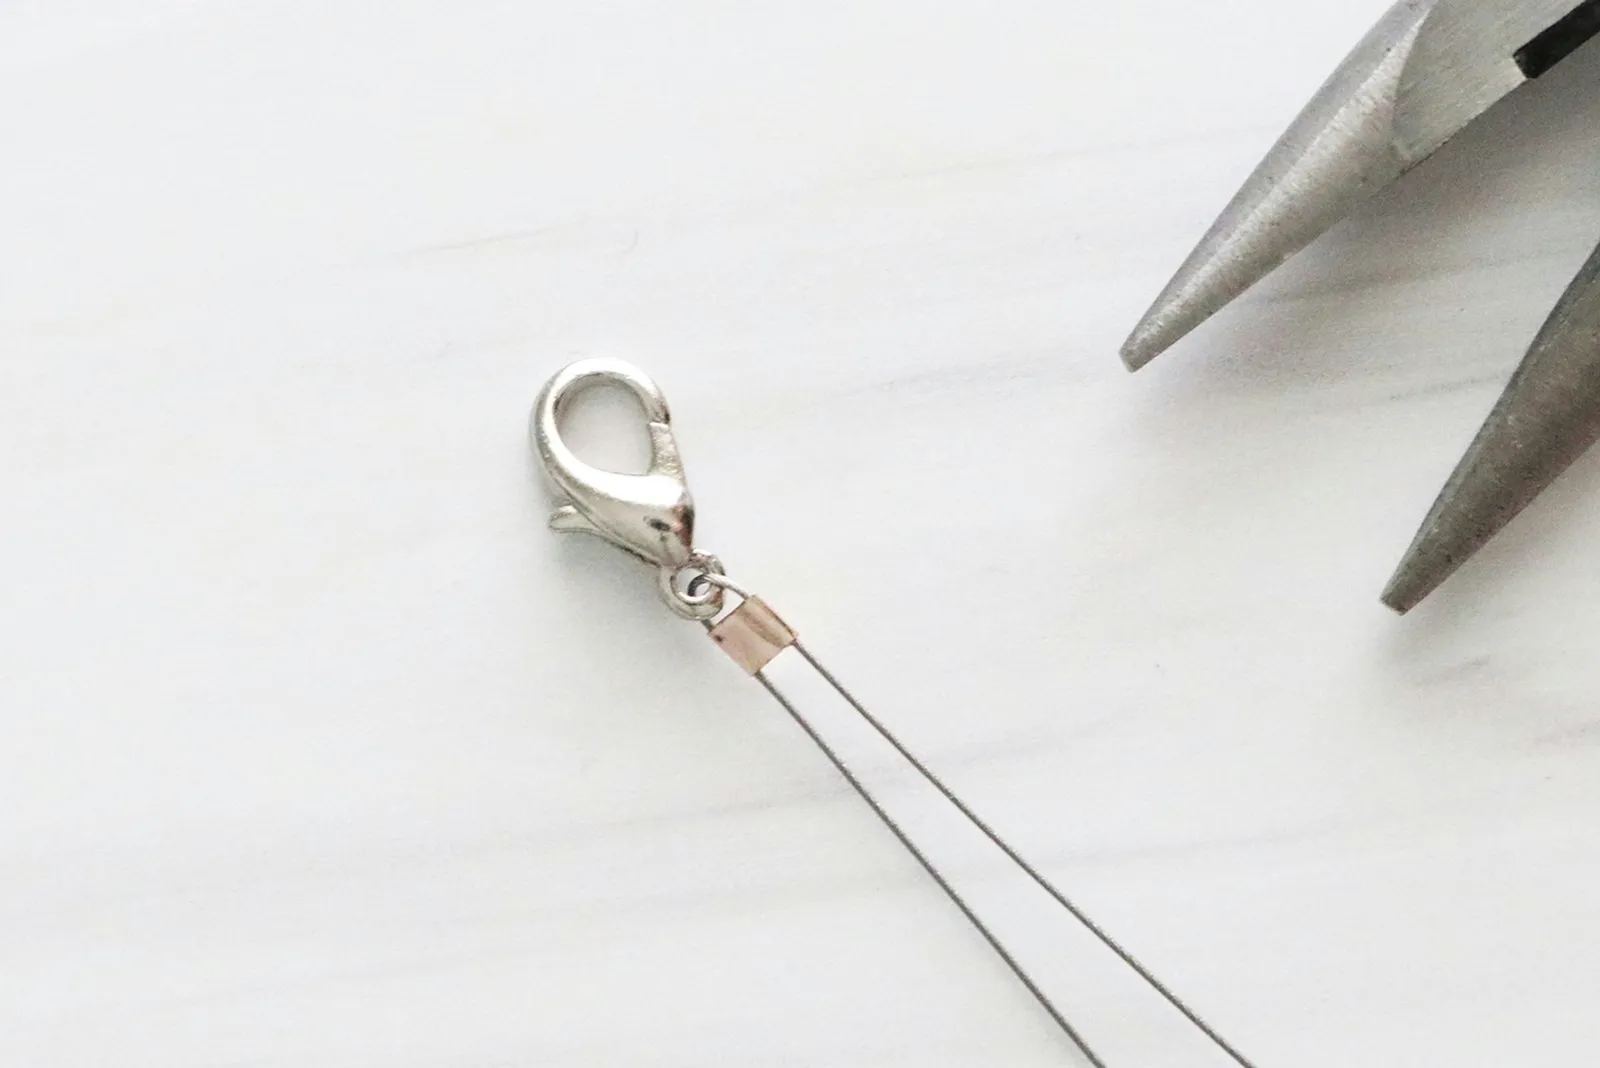
Cut a length of cord measuring at least 4 feet long. Fold it in half and add clasp, sliding it all the way to folded loop. Next, insert both ends through a crimp bead and slide it all the way to clasp. Using the flat portion of jewelry pliers, press crimp bead to secure.
2. Make beaded flower
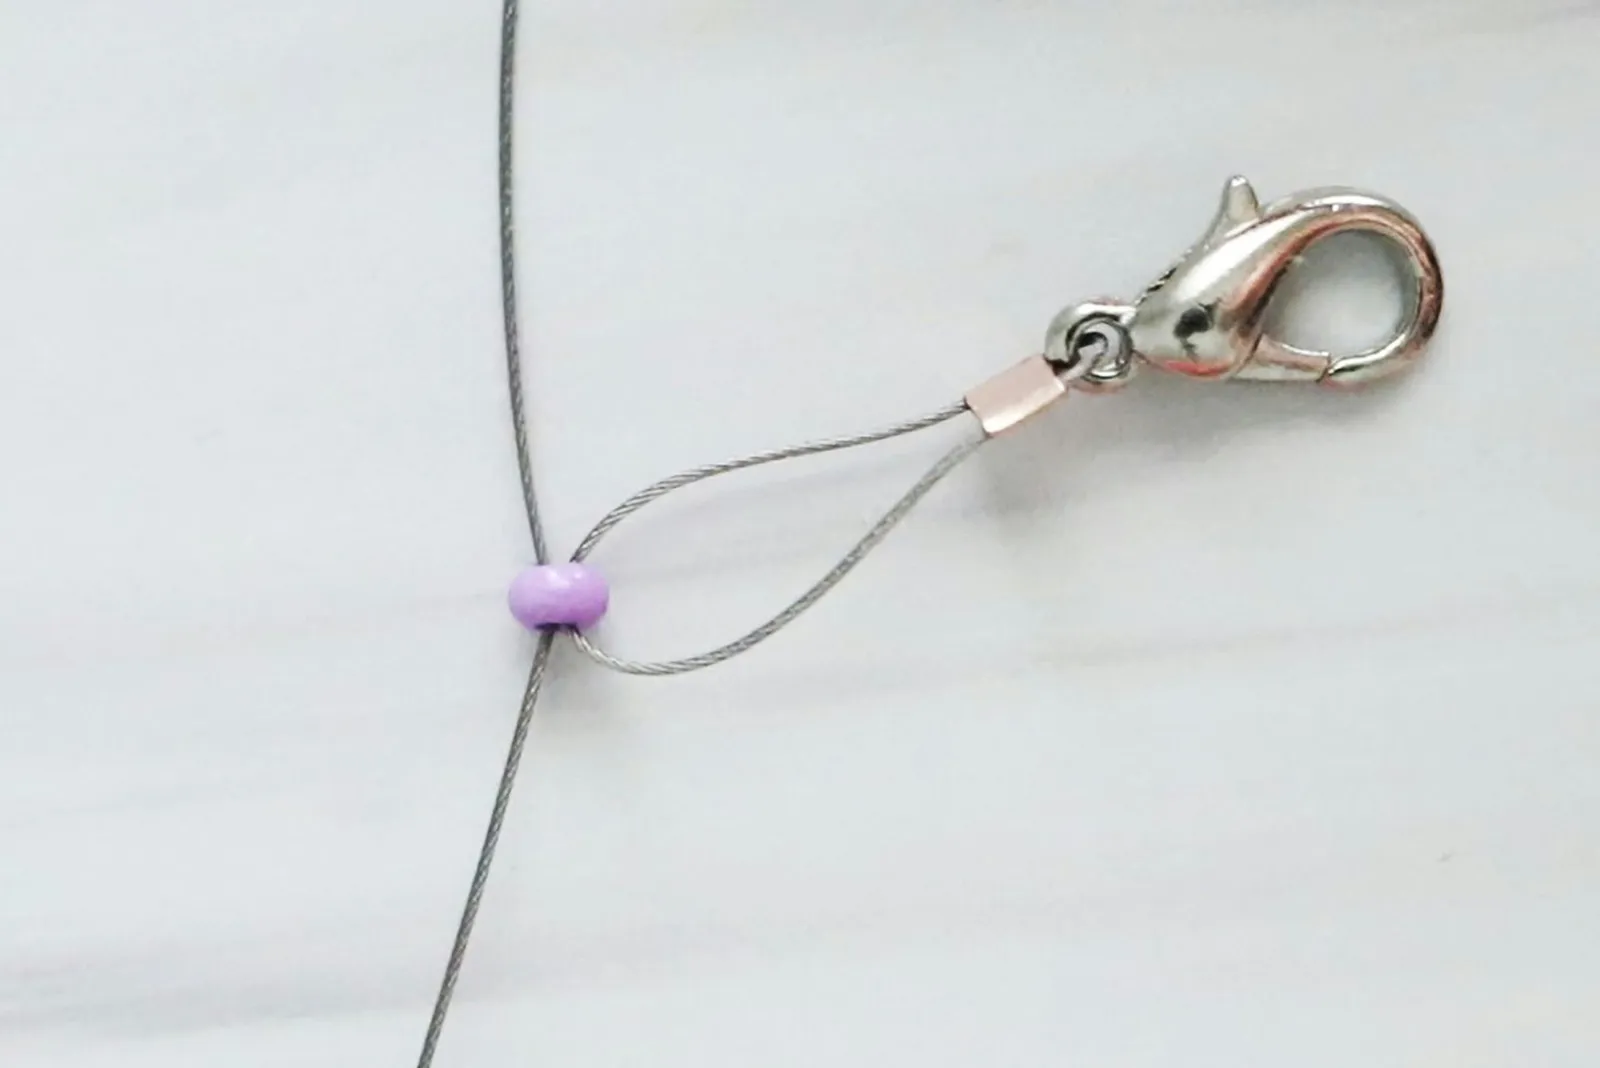
To start your flower bead bracelet, string one seed bead onto a strand. This should be the color you'd like to use for petals. From opposite side (i.e., where current strand is coming out of), insert other strand through bead. Pull to tighten. This creates bottom petal of flower.
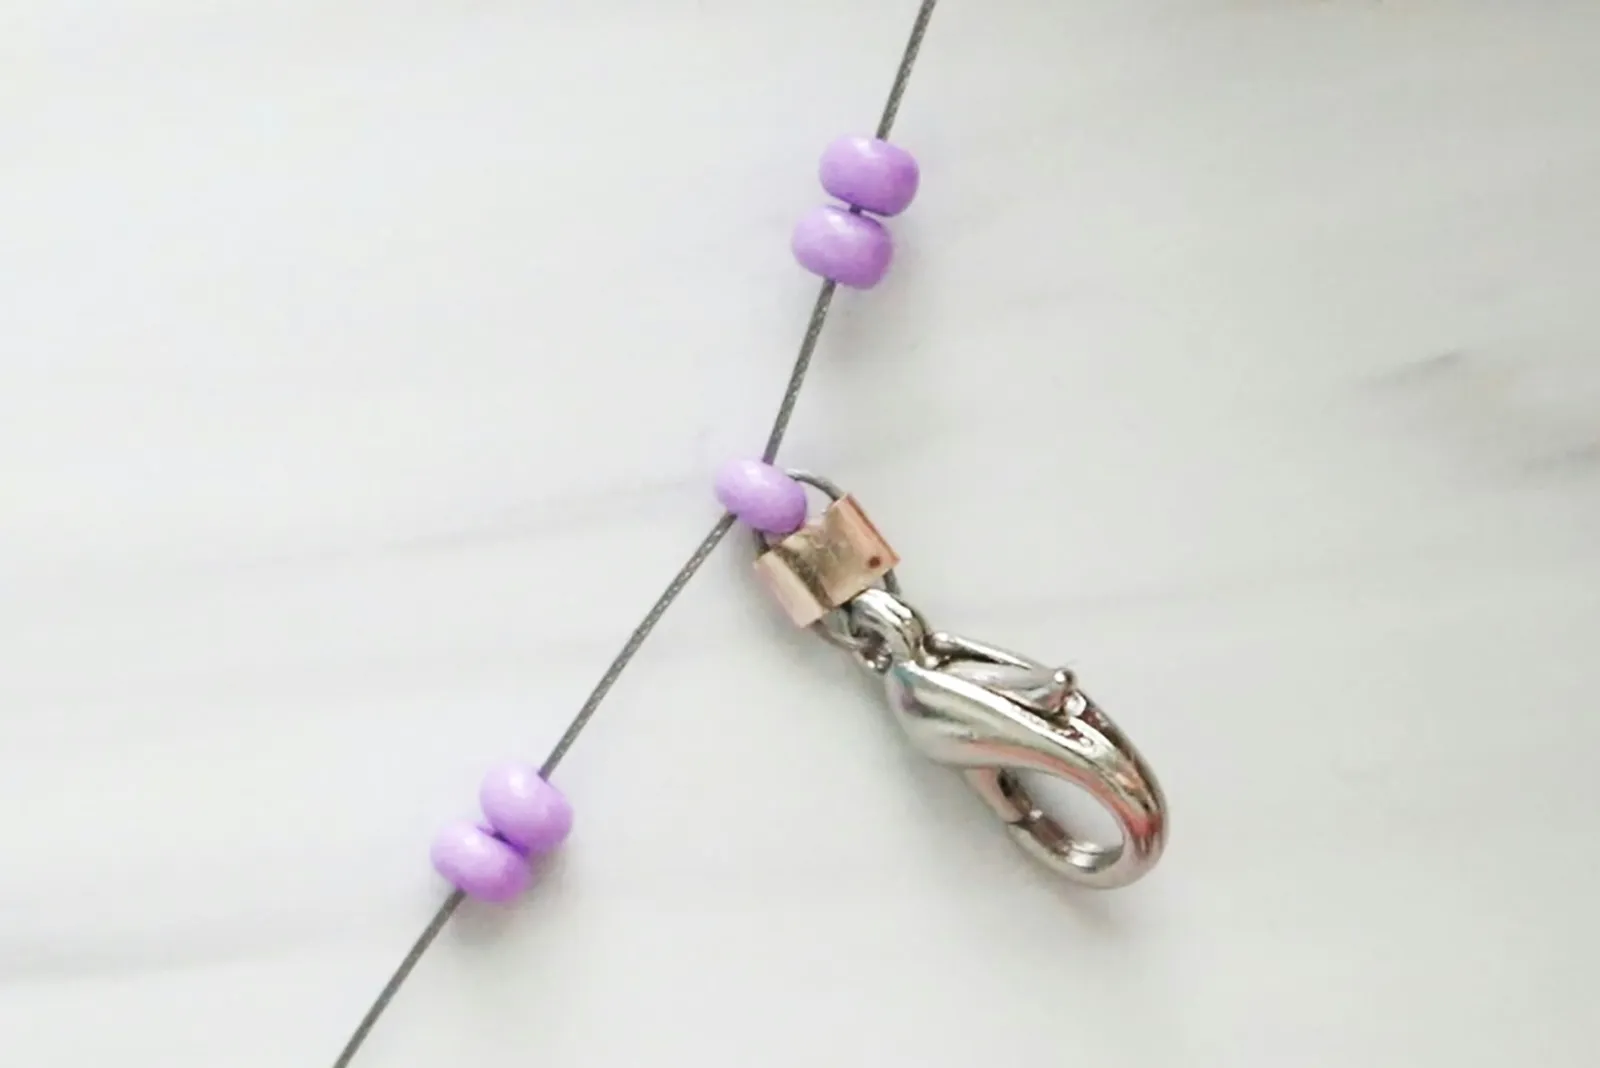
To each strand, add two seed beads.
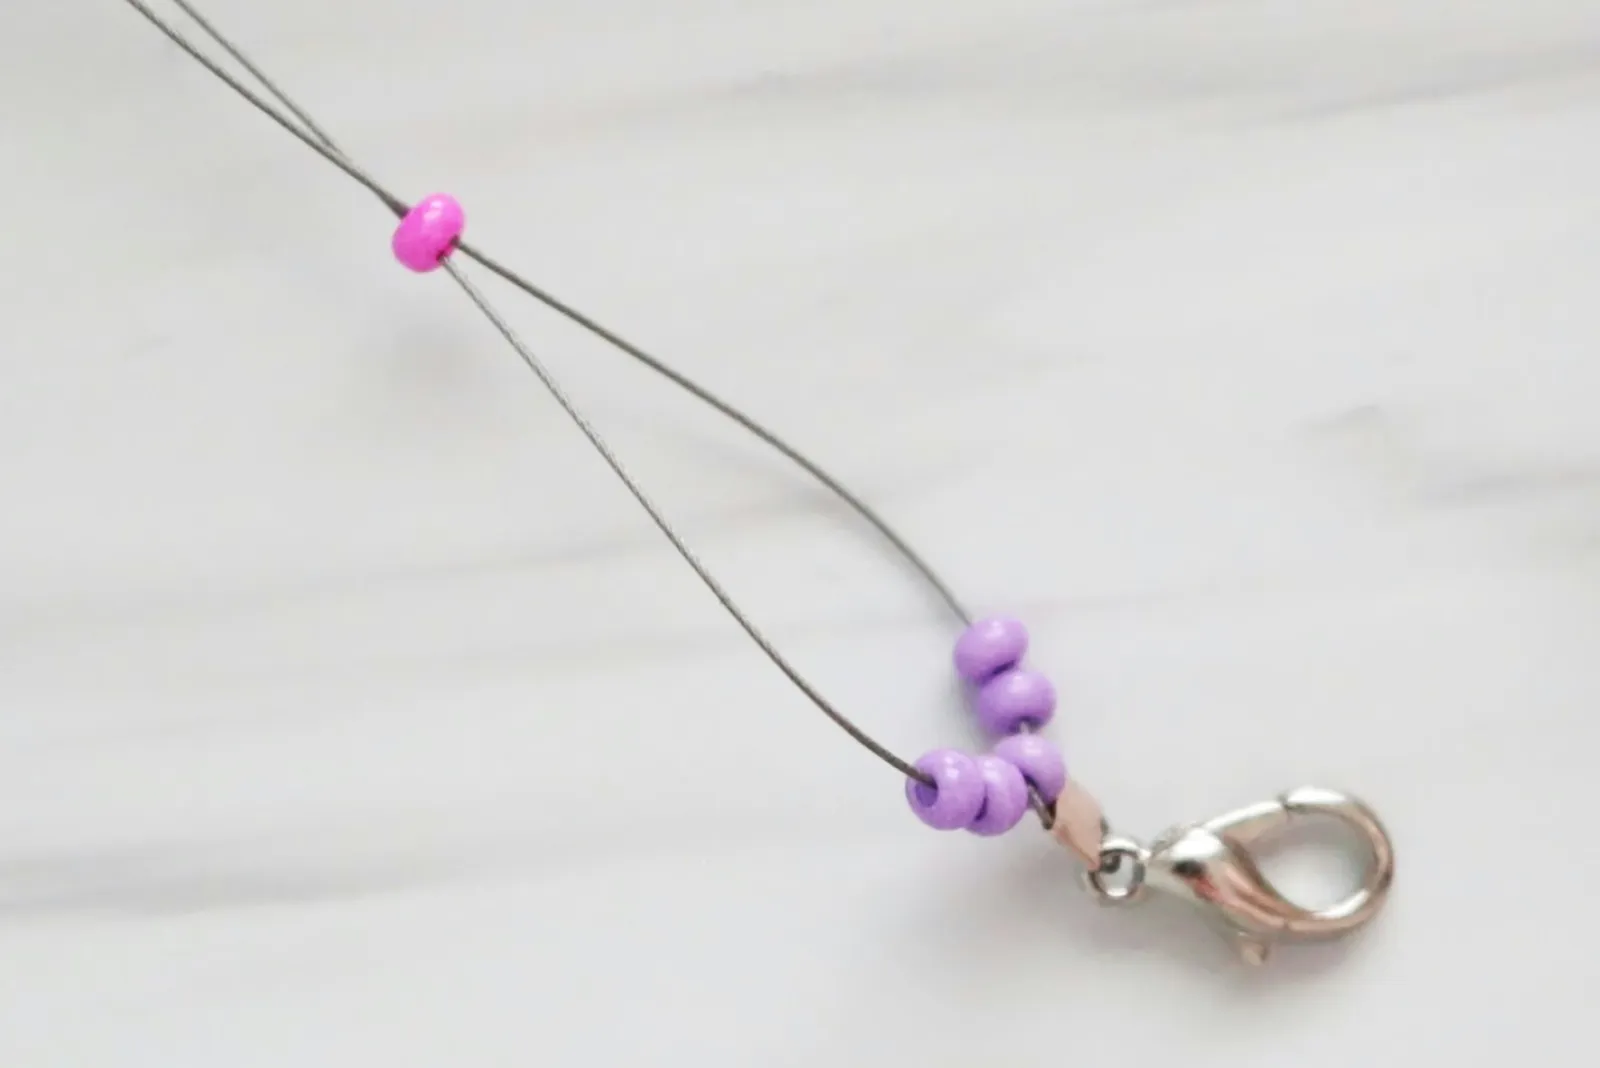
Insert both strands through seed bead that will be center of flower. It should be a different color than other beads.
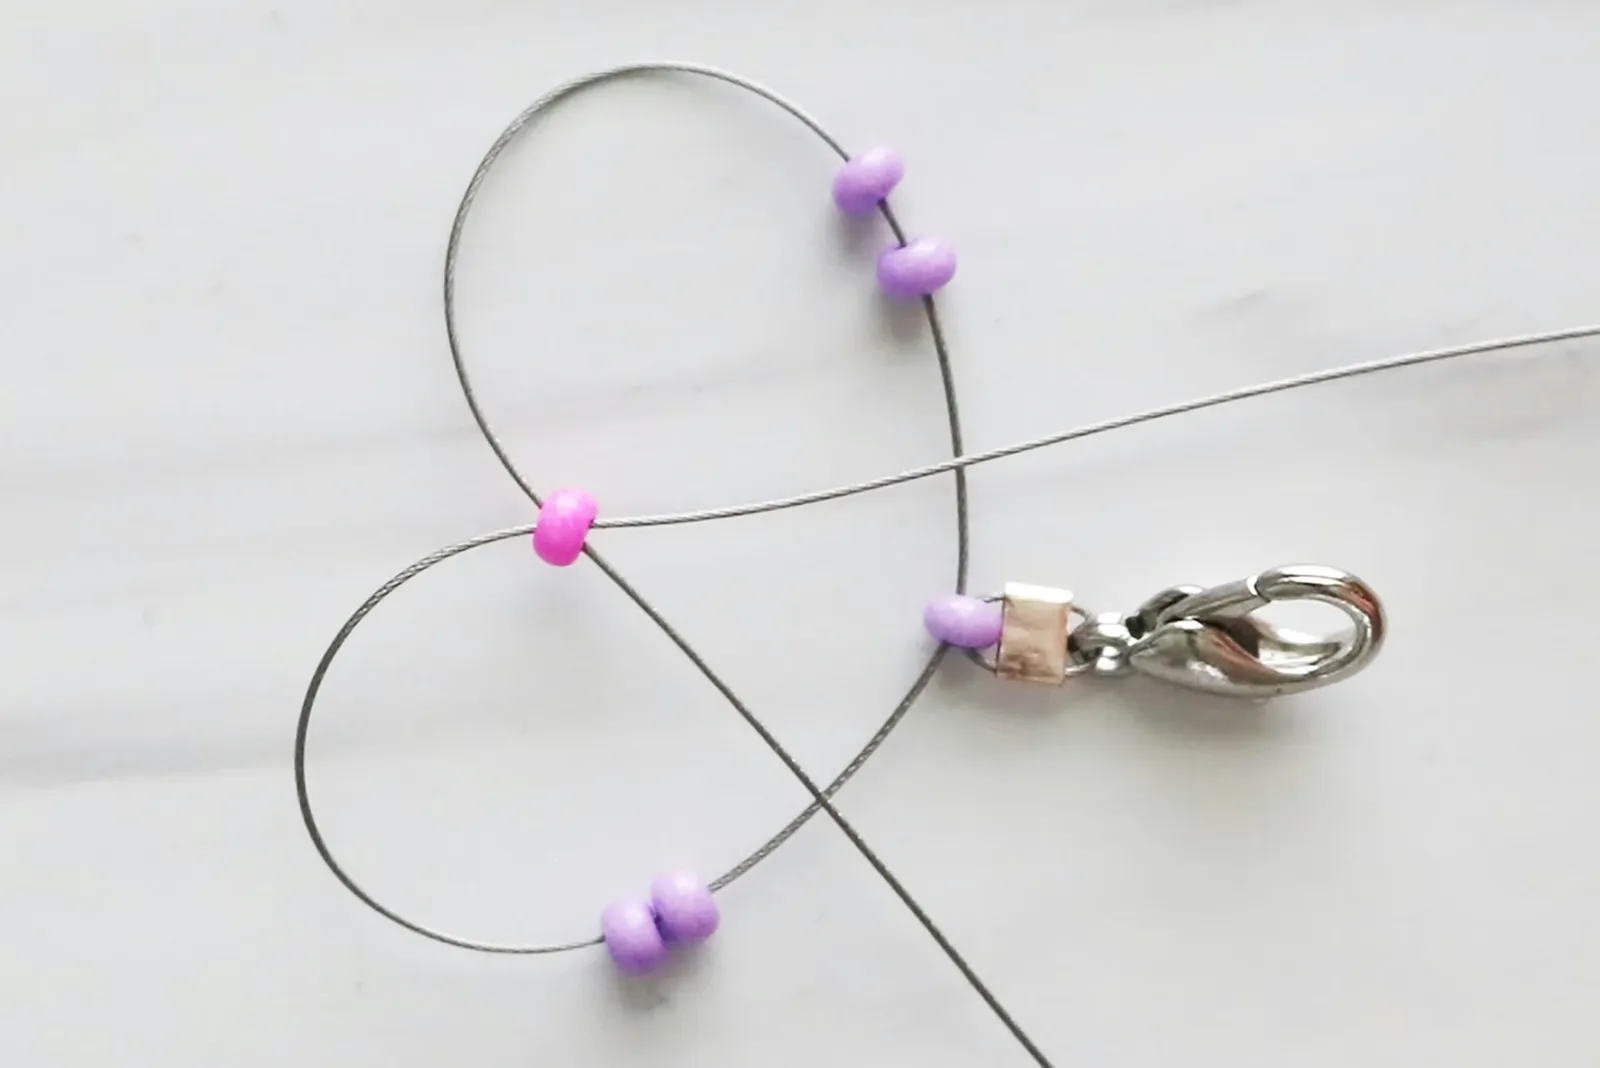
Bend both strands downward so that each strand is positioned just under each pair of beads. This will create a heart shape.
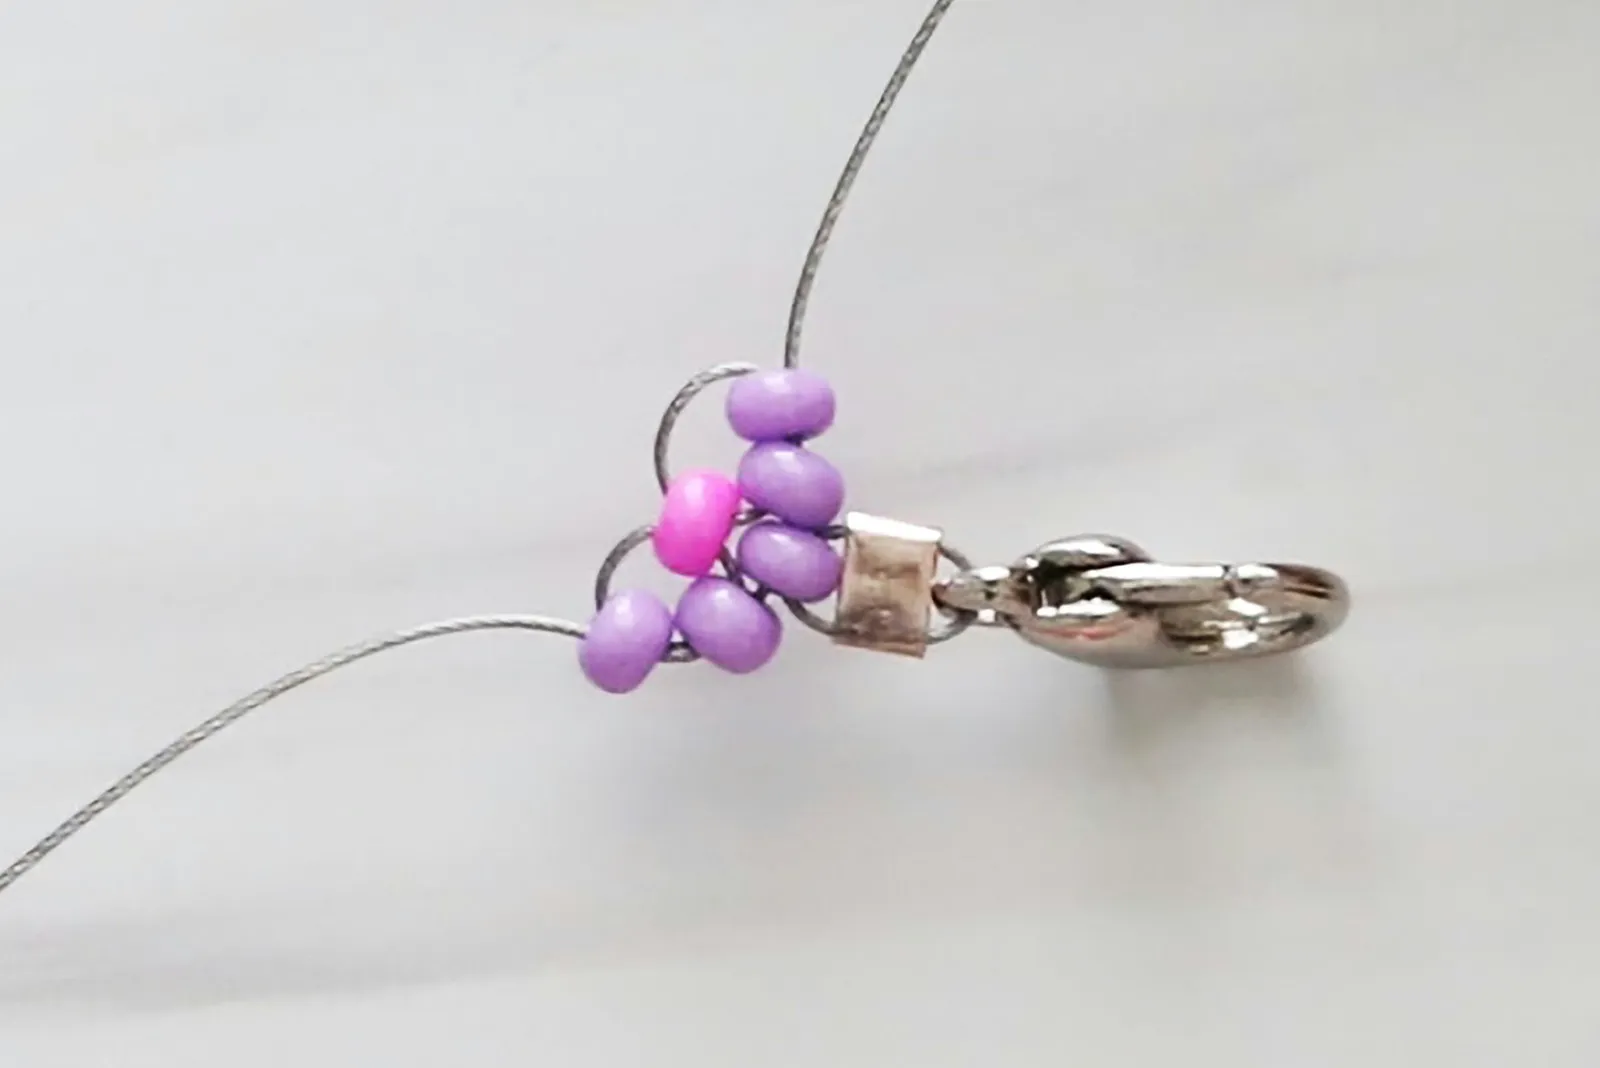
Insert left strand up and through beads on left. Repeat on right side. Pull to tighten. This creates sides of flower.
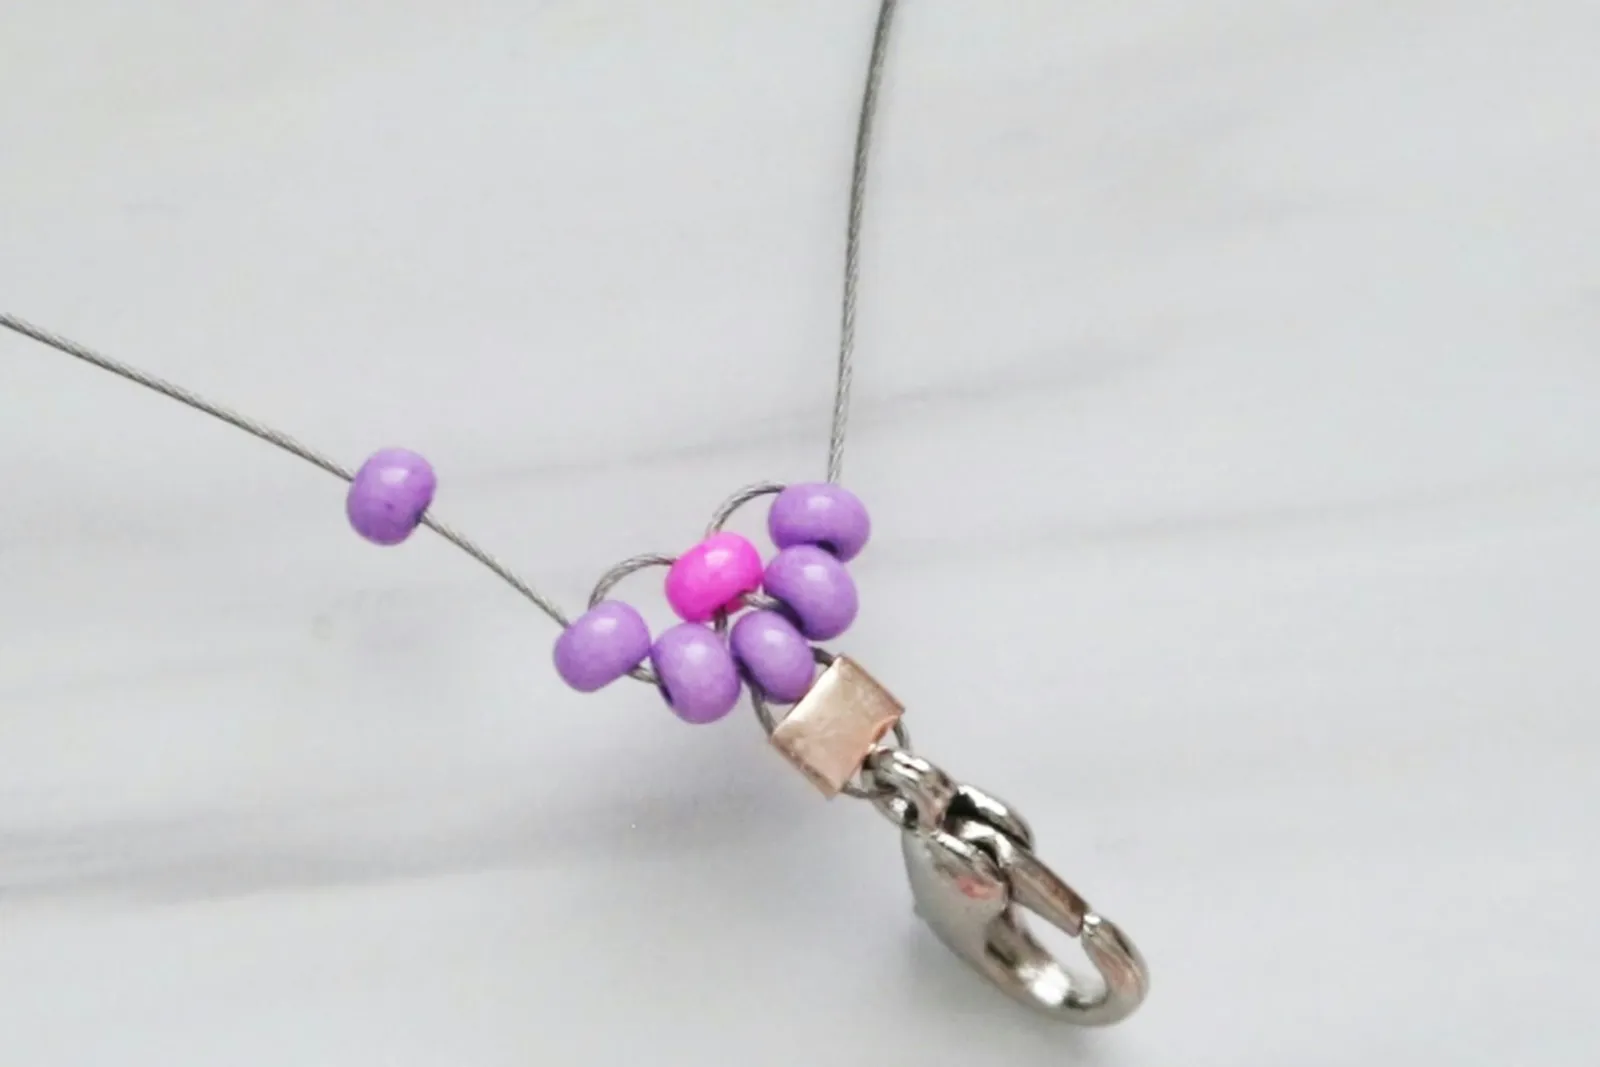
To close up flower, add one seed bead to one strand.
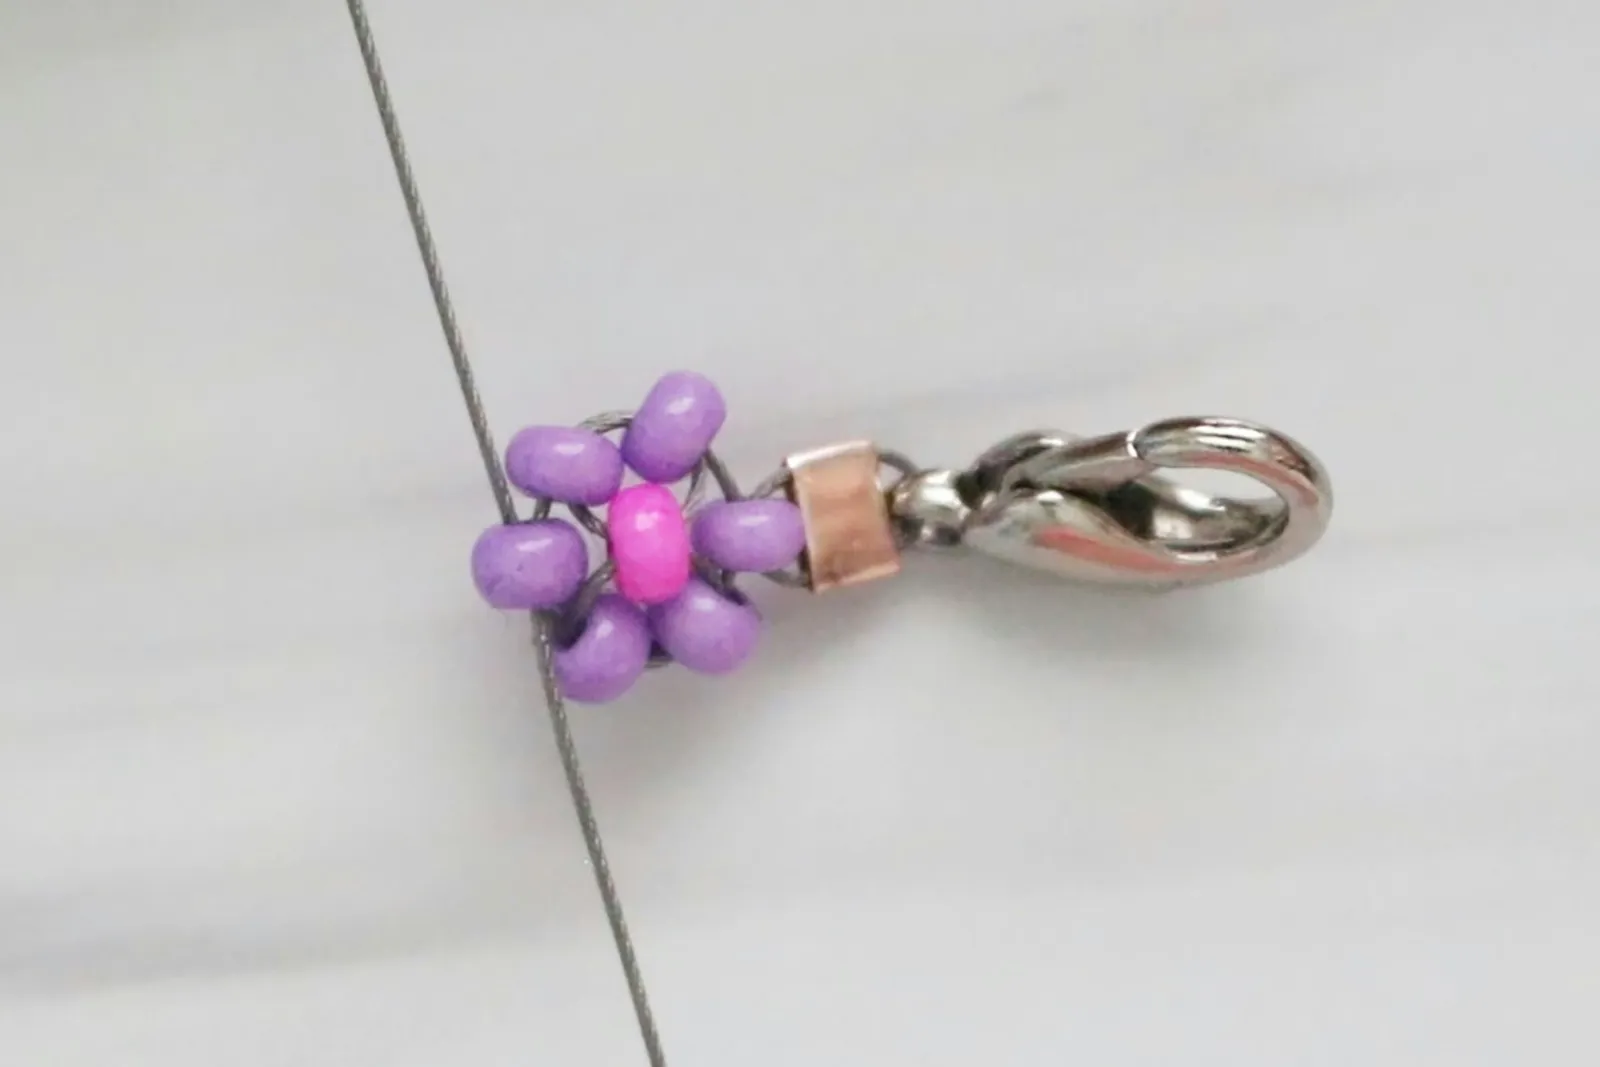
Insert other strand through bead and pull to tighten.
3. Make beaded leaves
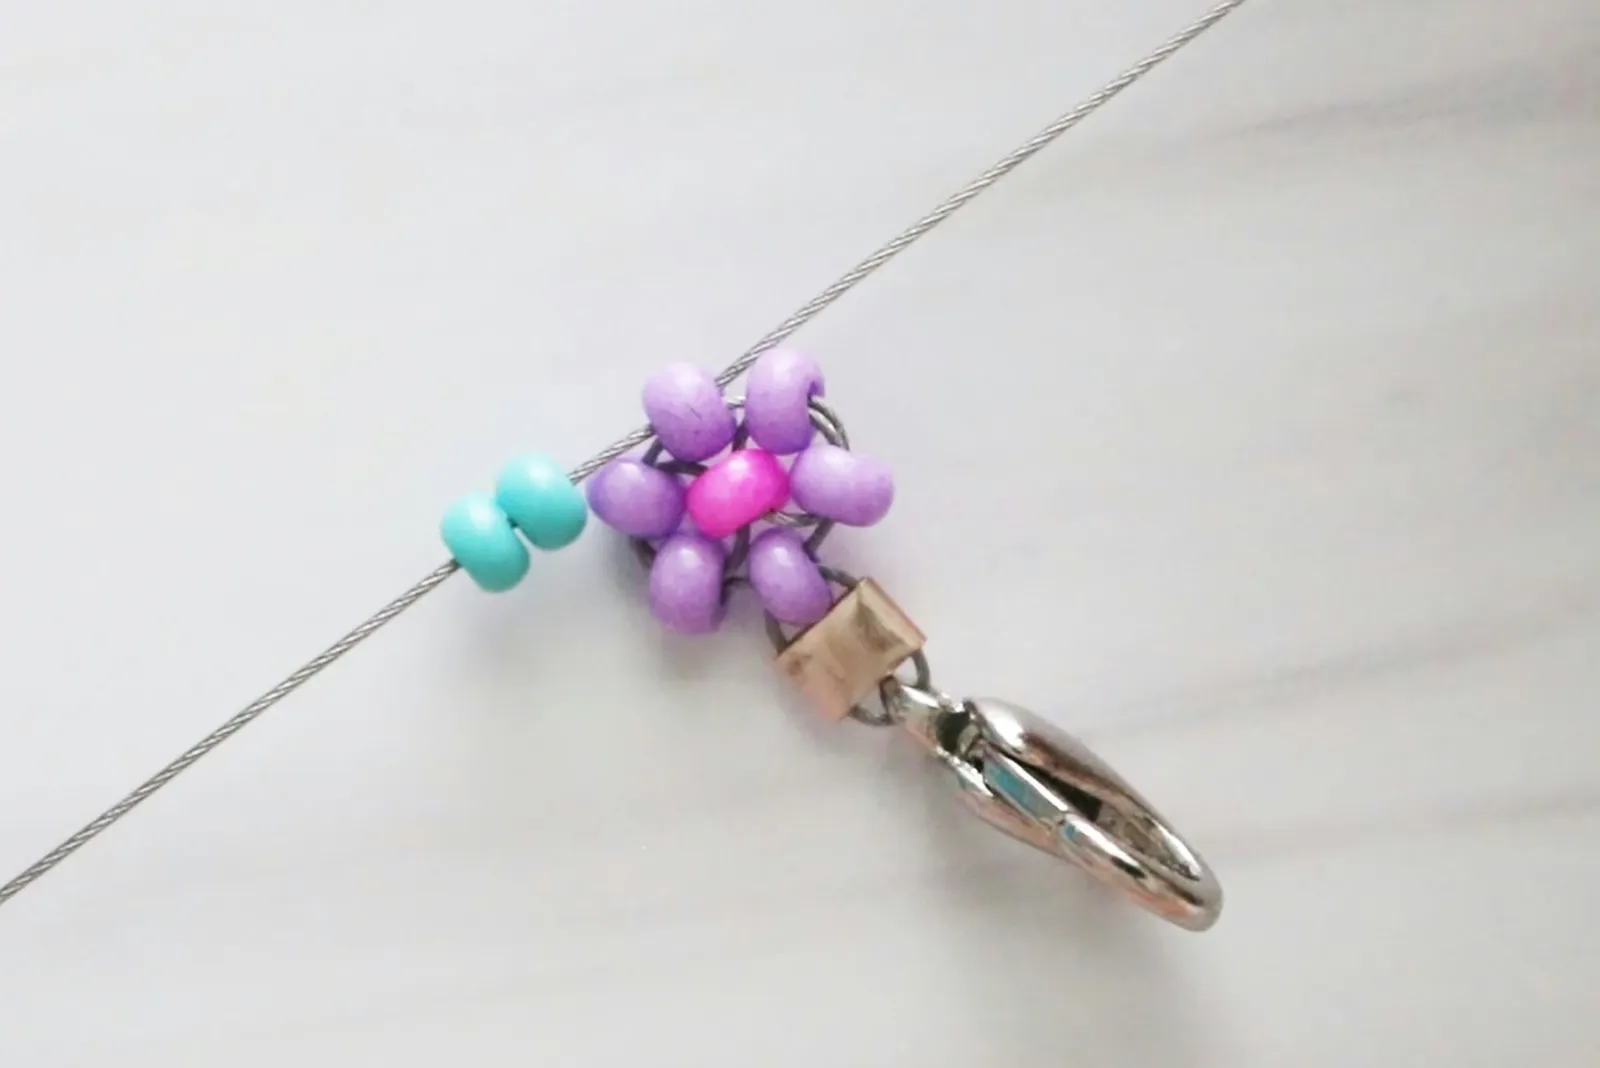
For the "leaves," add two seed beads to one strand.
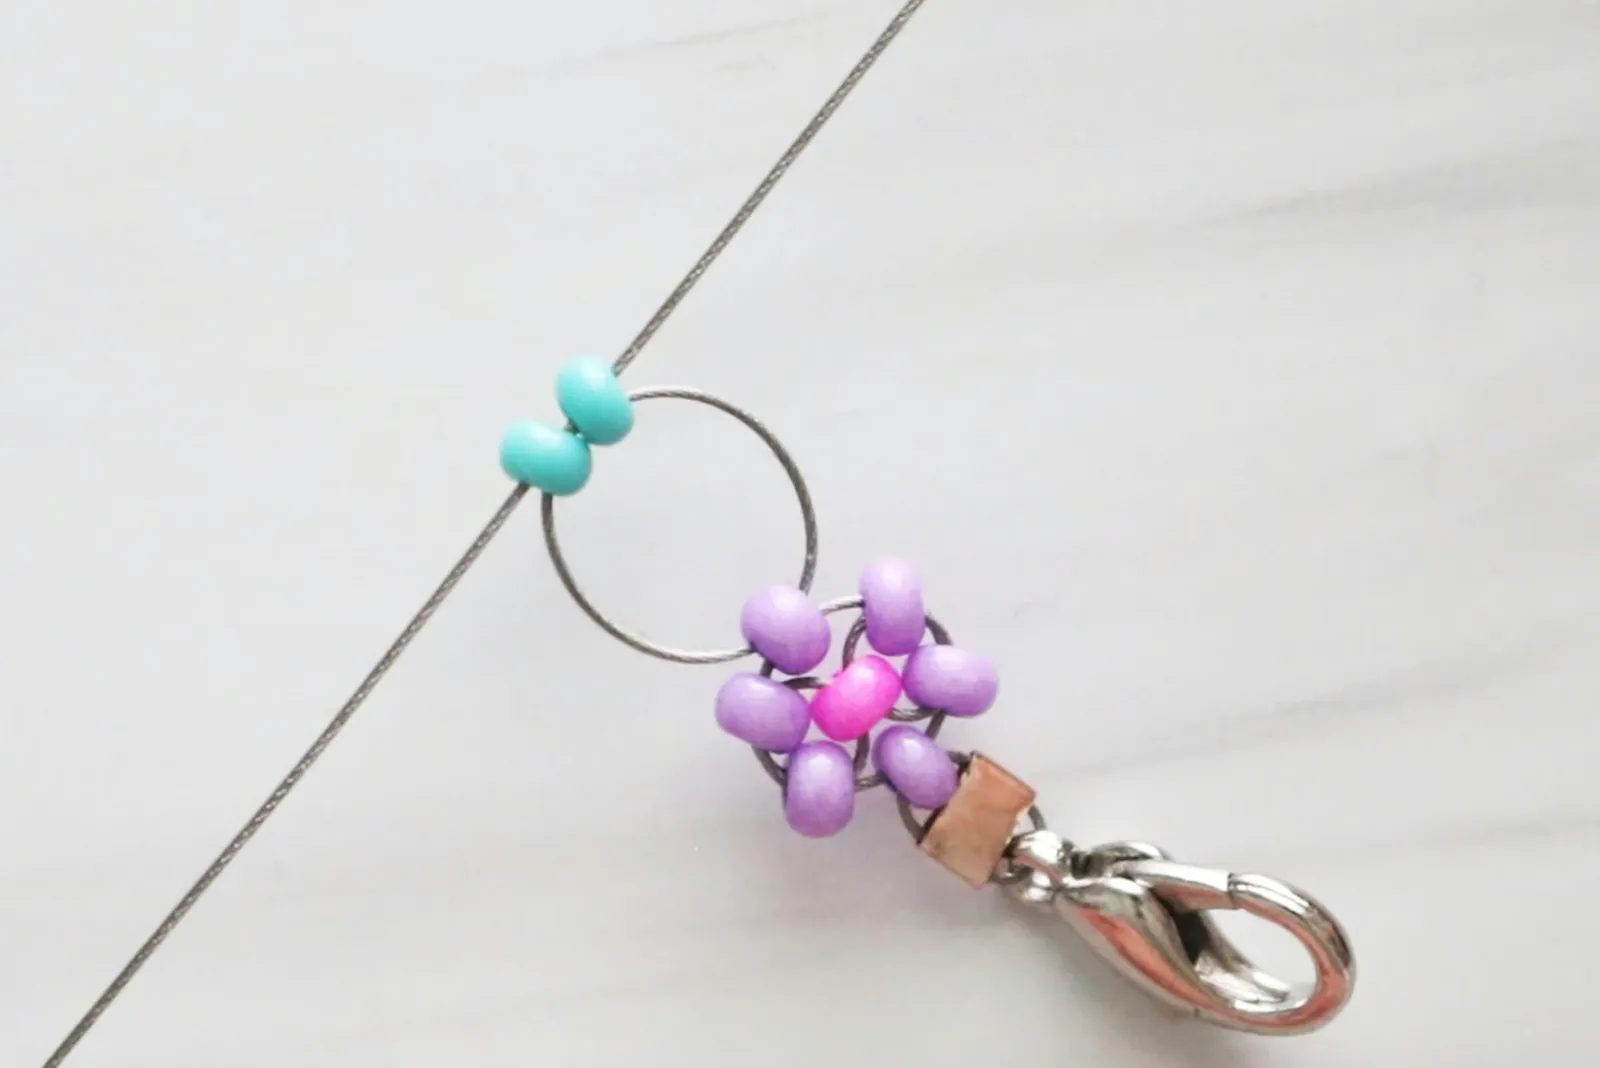
Insert other strand through both beads and pull to tighten.
4. Repeat pattern
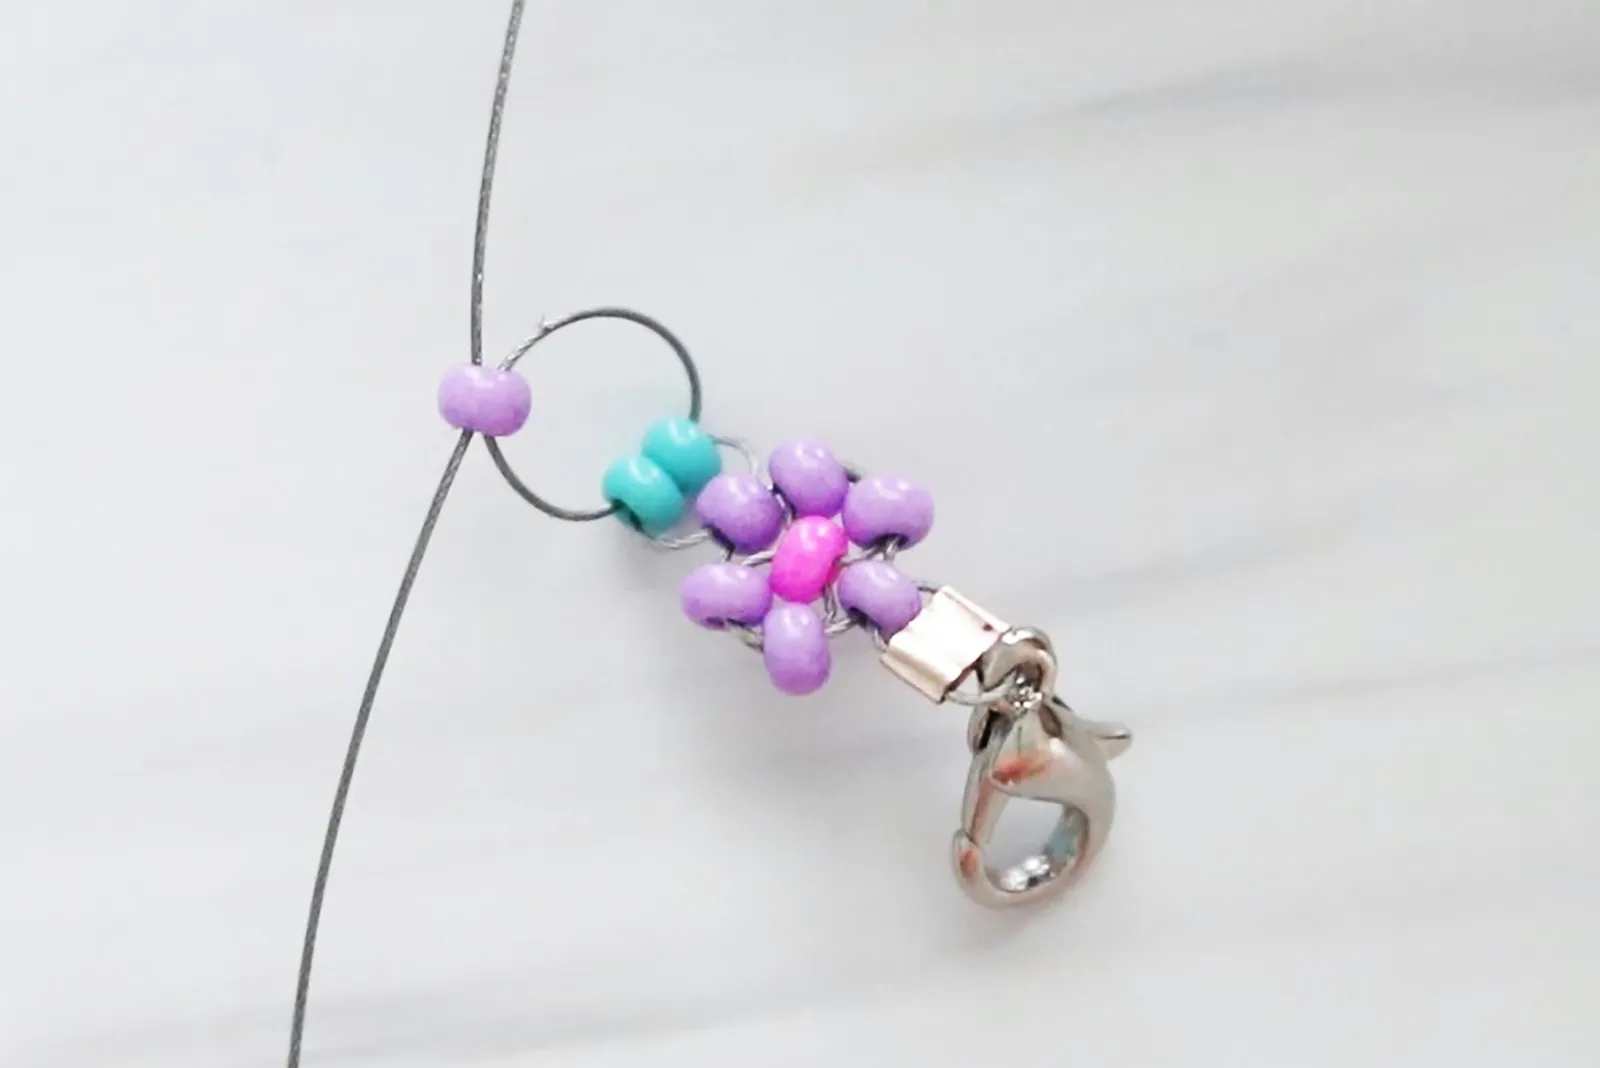
Add one petal bead to start next flower.
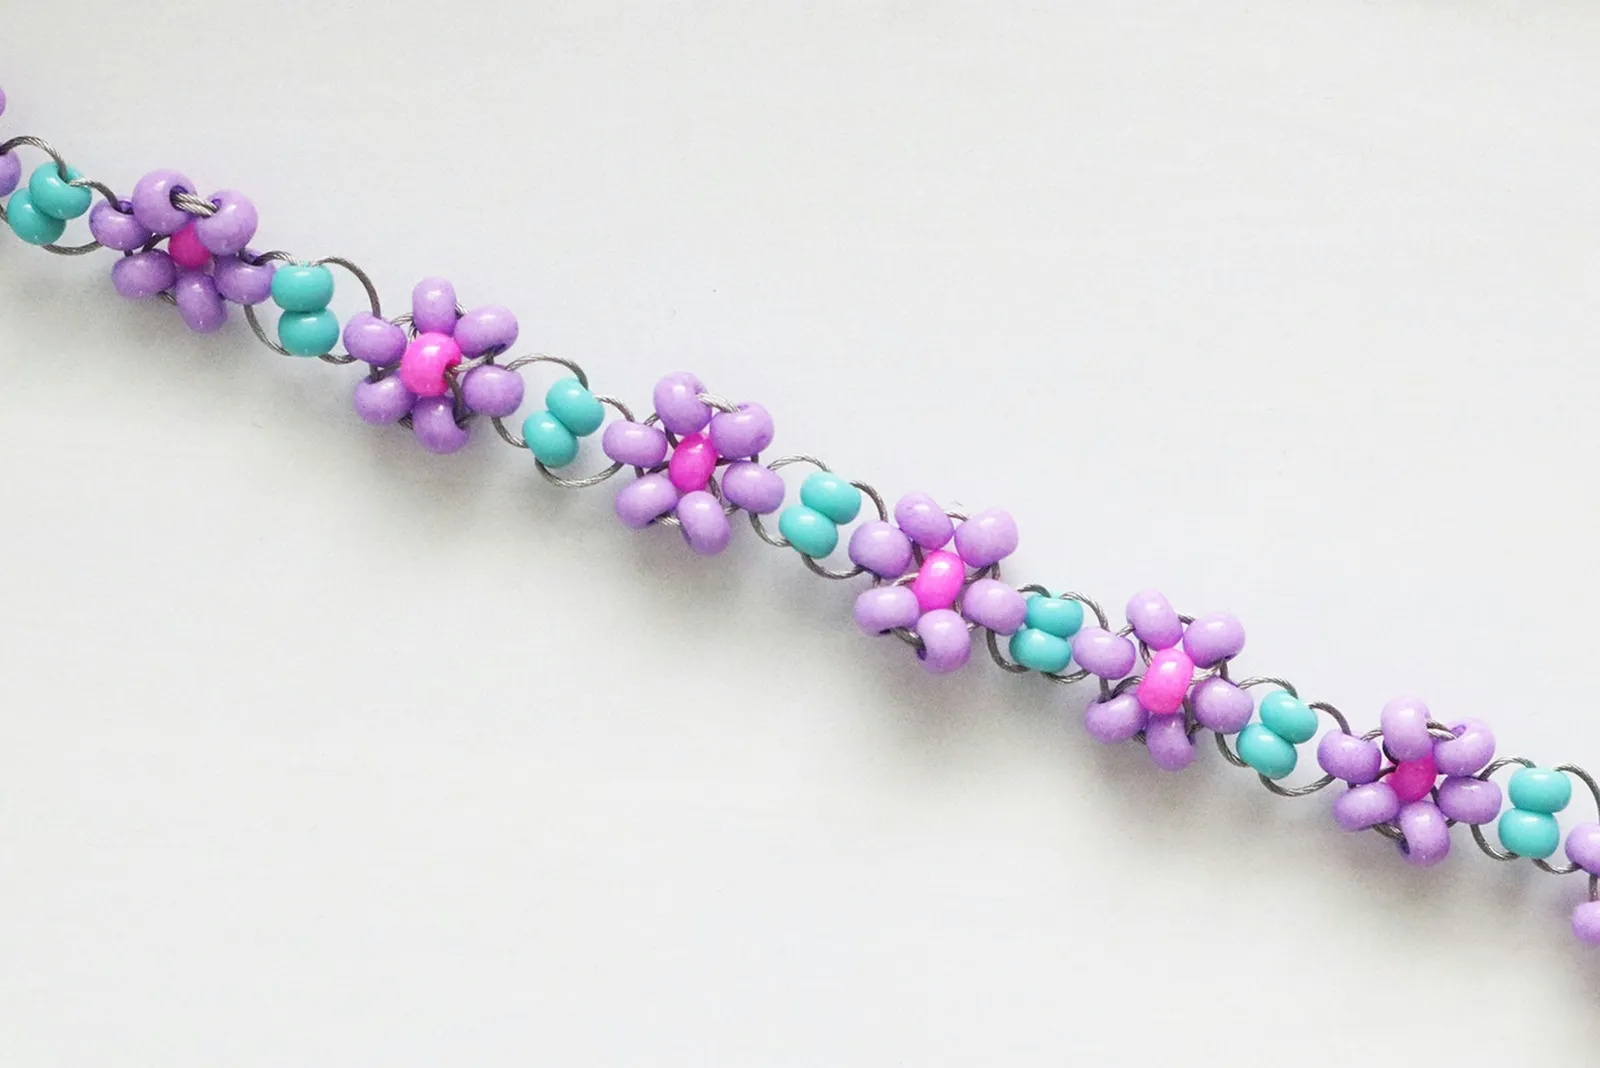
Continue making flowers and leaves until bracelet has reached desired length.
5. Add jump ring
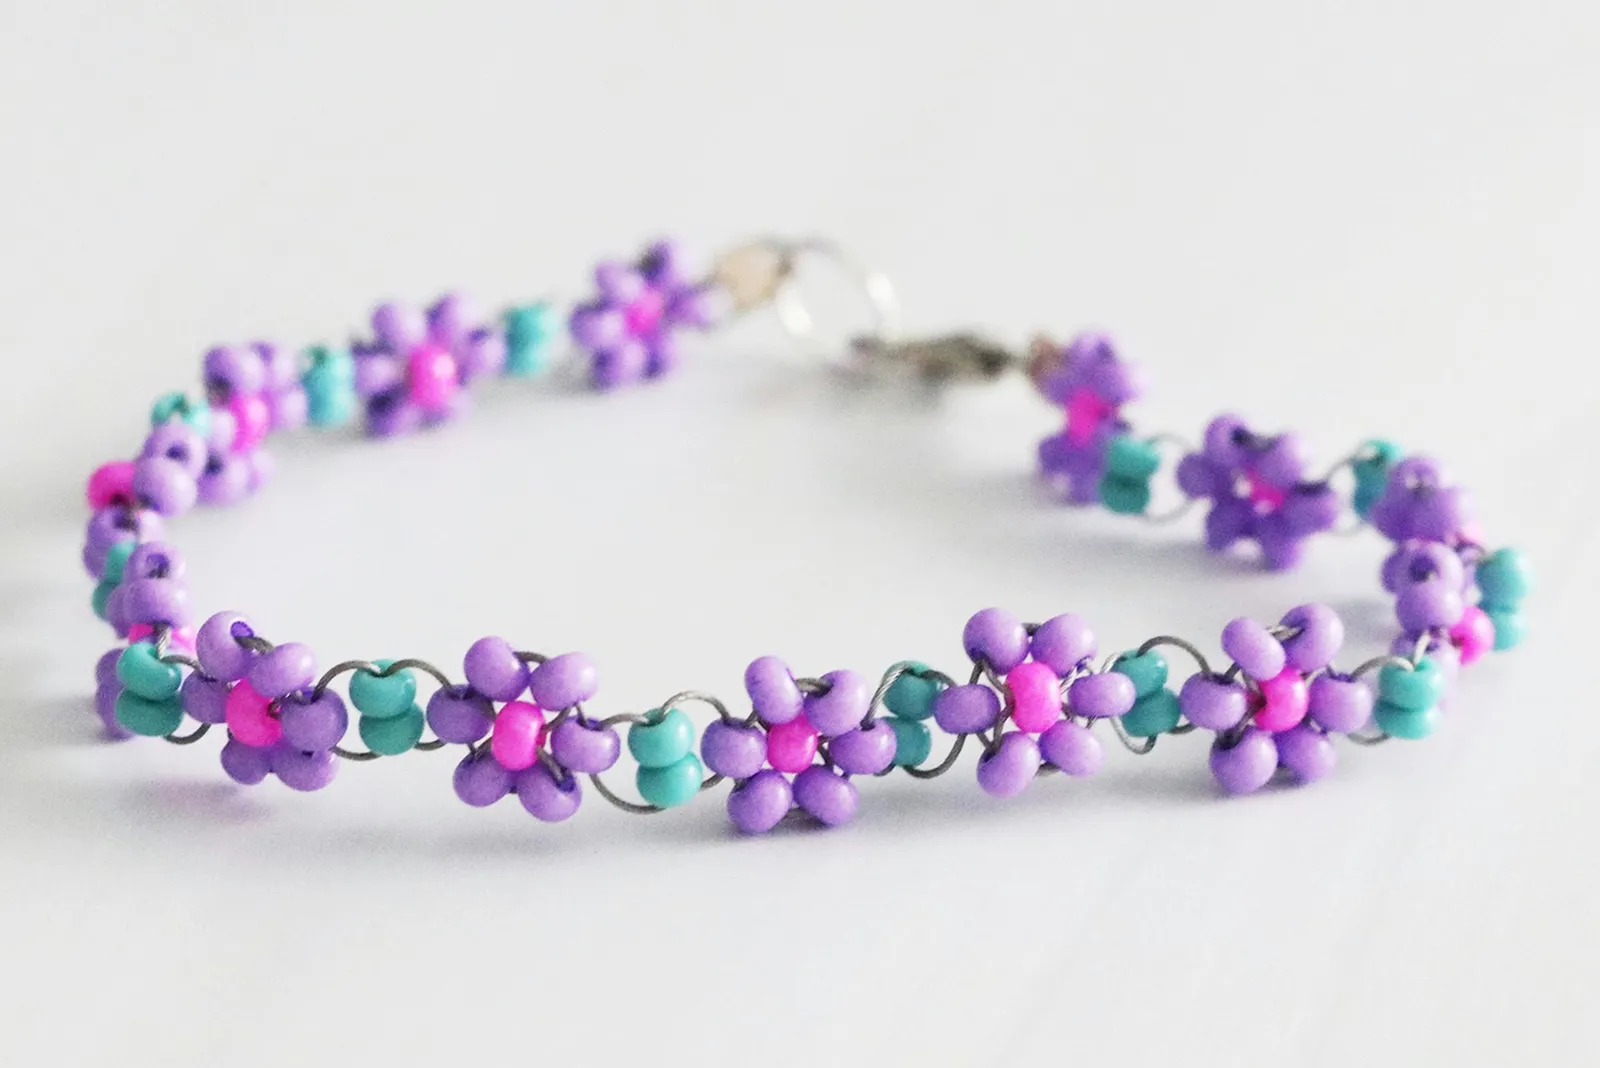
When you've reached end, add a crimp bead followed by a jump ring. Thread ends of cord back into crimp bead. Using flat portion of jewelry pliers, flatten crimp bead to secure. Trim excess cord.
Now, it's time to gift the daisy beaded bracelet to your best _bud_!
3. Letter Beaded Bracelet
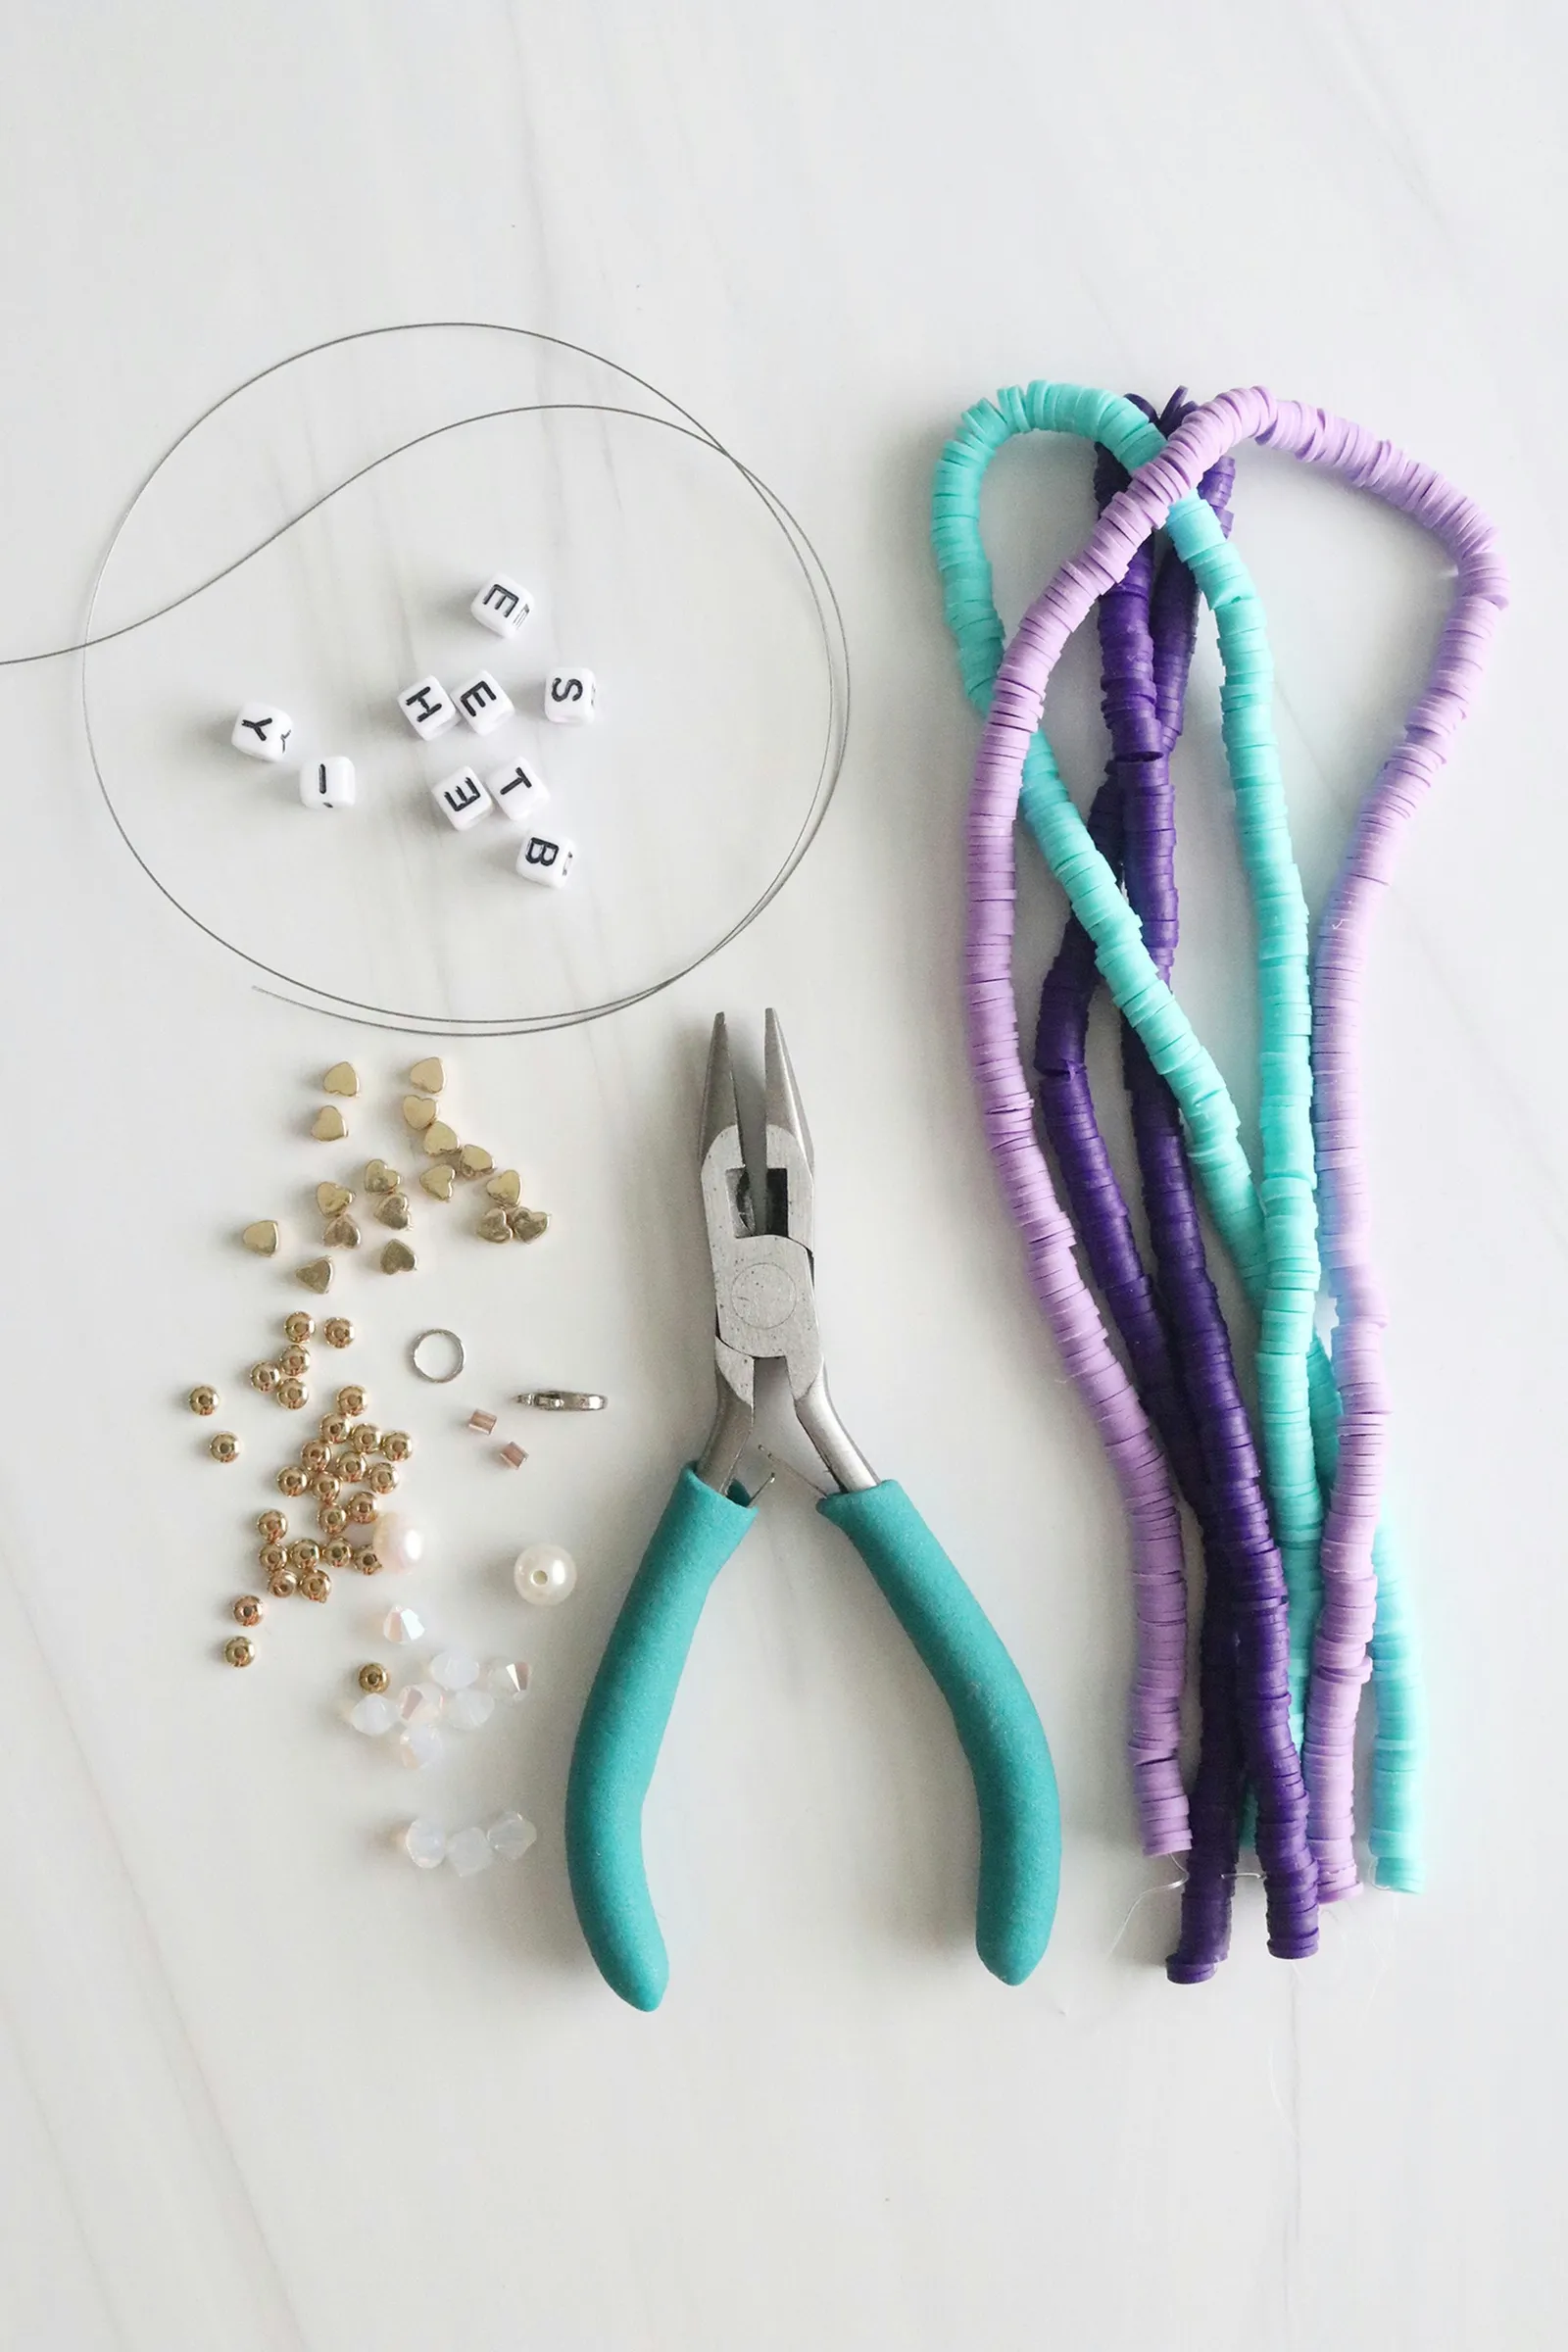
1. Prepare wire
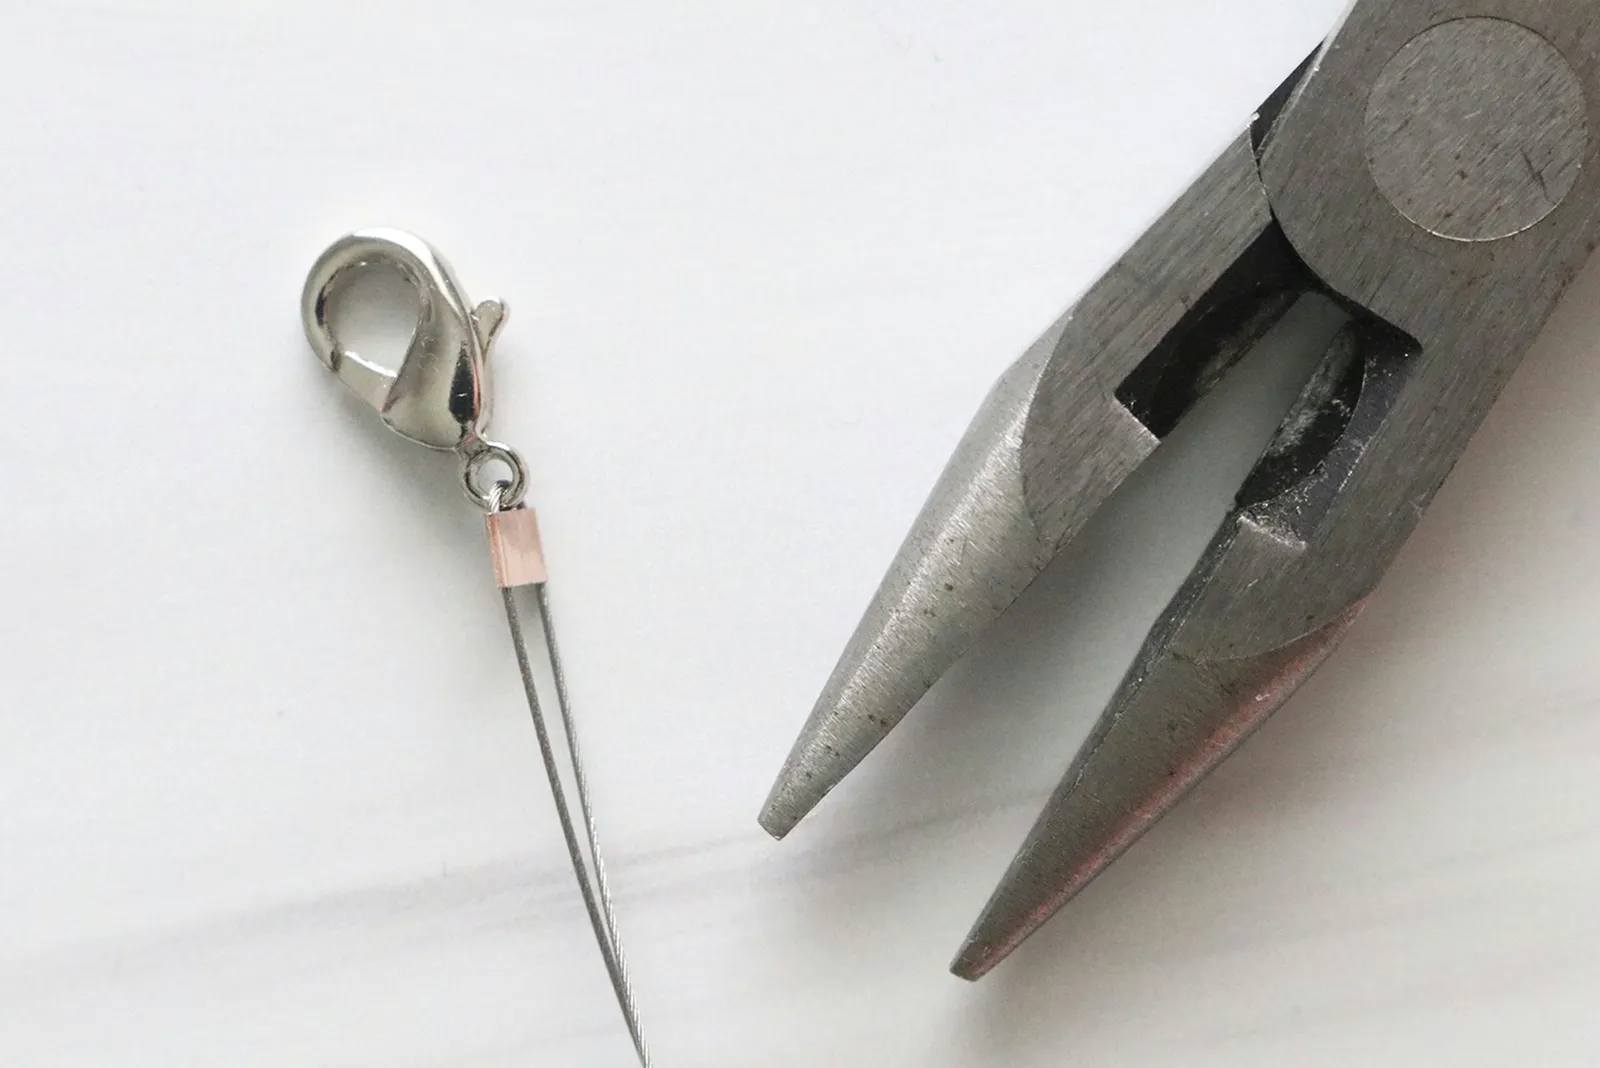
Cut a strand of beading wire slightly longer than desired length. Slide on a crimp bead followed by a clasp. Insert end of wire through crimp bead. Flatten crimp bead with flat portion of jewelry pliers.
2. Add beads
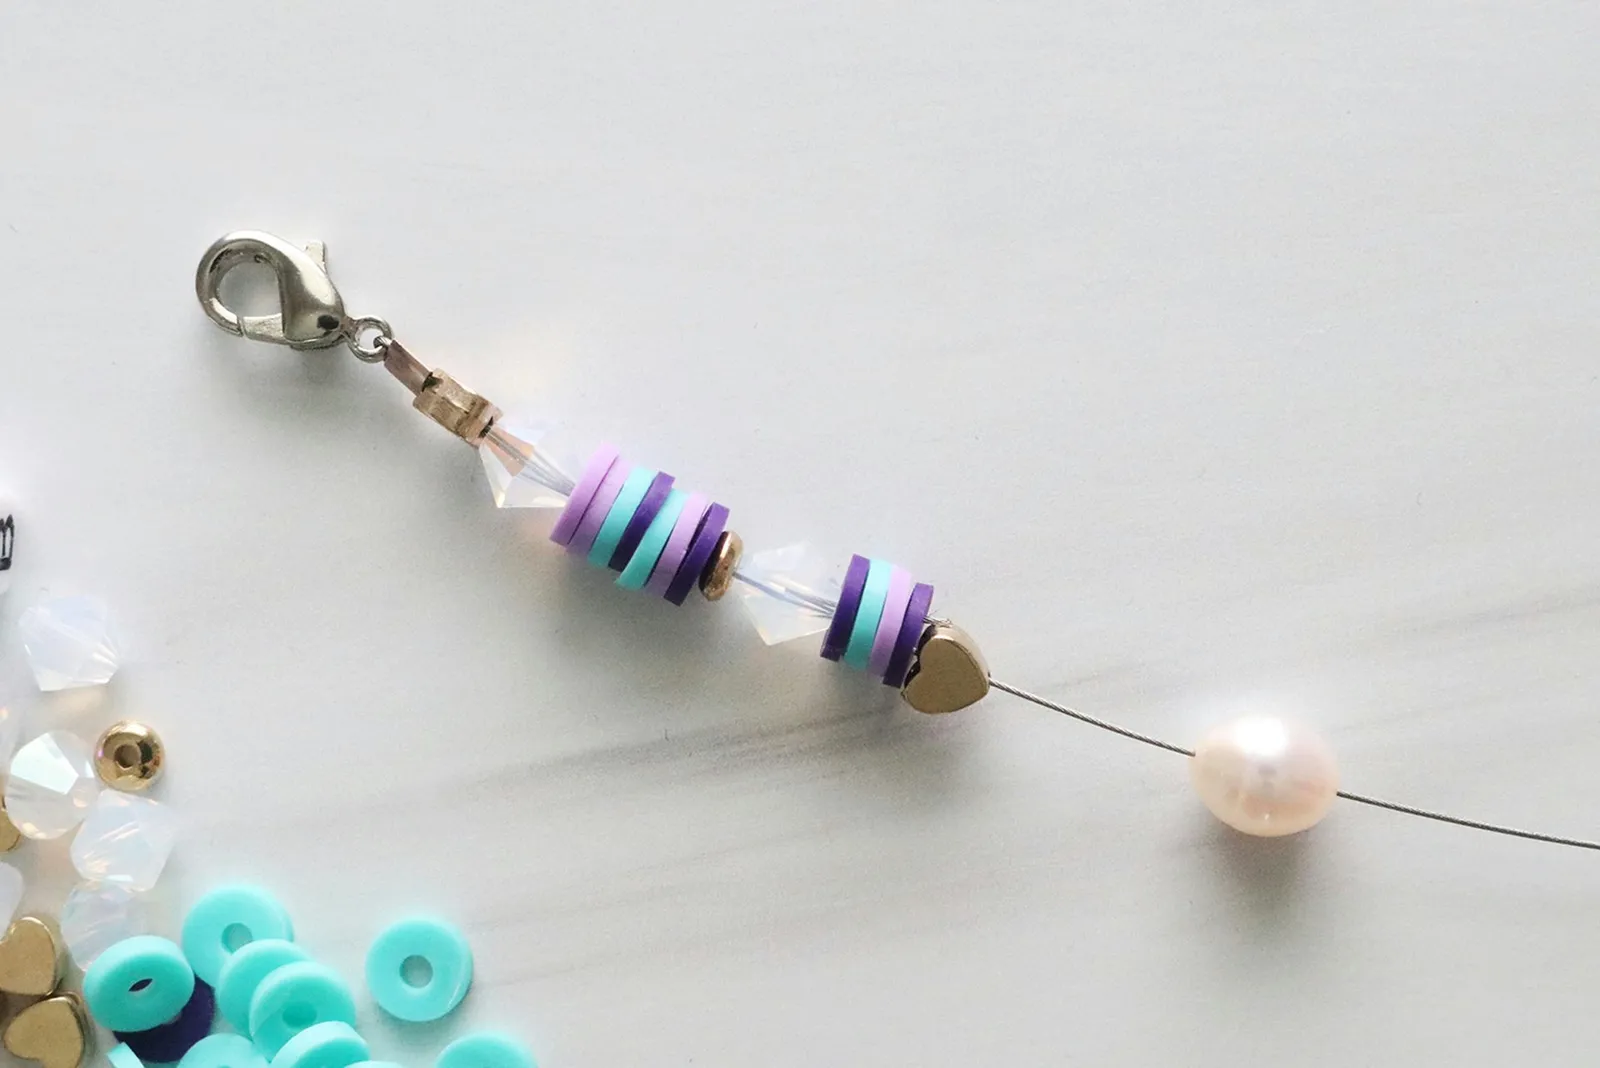
String on first half of beads.
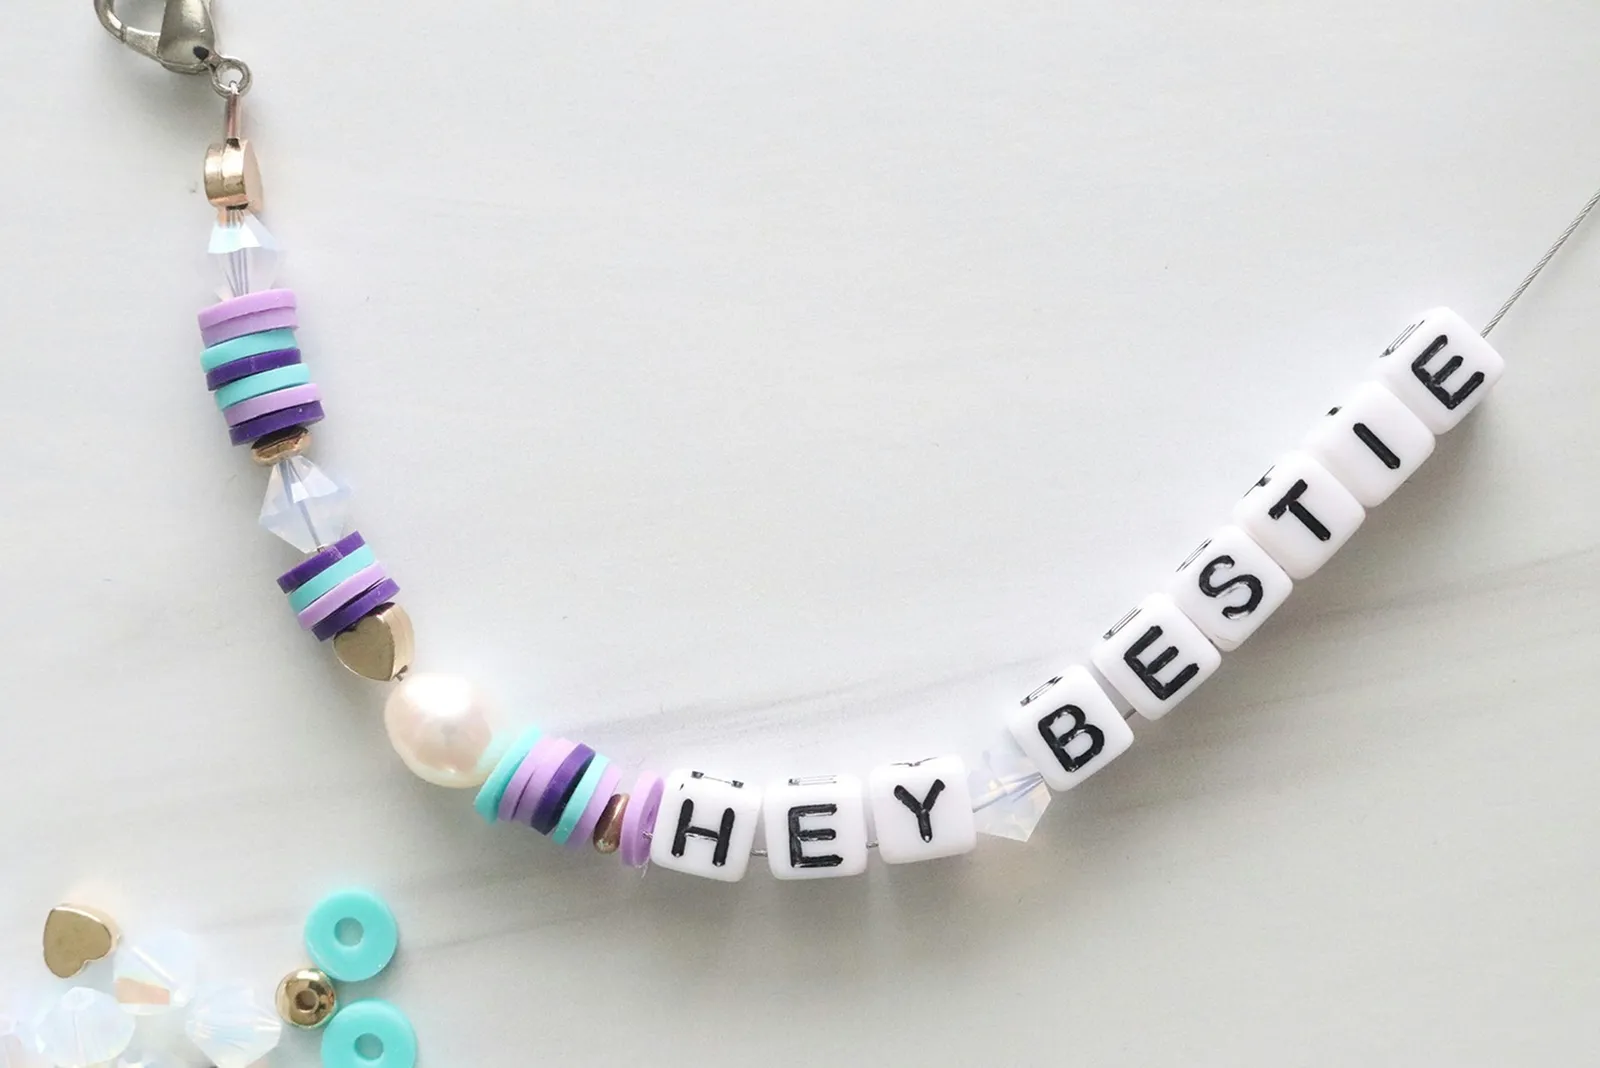
Next, add letter beads to spell out your desired word or phrase. Add a nonletter bead between words to separate them.
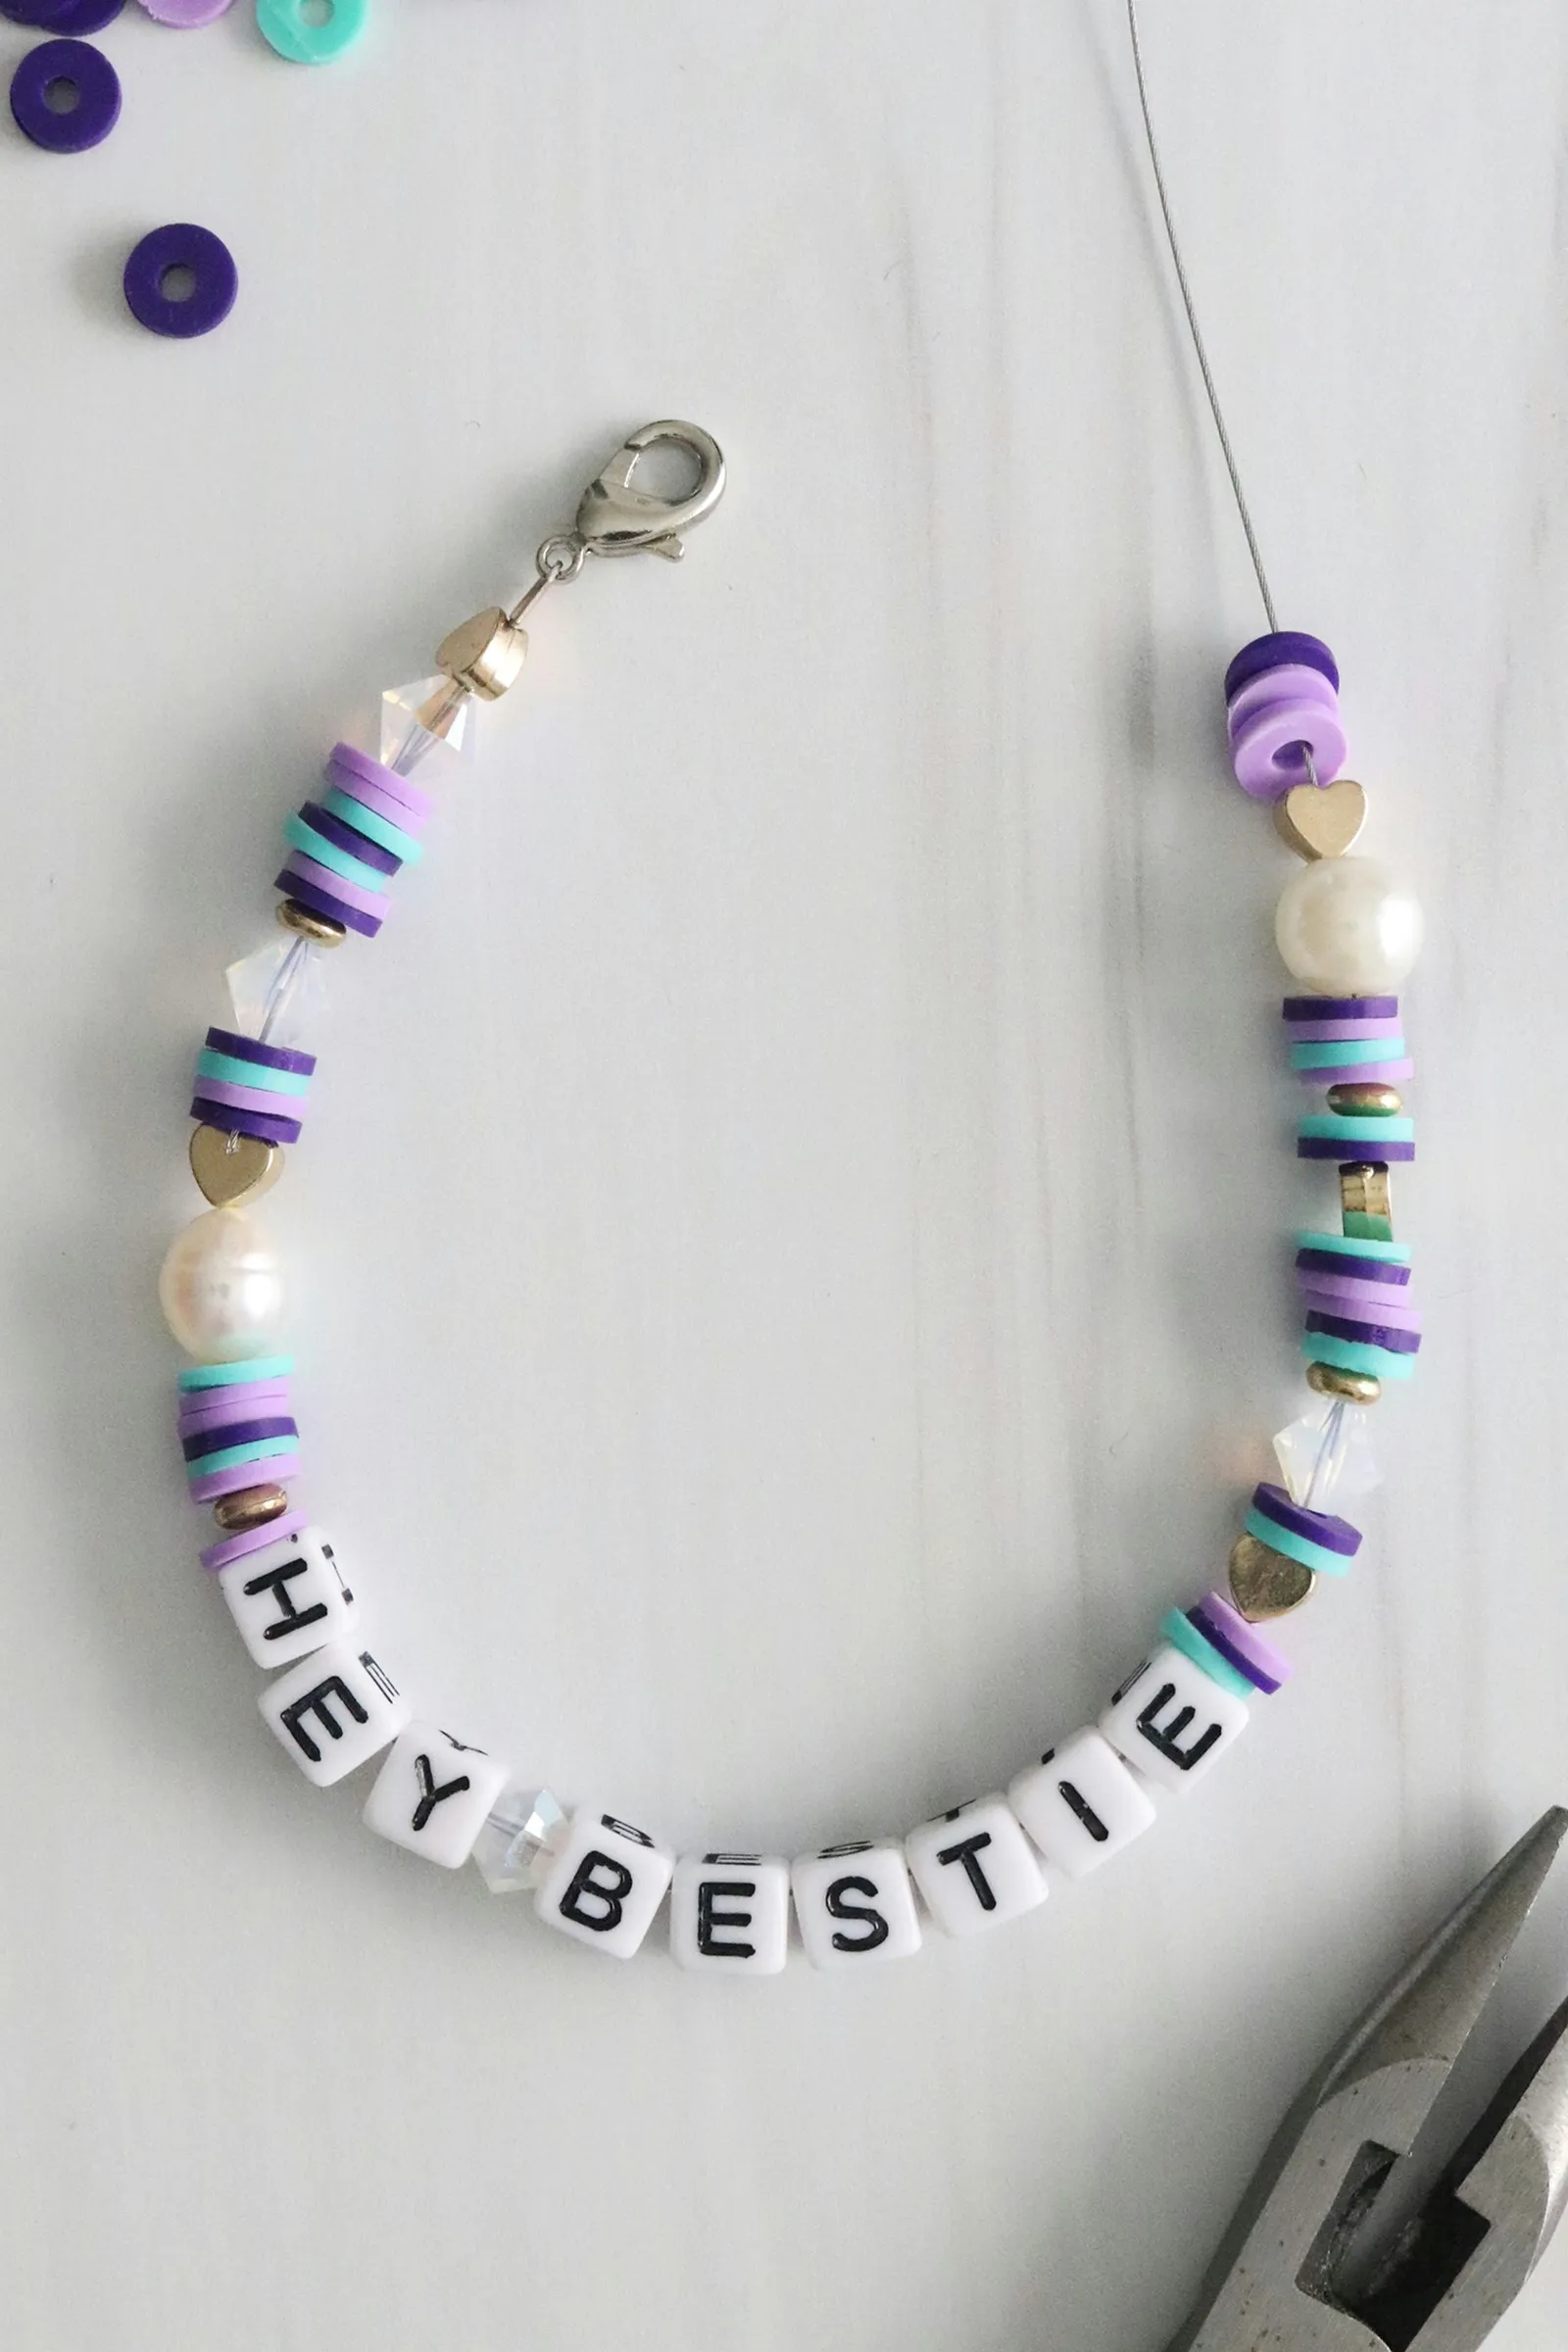
String on remaining beads.
3. Add jump ring
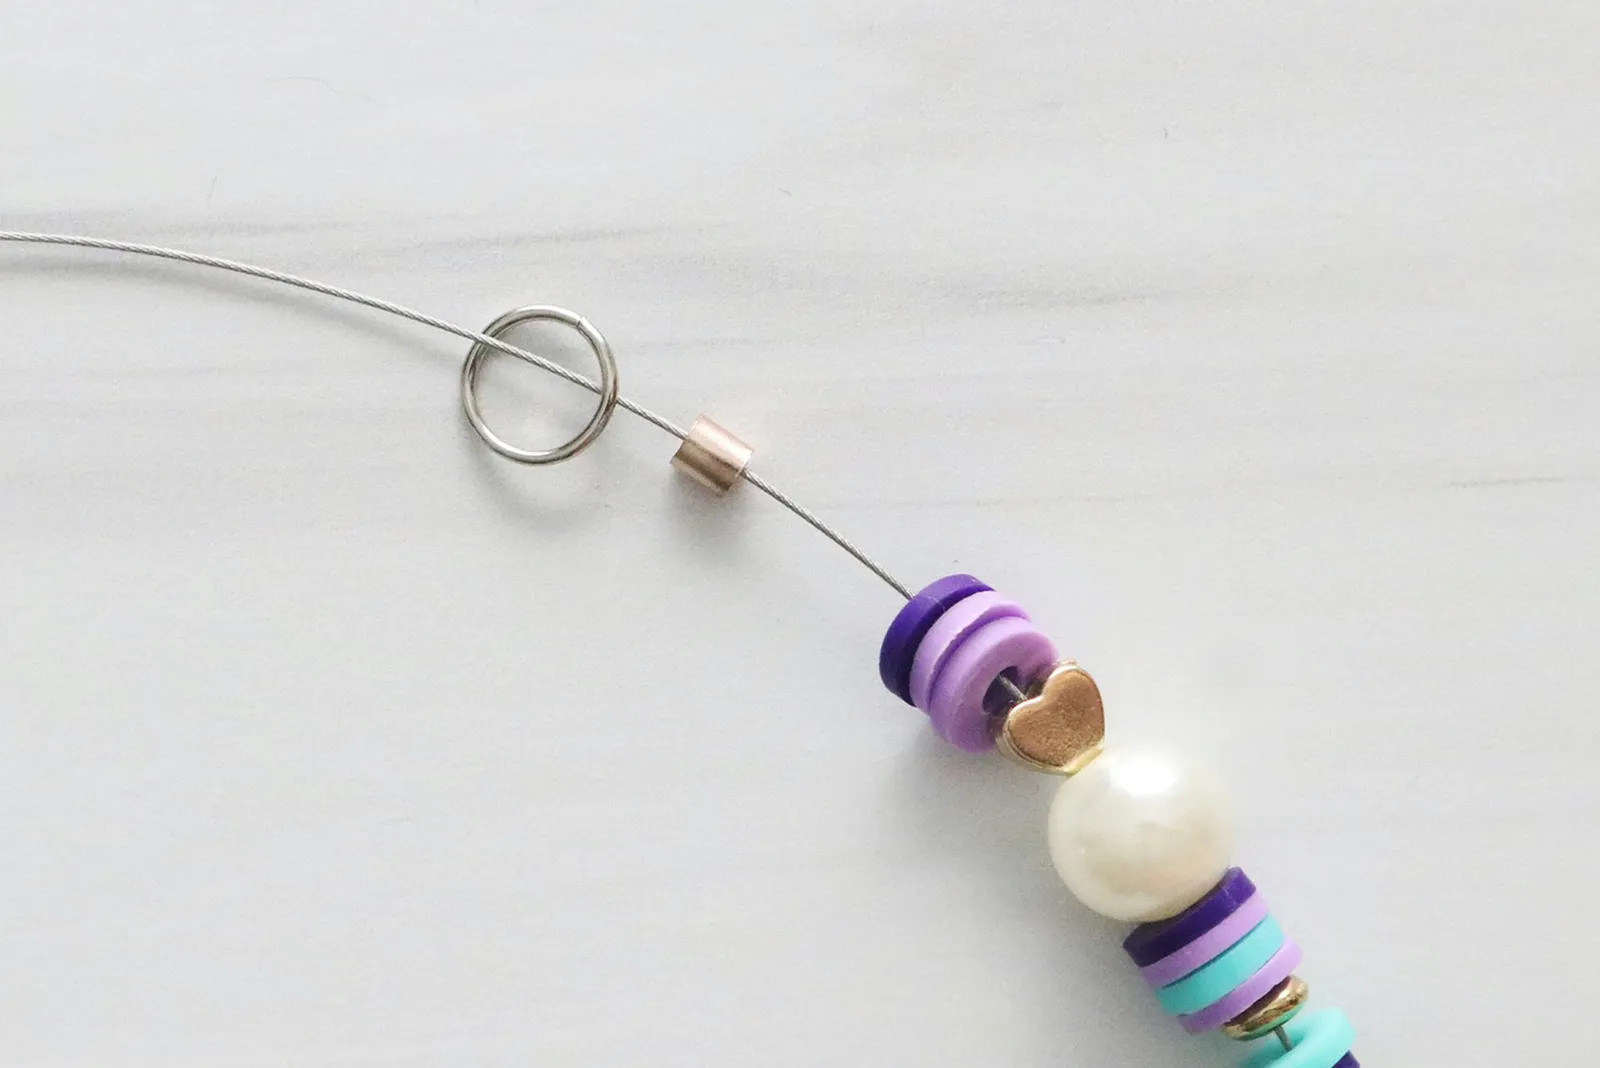
To complete your easy friendship bracelet, add another crimp bead followed by a jump ring. Insert end of wire through crimp bead as well as a few other beads. This will add extra security. Using flat portion of pliers, flatten crimp bead. Cut away excess wire using cutting portion of pliers or scissors.
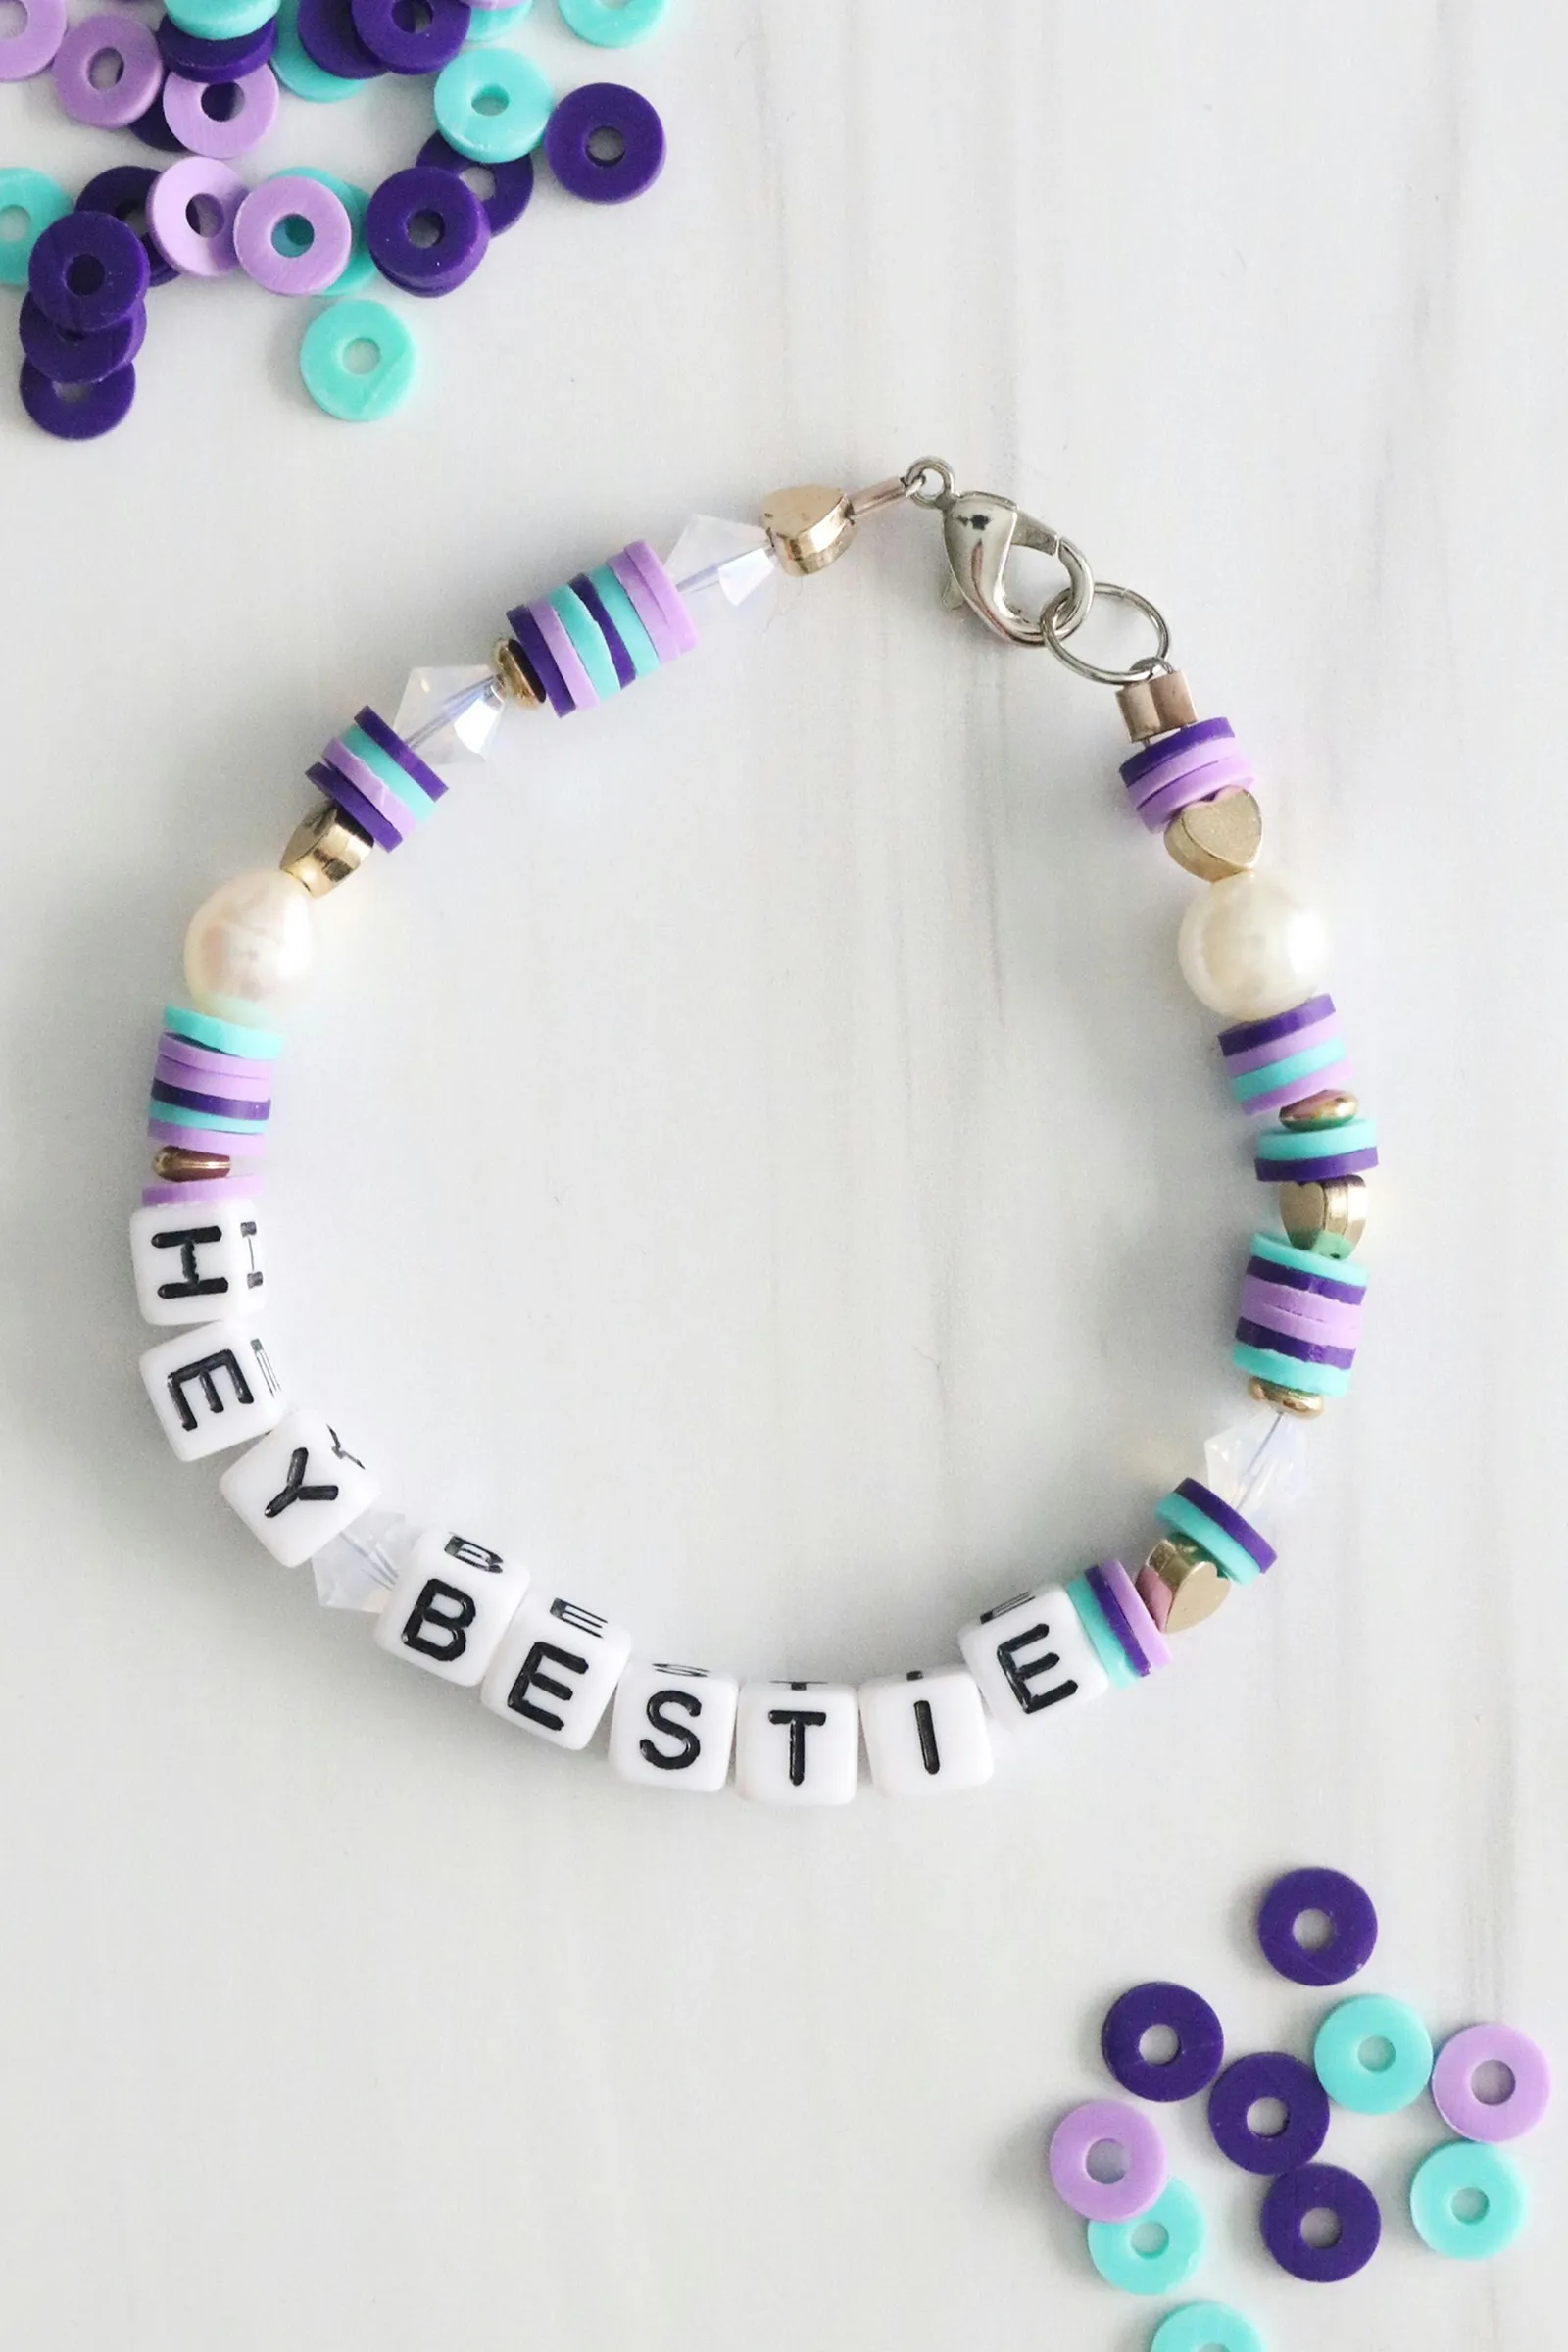
Wear your friendship bracelet on its own or style it with your other creations.
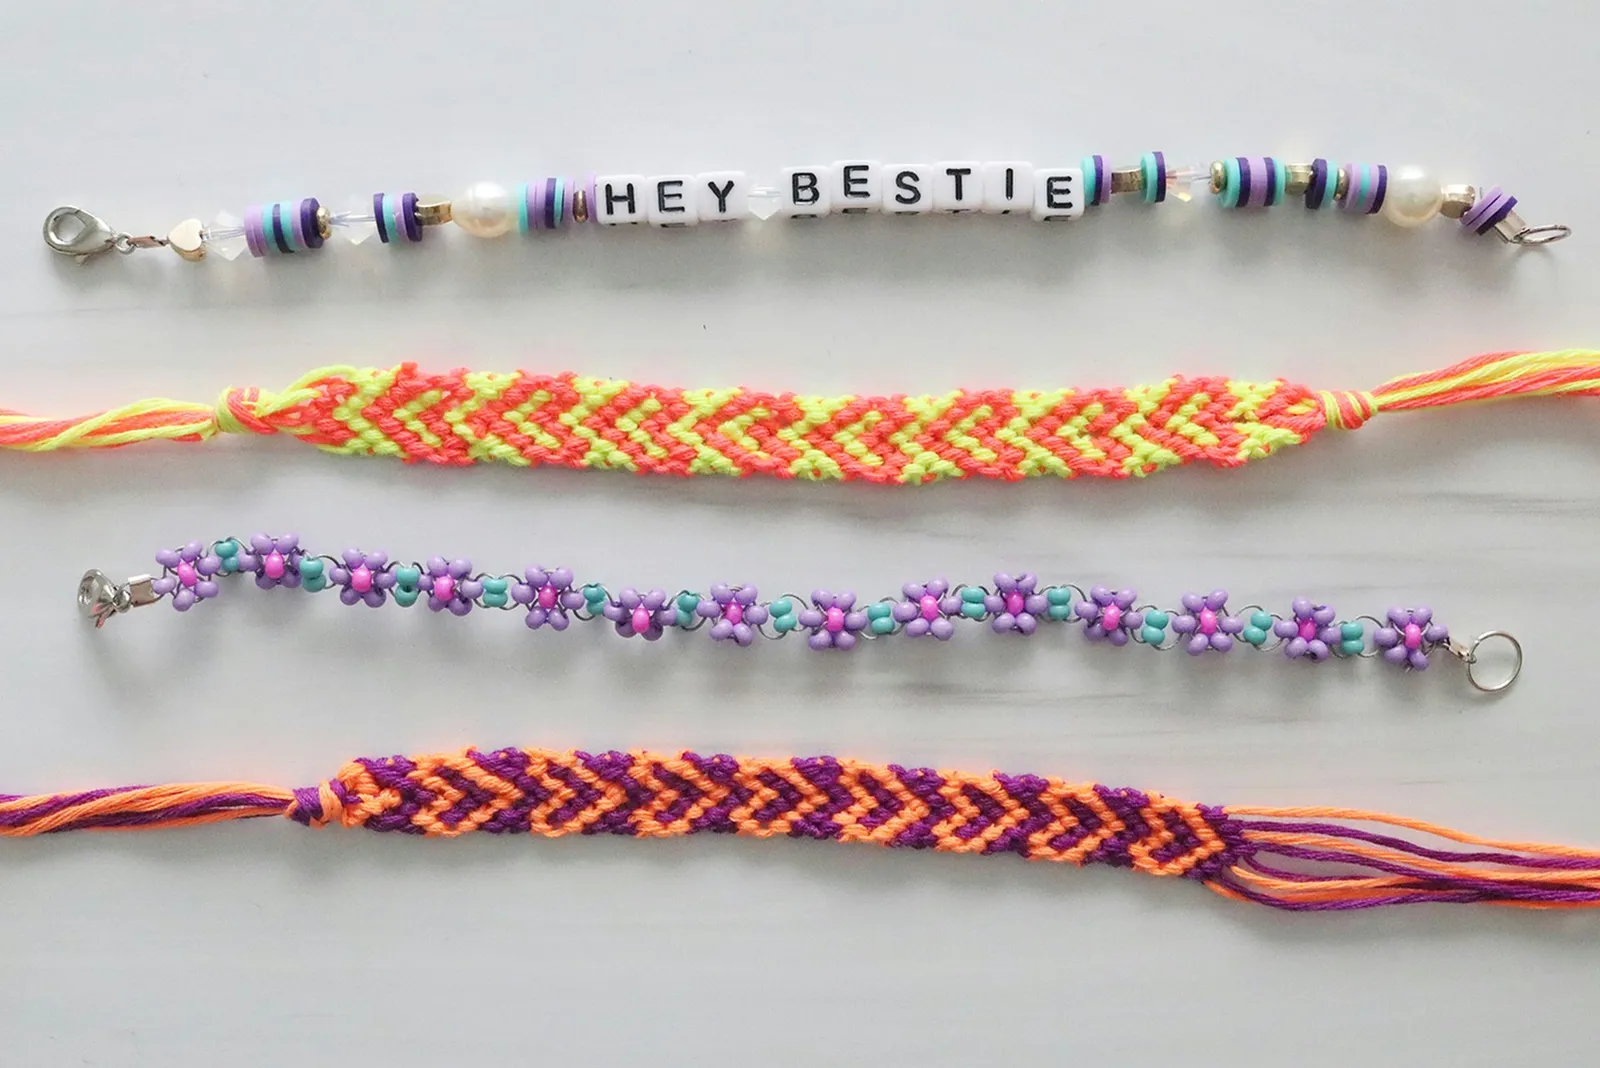
If you ask us, you're never too old to dress up your wrists with adorable bracelets—or to express your love for your besties! Get beading and let the fun begin.