Hand-Paint Blue and White Chinoiserie Ornaments for Holiday Decor
Create your own blue and white chinoiserie ornaments using simple supplies like white glass ornaments, paint pens, and acrylic paint. Follow step-by-step instructions to paint floral motifs, then bake for durability. Use them on trees, garlands, as centerpieces, or give as gifts.
By Jordan Lee10 steps
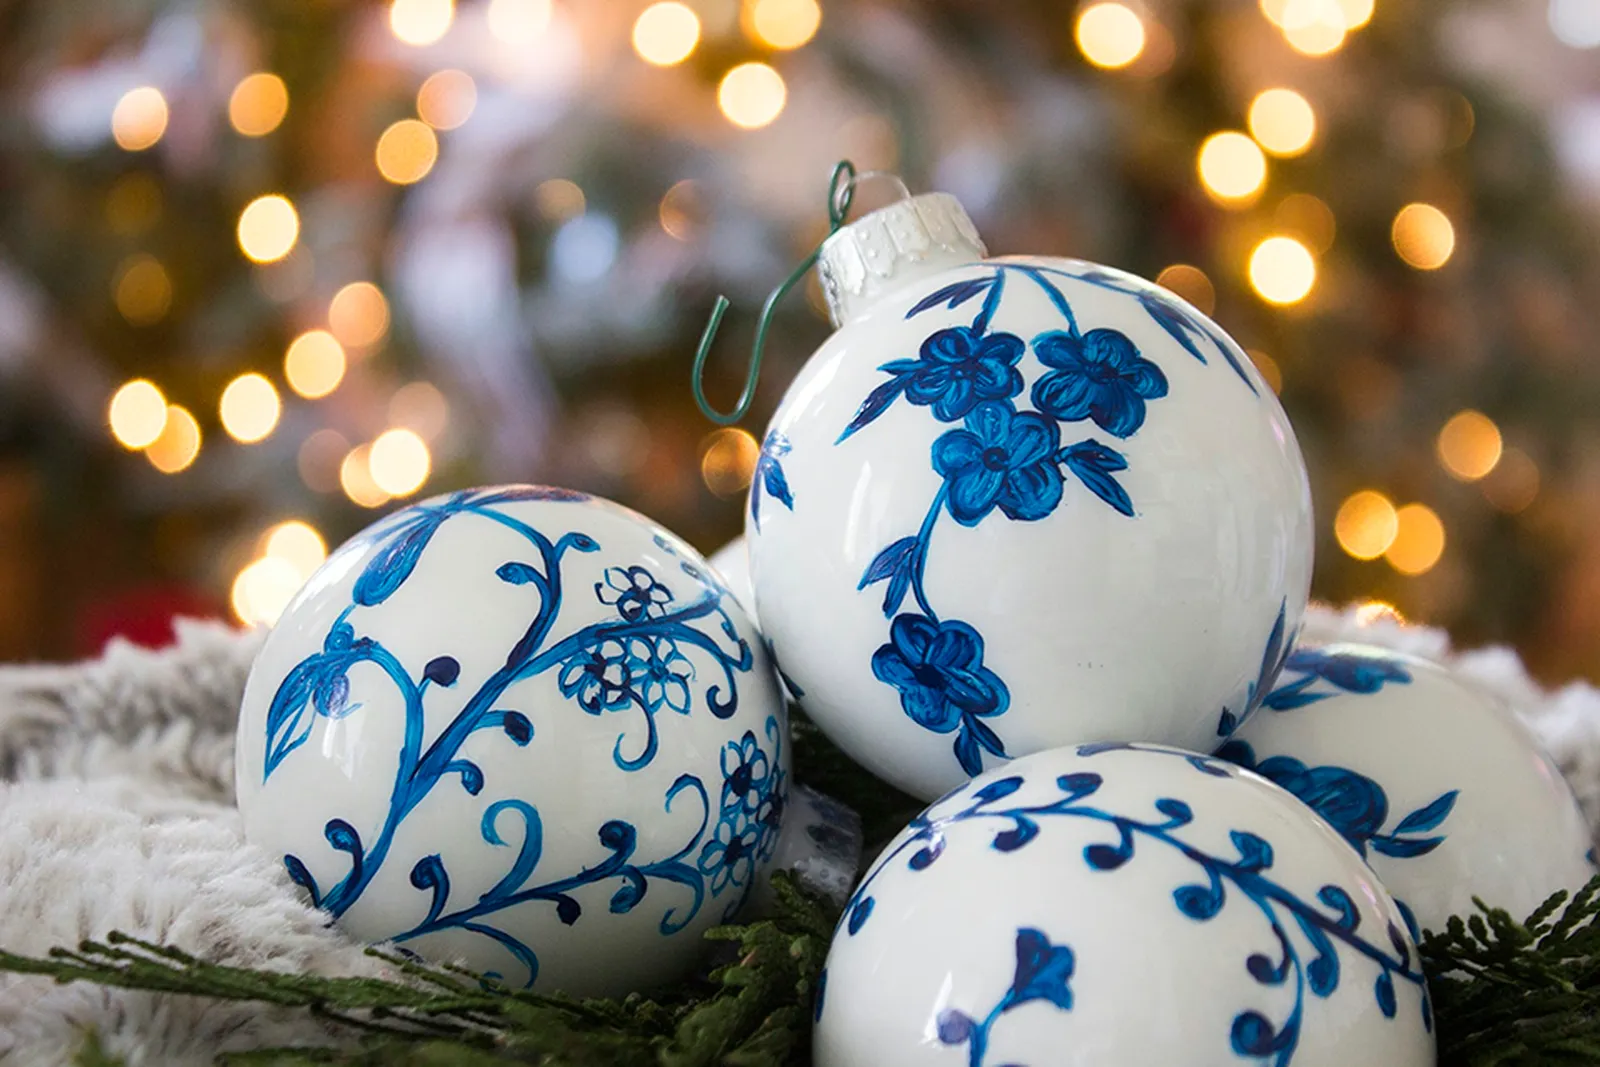
Chinoiserie porcelain is known for its intricate designs and timeless blue-and-white palette, which makes it a sought-after collectible that can be quite pricey. By making your own chinoiserie-inspired ornaments with a basic motif, you can achieve that high-end, collectible appearance for your Christmas tree without spending a lot.
Beautiful DIY Chinoiserie Ornaments
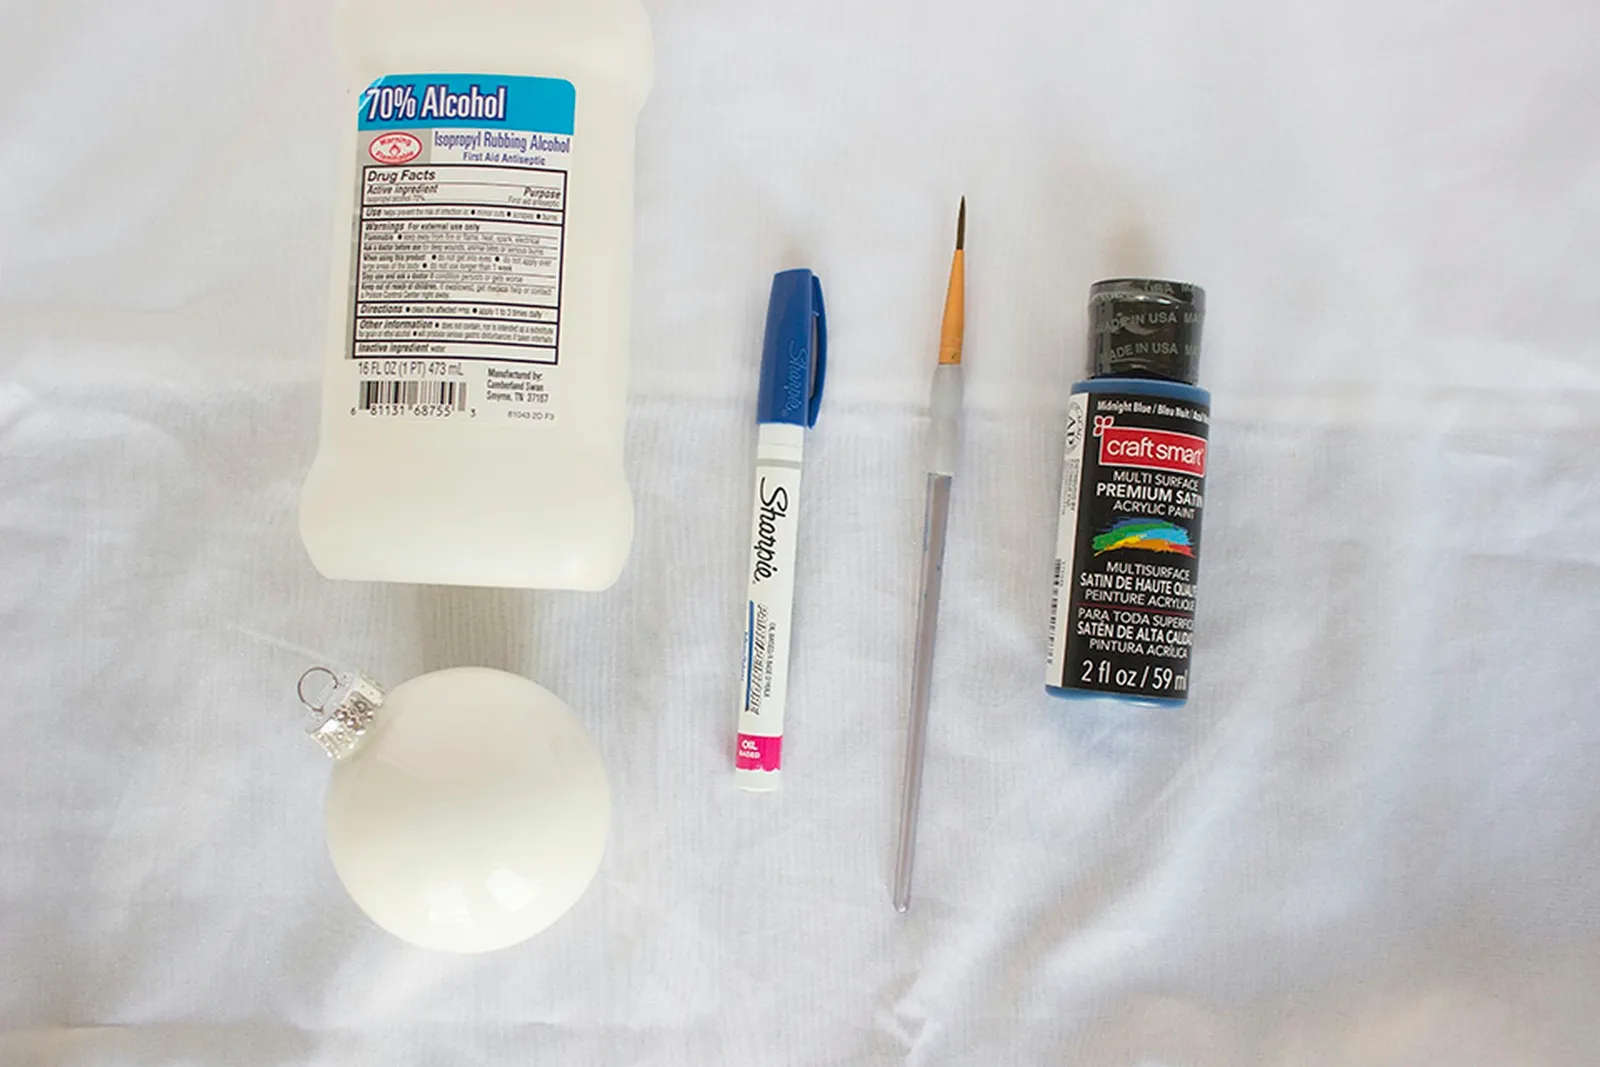
Step 1: Clean Ornament with Alcohol
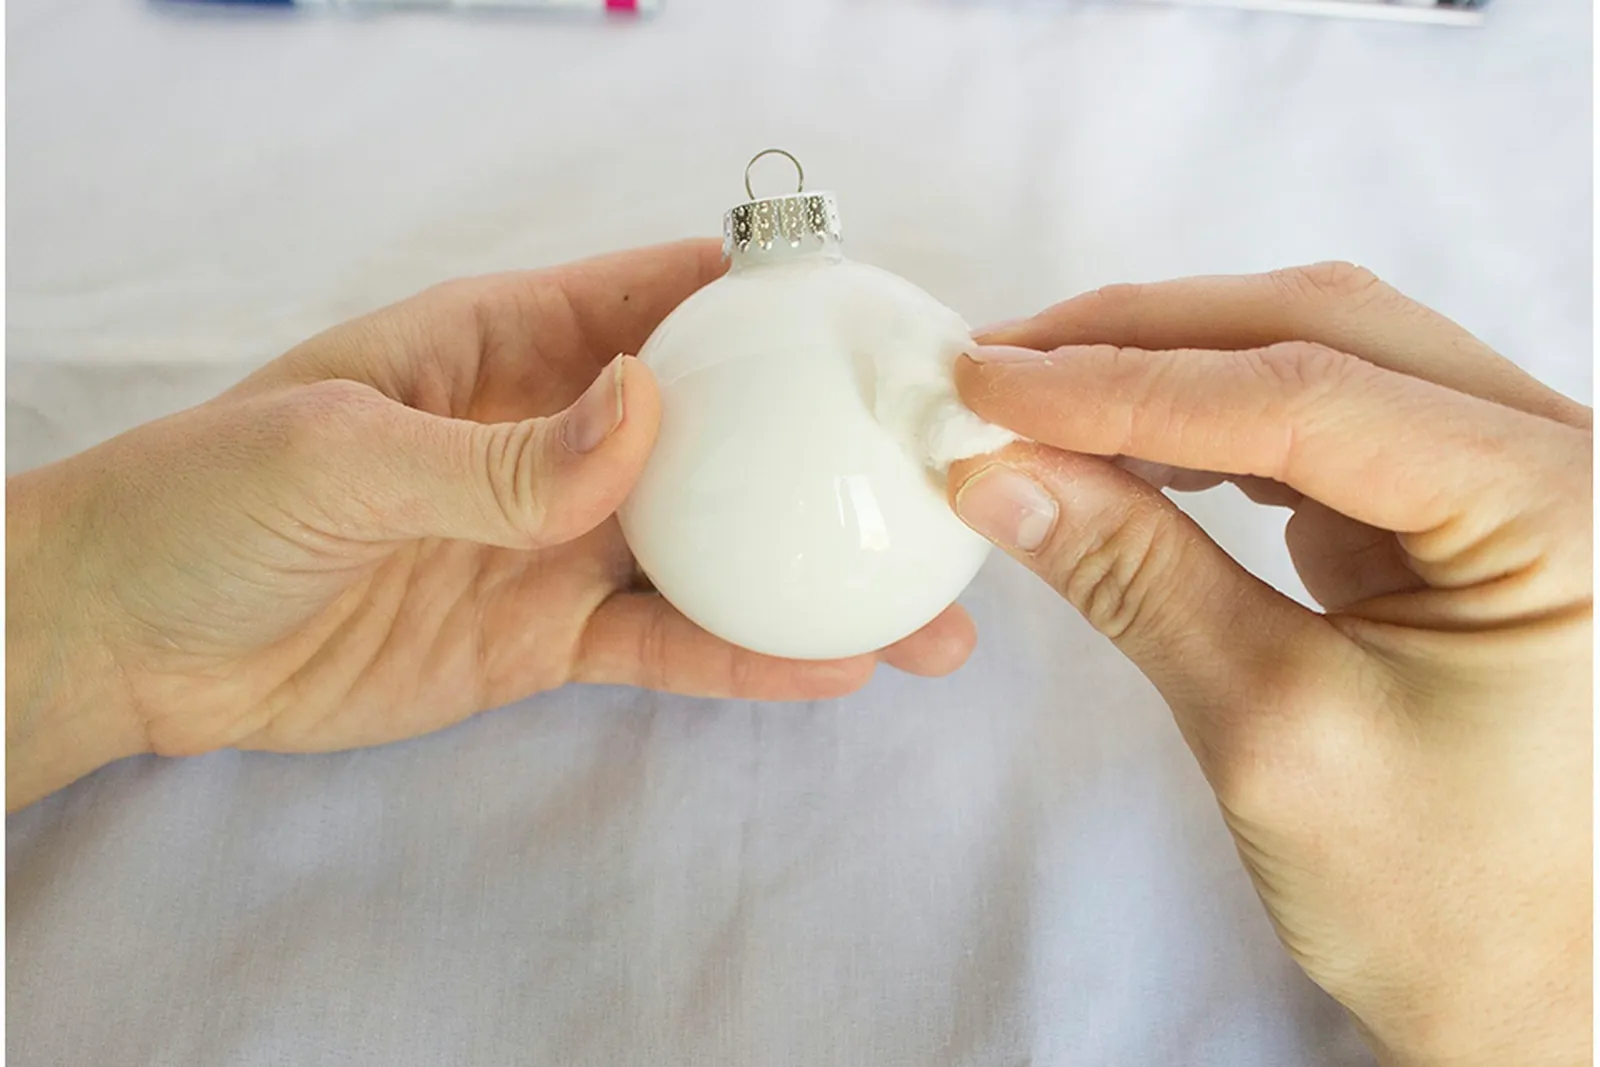
Use a cotton ball dipped in rubbing alcohol to clean the entire surface of the ornament. The alcohol removes any residue and helps the paint adhere properly.
Step 2: Draw Flowers with Paint Pen
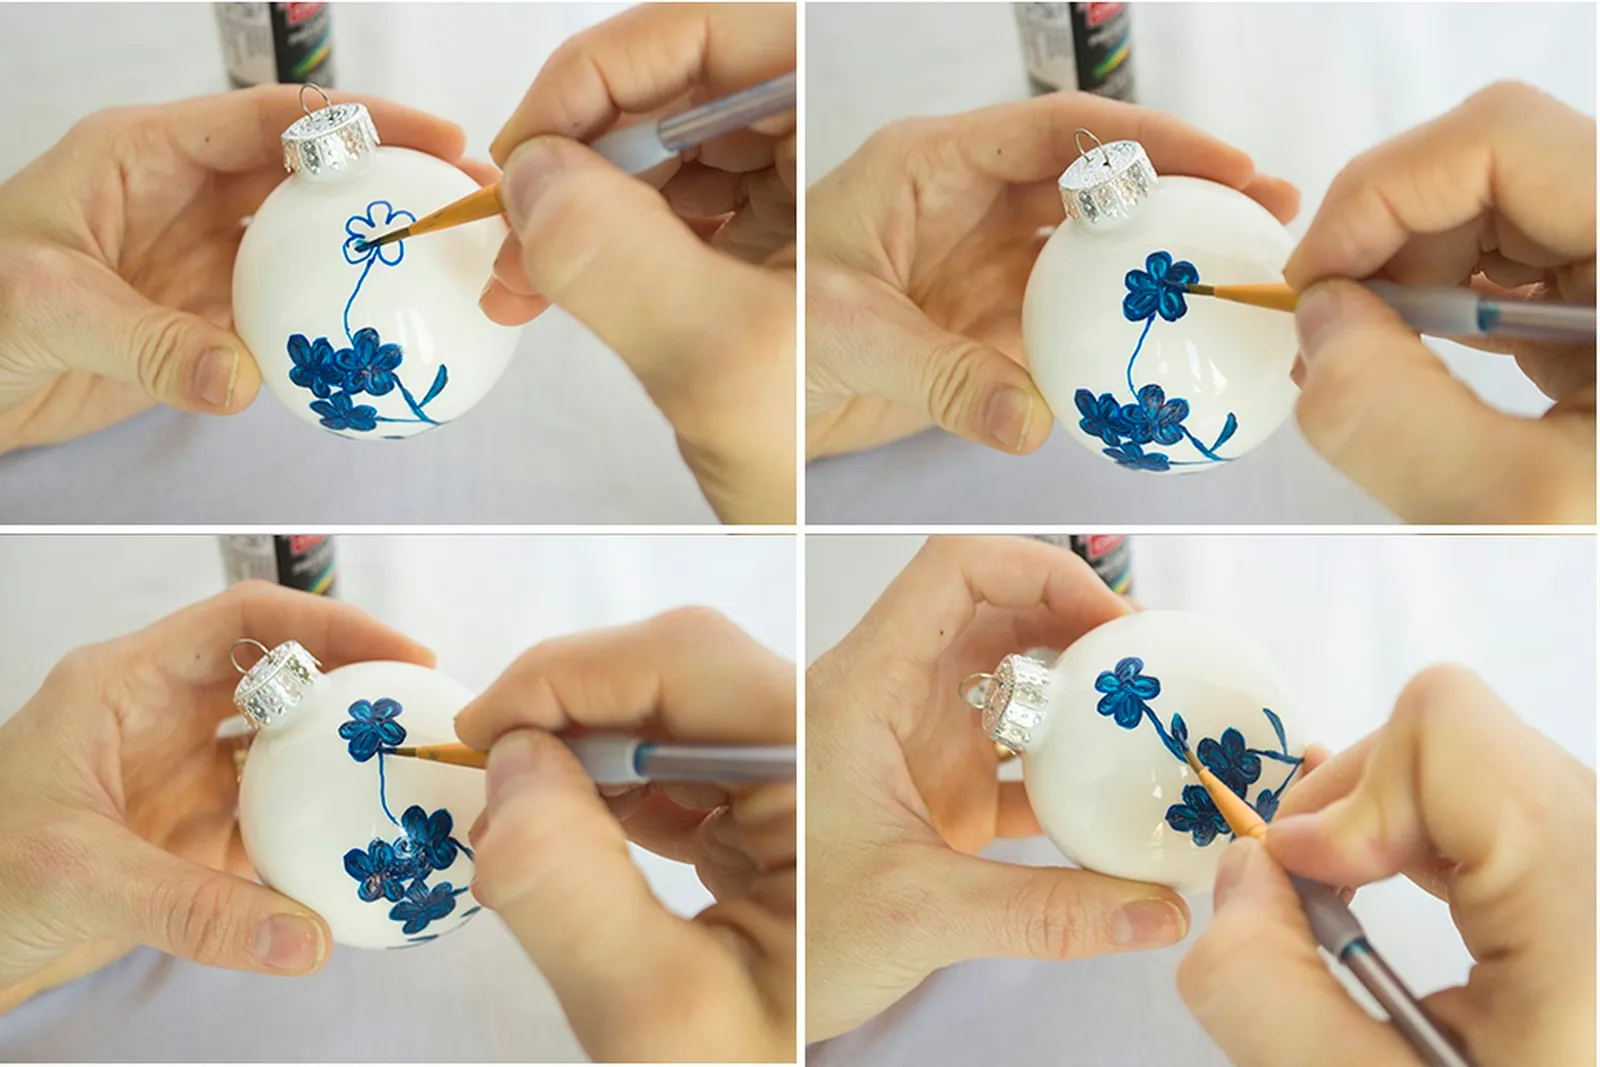
Using the blue paint pen, draw the outline of a group of three flower heads, each with five petals, close together, about halfway down the ornament.
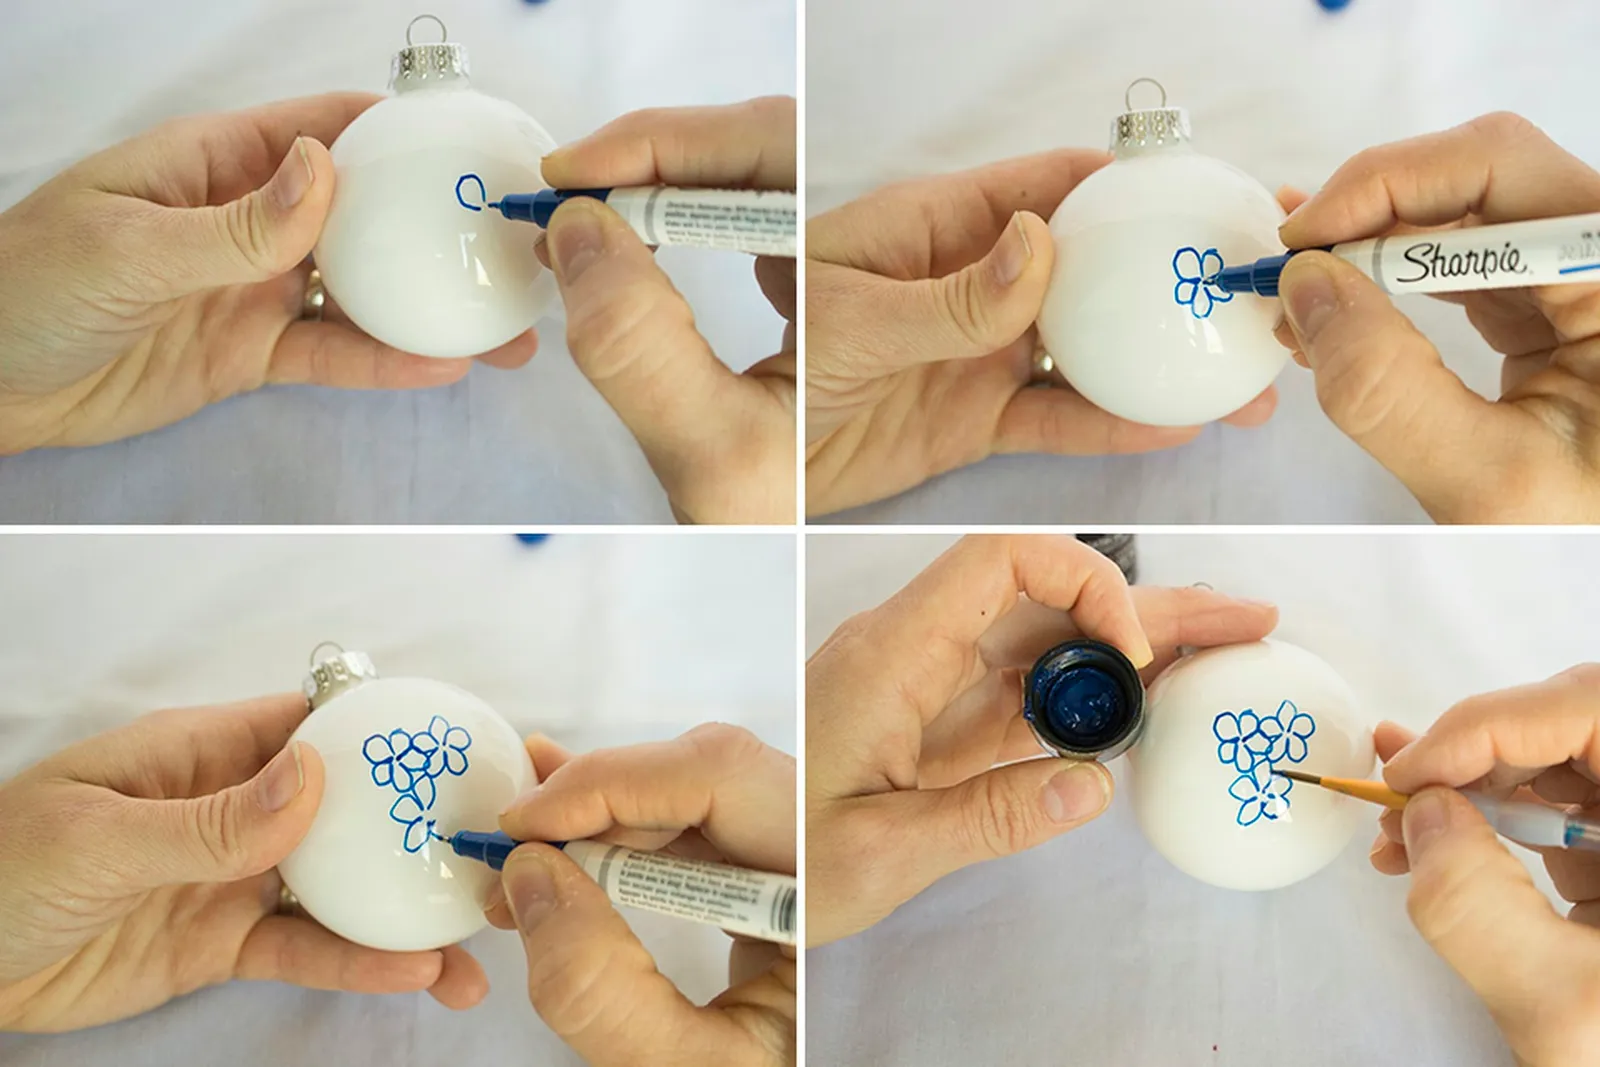
Step 3: Fill In Flowers with Paint
With a size 3 round tip paintbrush, dip only the end of the bristles in the multi-surface paint and fill in the flowers completely. For darker flowers, apply a second coat. Once dry, add a thick dab of paint in the center of each flower.
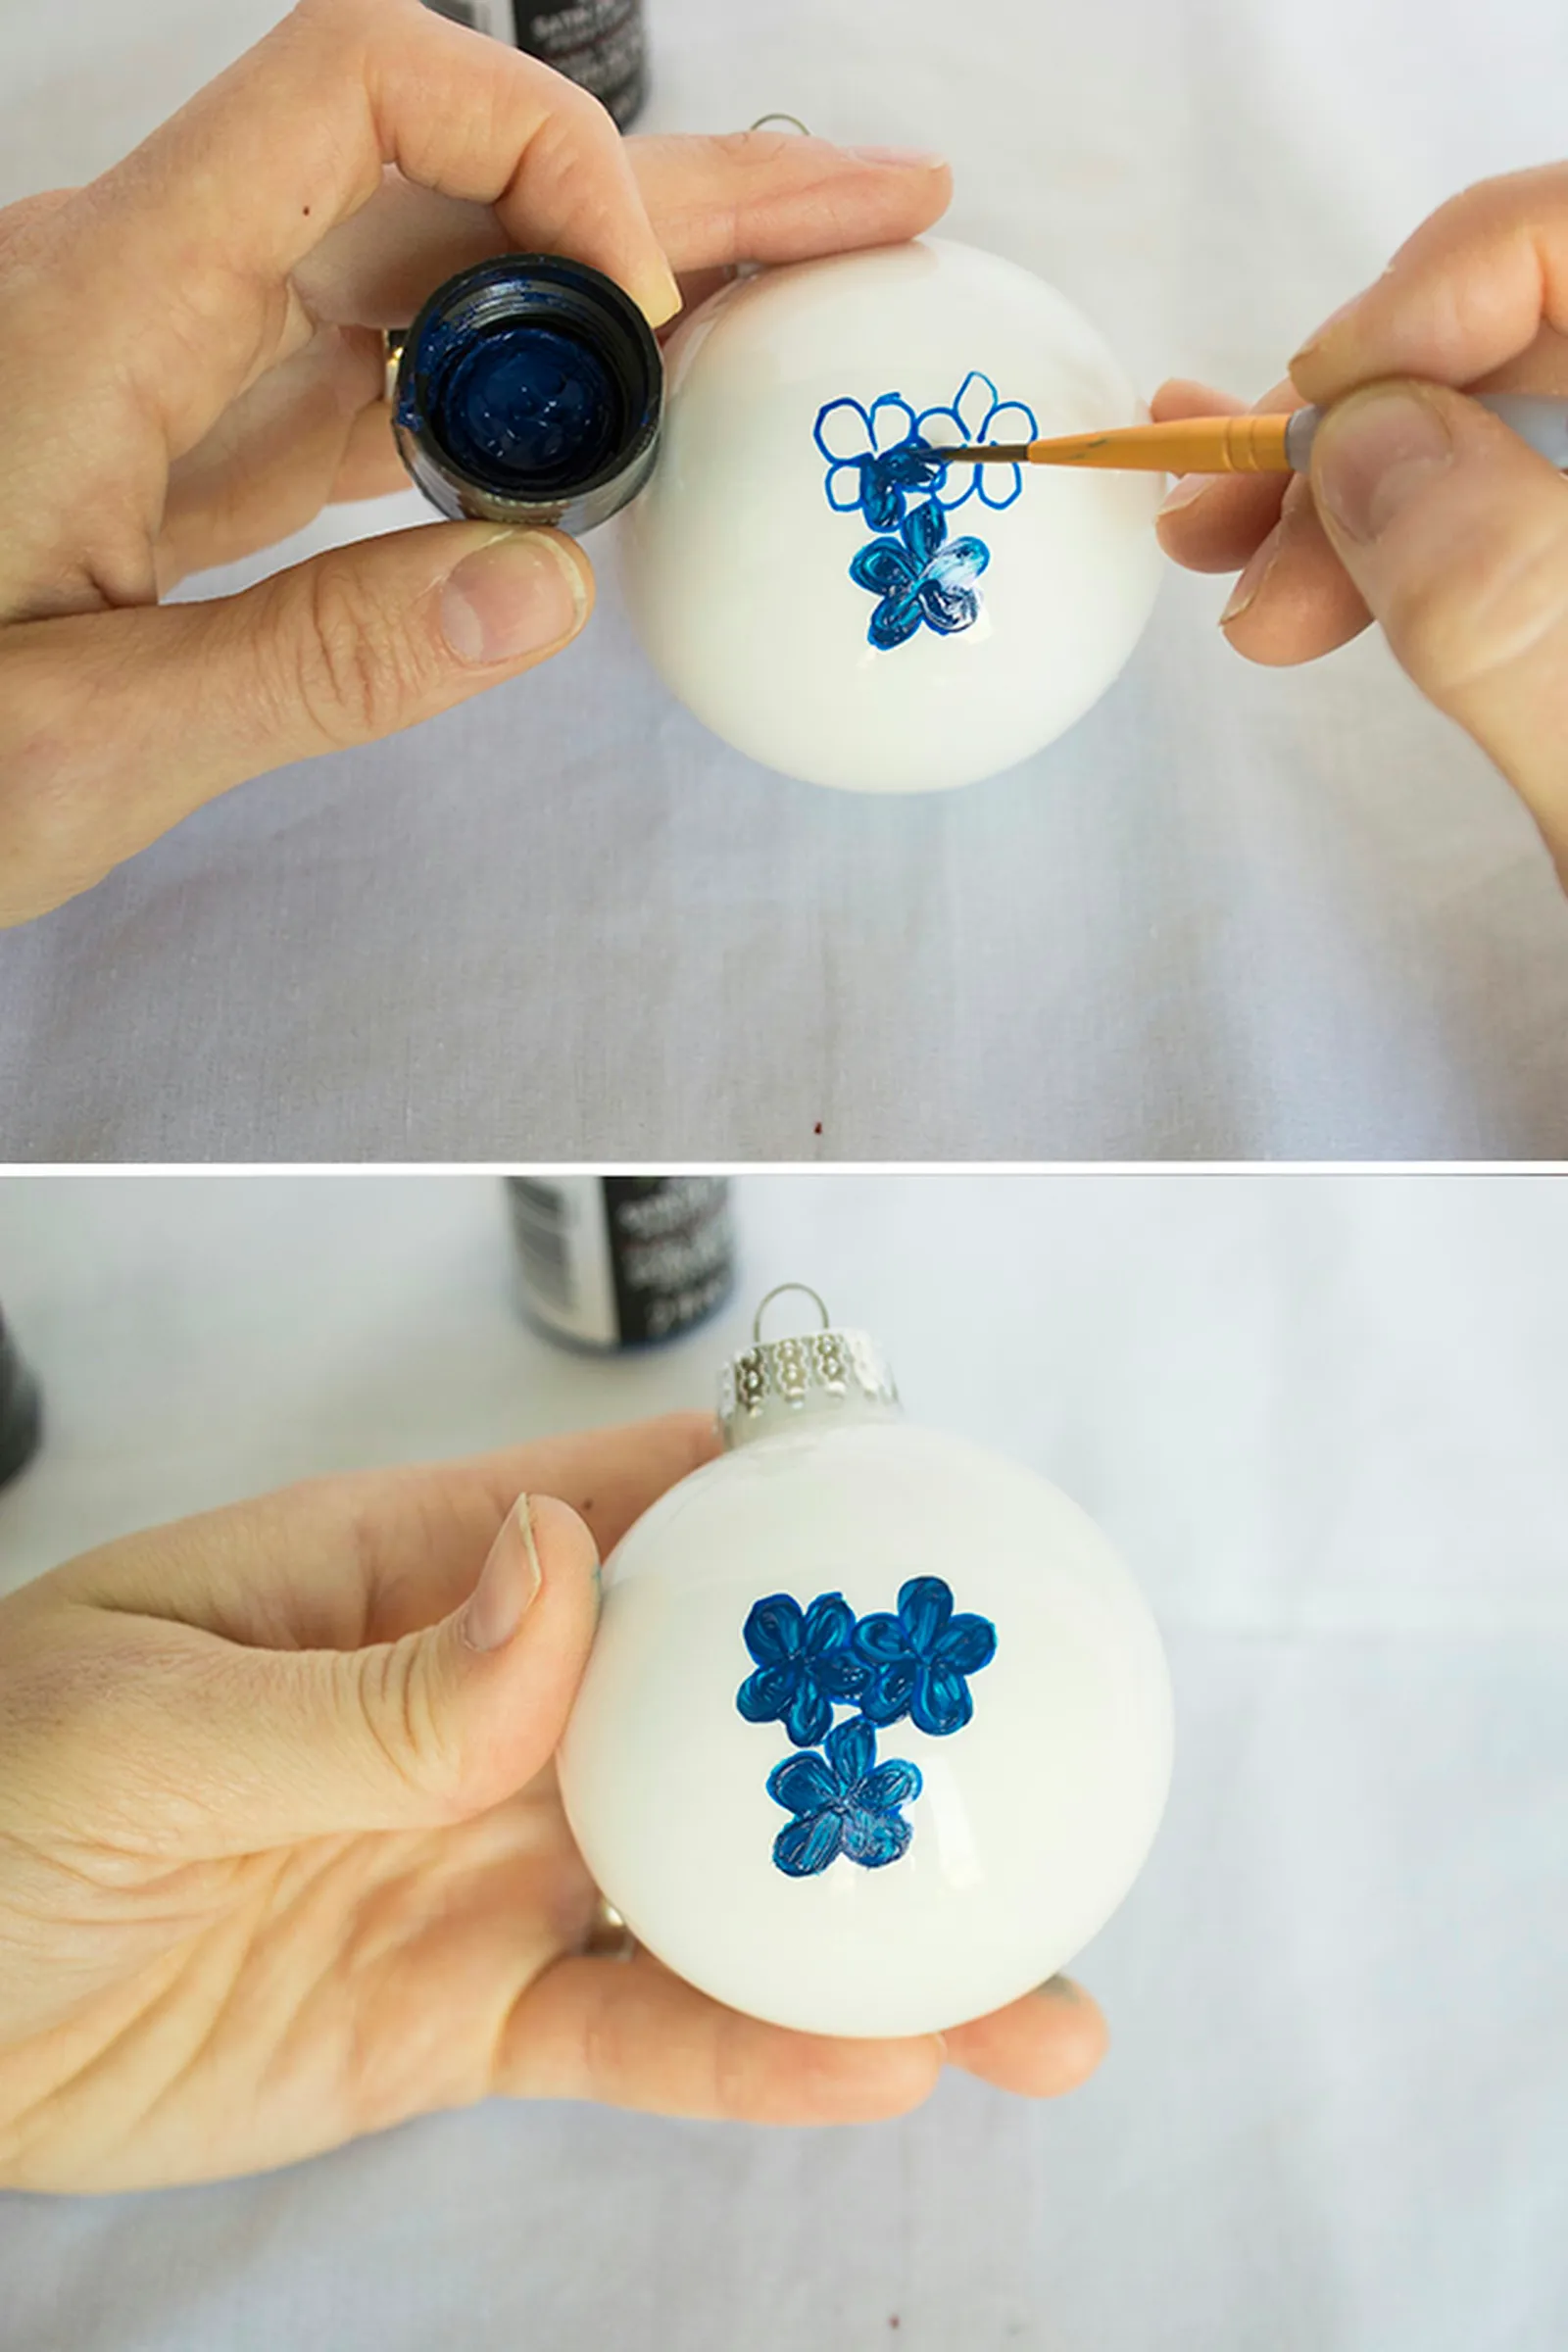
Step 4: Draw Stems with Paint Pen
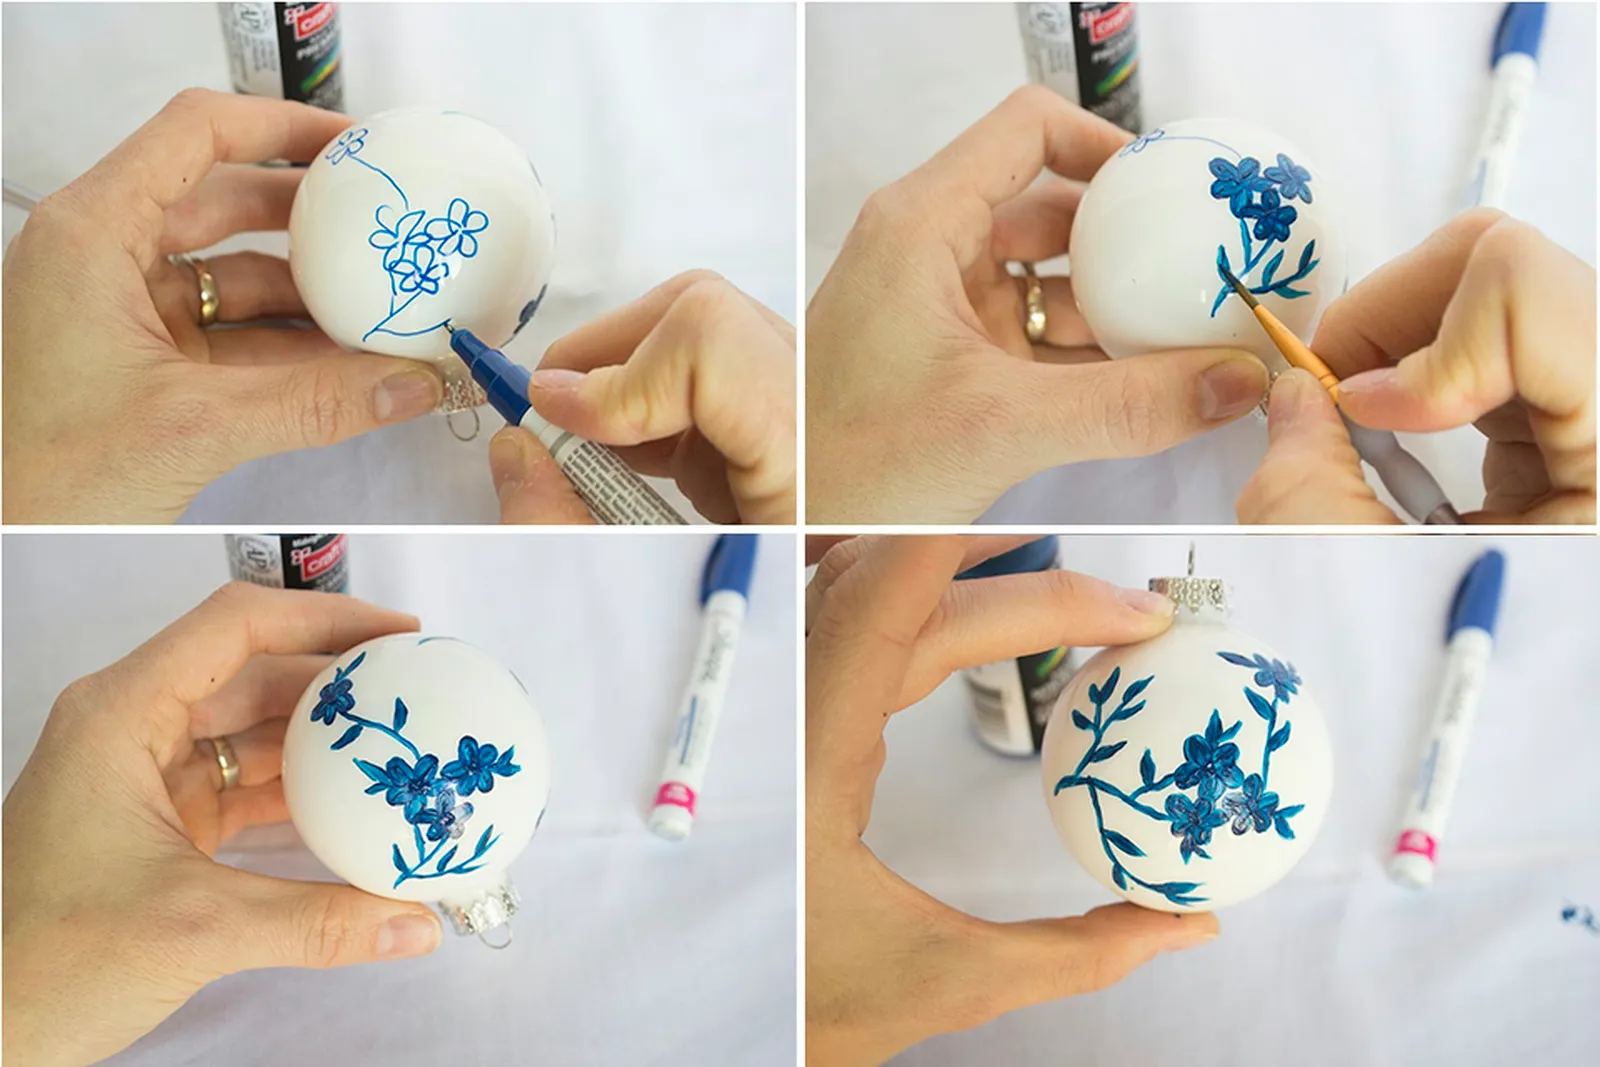
Draw one slightly curved line down from one of the flower heads, then another curved line from the adjacent flower head, connecting it to the first line. On the opposite side of the stem, draw another line that slightly curves out. This will be a stem with only leaves on it. From the top of the grouping of three flowers, draw another line that curves up from the flowers about 1 inch, and then draw a single flower head at the end of it. Allow to dry.
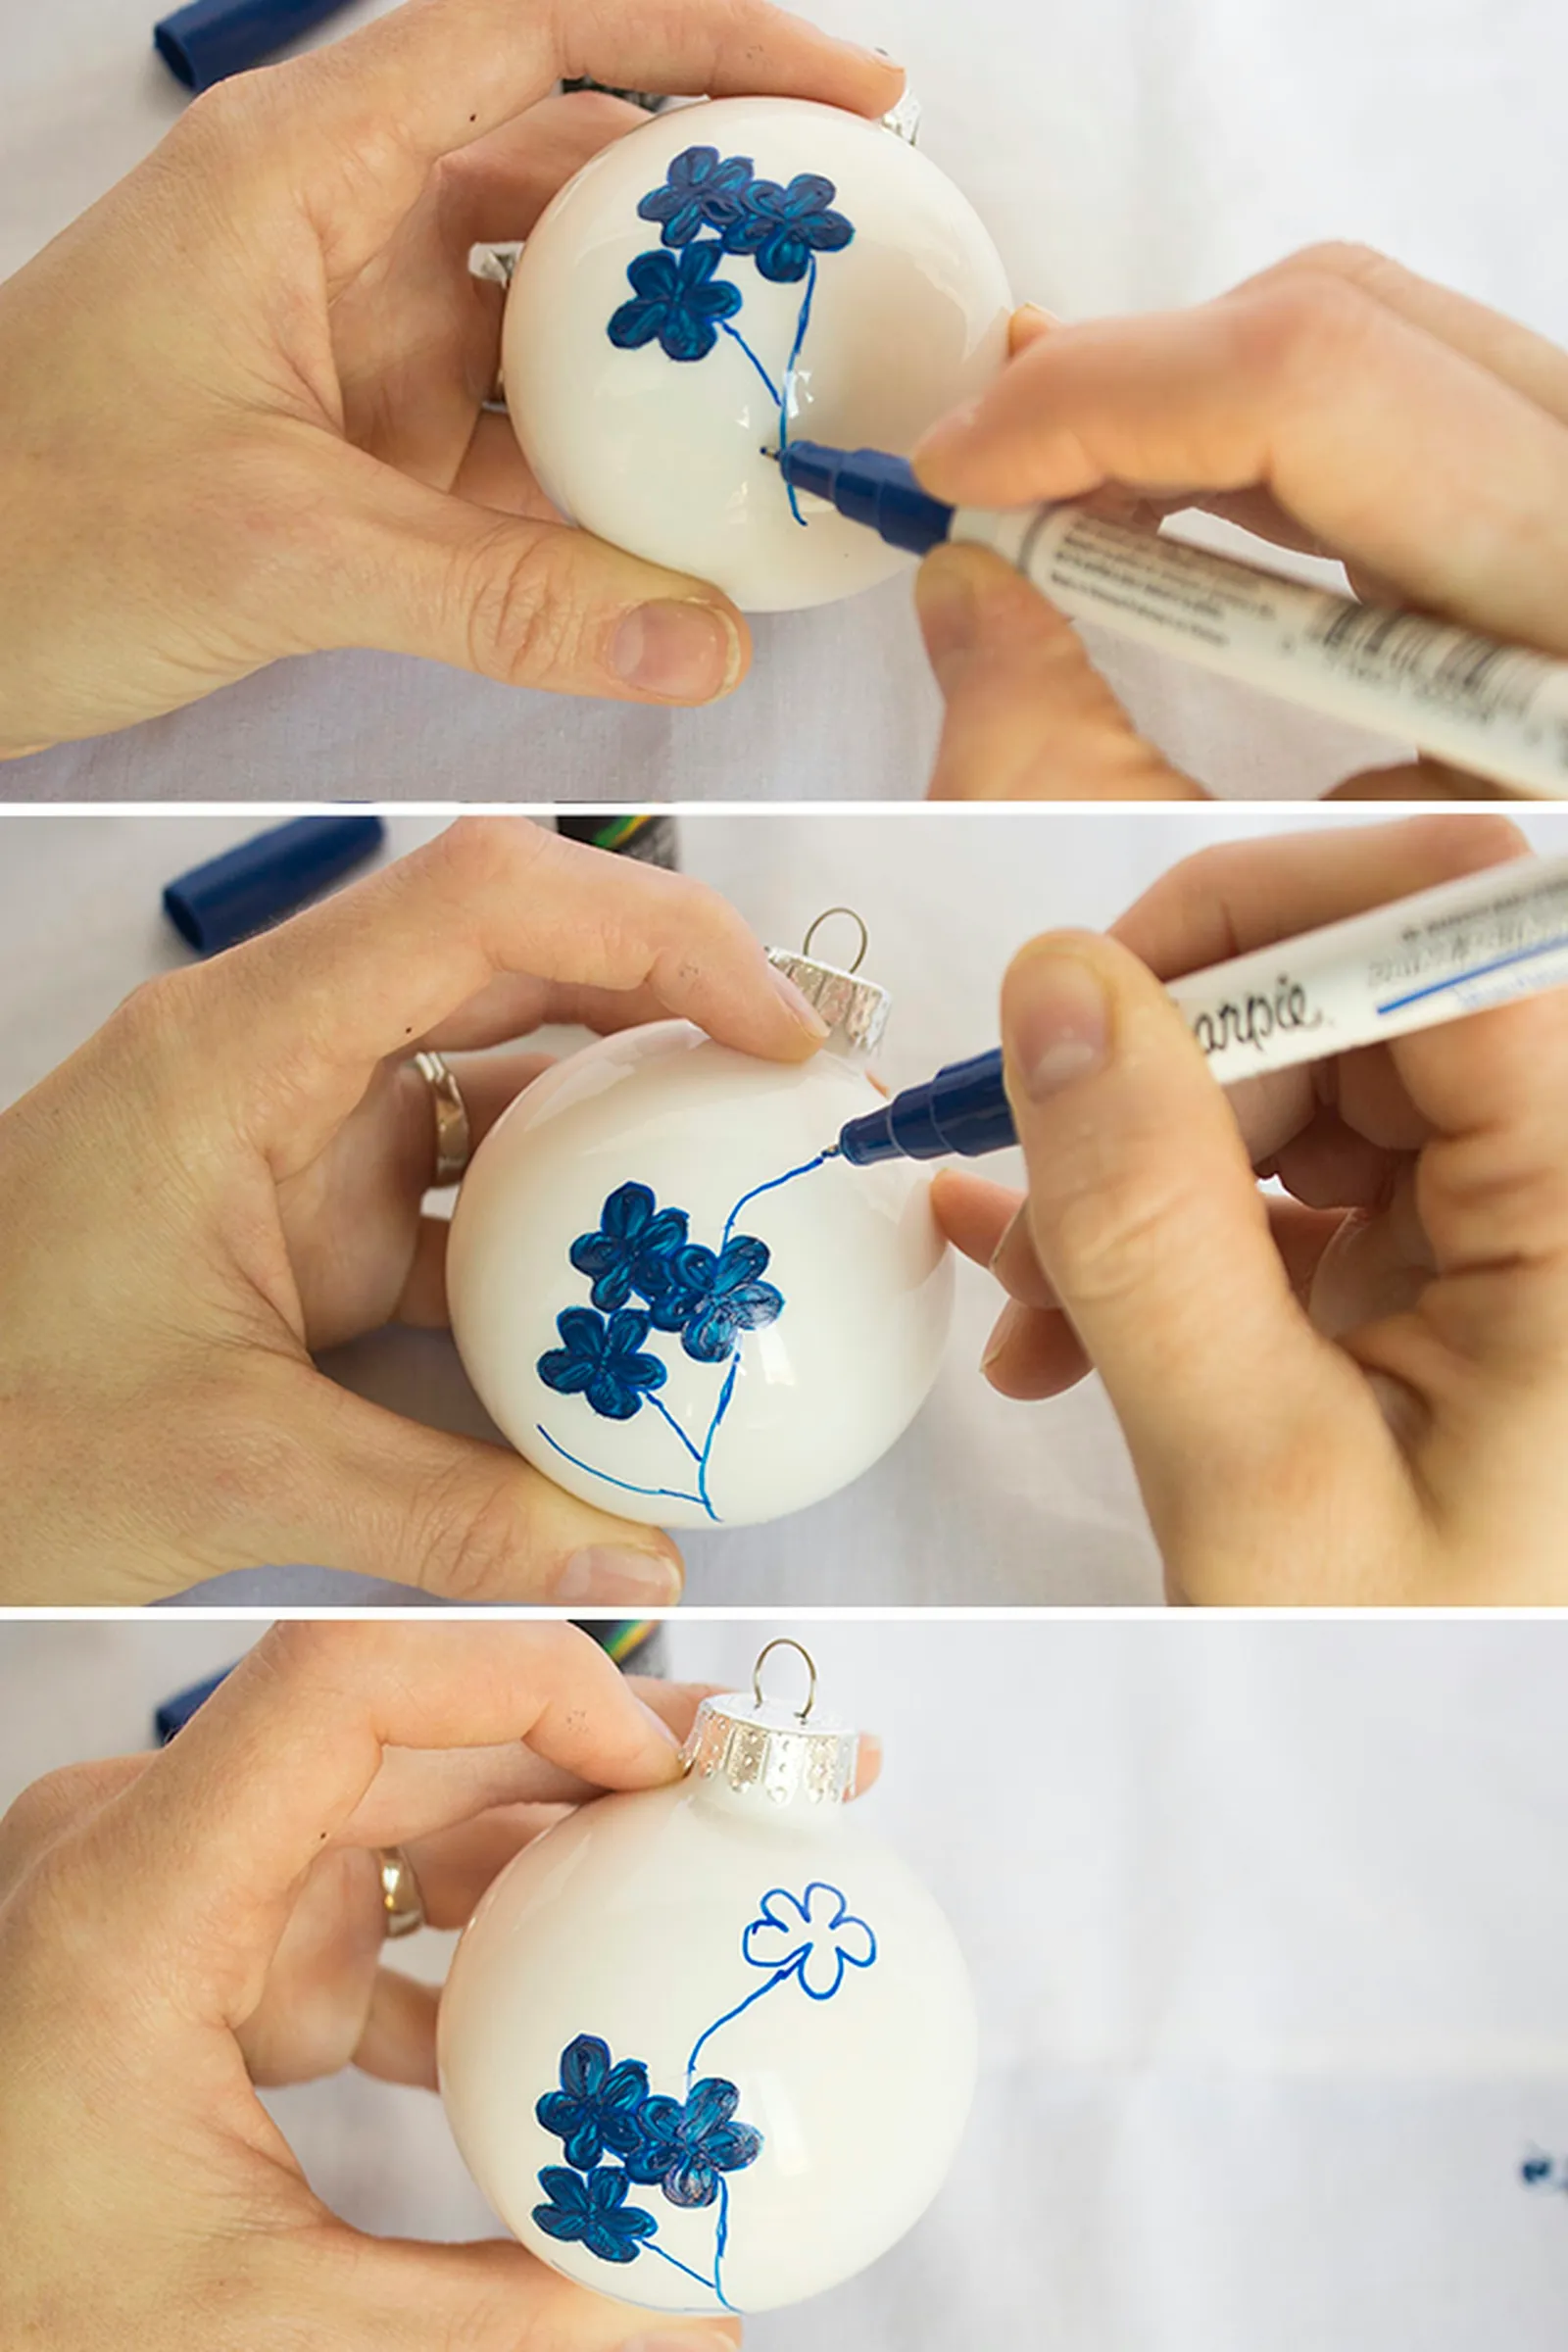
Step 5: Paint Over Stem Lines
Using the same paintbrush (size 3, round tip), with only a very small amount of paint on the very tip, paint over the stems that you drew with the paint pen. If too much paint is on the bristles of the brush, the stem will look too thick. Simply wipe it off with a tissue before it dries and make sure the fresh paint doesn't extend more than about 3/8 inch up the brush.
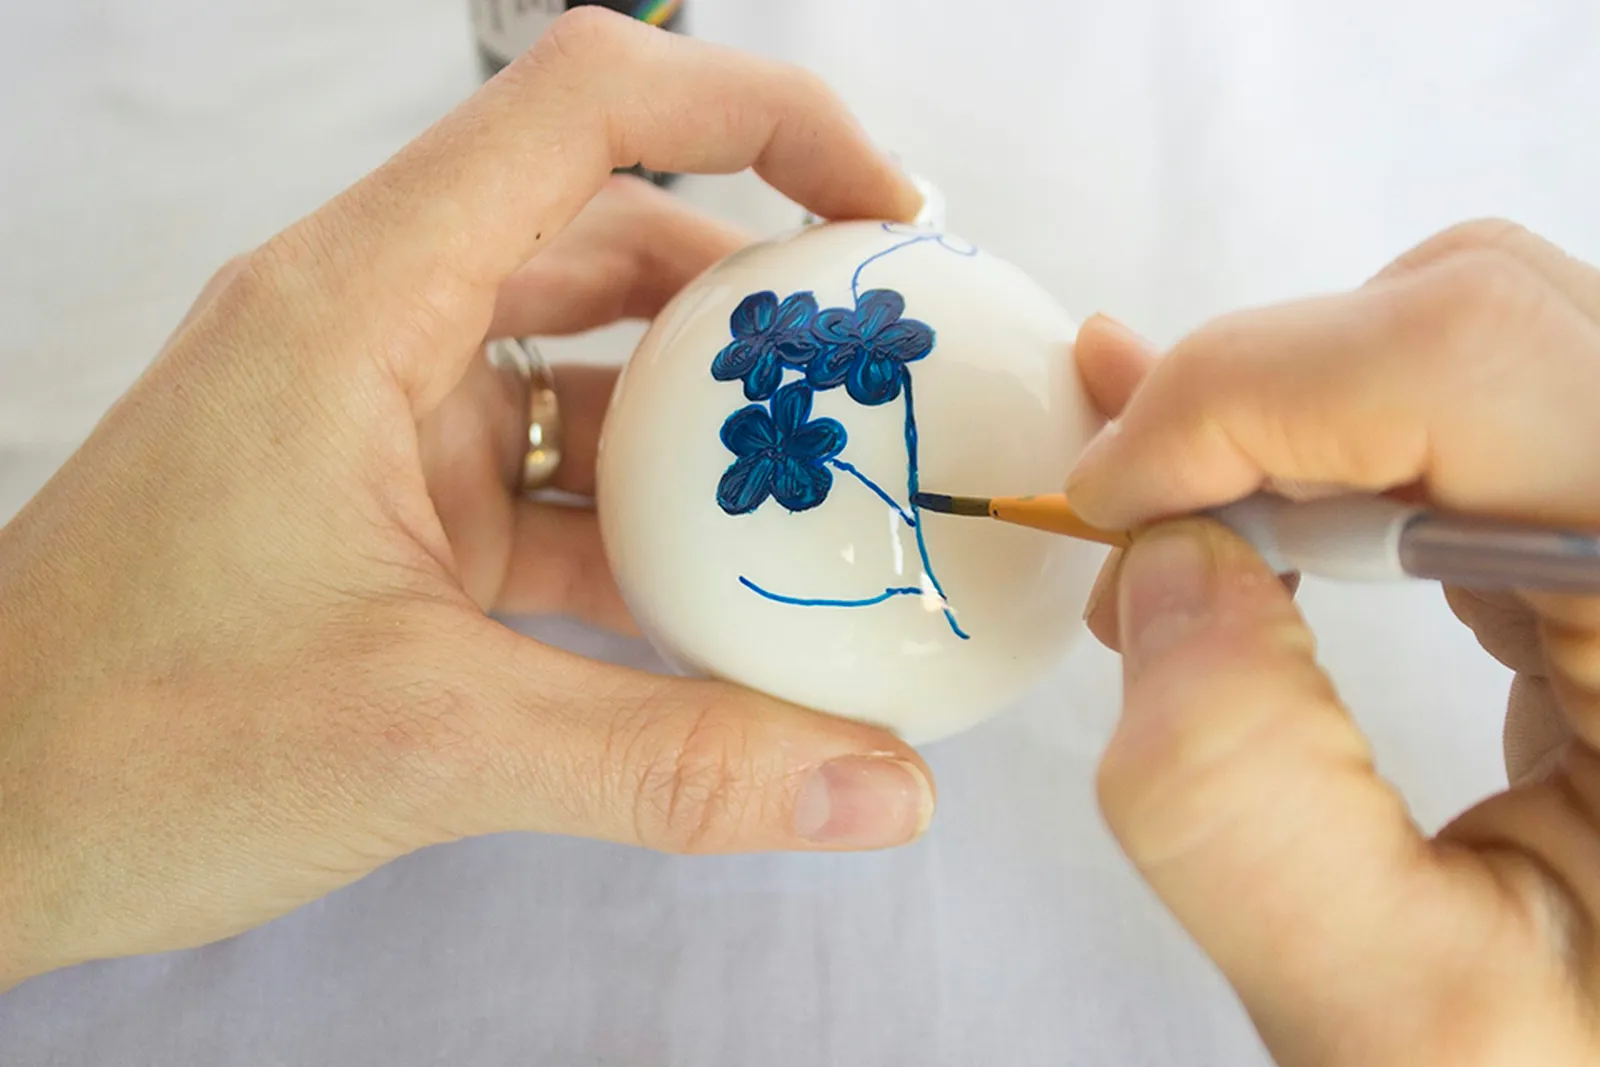
Step 6: Paint Leaves on Stems
To paint the leaves, start with a small amount of paint at the tip of the brush and gently draw a line about 1.25 to 1.5 inches up from the stem, pulling it toward you in a slight curve while applying light pressure, then lifting the brush as you get to the stem. This will make the center part of the curved line slightly thicker. A little below where you initially started the tip of the leaf line, paint alongside your first line, but keep the line more straight, and pull it toward the stem with gentle pressure. Repeat this process for several leaves on all the stems.
Step 7: Fill in Top Flower
Fill in the top flower with paint and trace over the stem with the paintbrush.
Step 8: Adorn Flower Heads with Leaves
Paint additional leaves along each flower head with the paintbrush and multi-surface paint, using the same method as demonstrated in Step 6. Keep leaves in groups of two, one smaller and one larger, when adorning the flower heads.
Step 9: Repeat Flower and Stem Pattern Twice
Rotate the ornament part-way, turn it upside down, and repeat the same flower and stem pattern from Steps 2 through 7. Then turn the ornament toward the remaining empty space, rotate it halfway, and repeat this pattern again. Add additional leaves as desired.
Step 10: Bake Ornaments
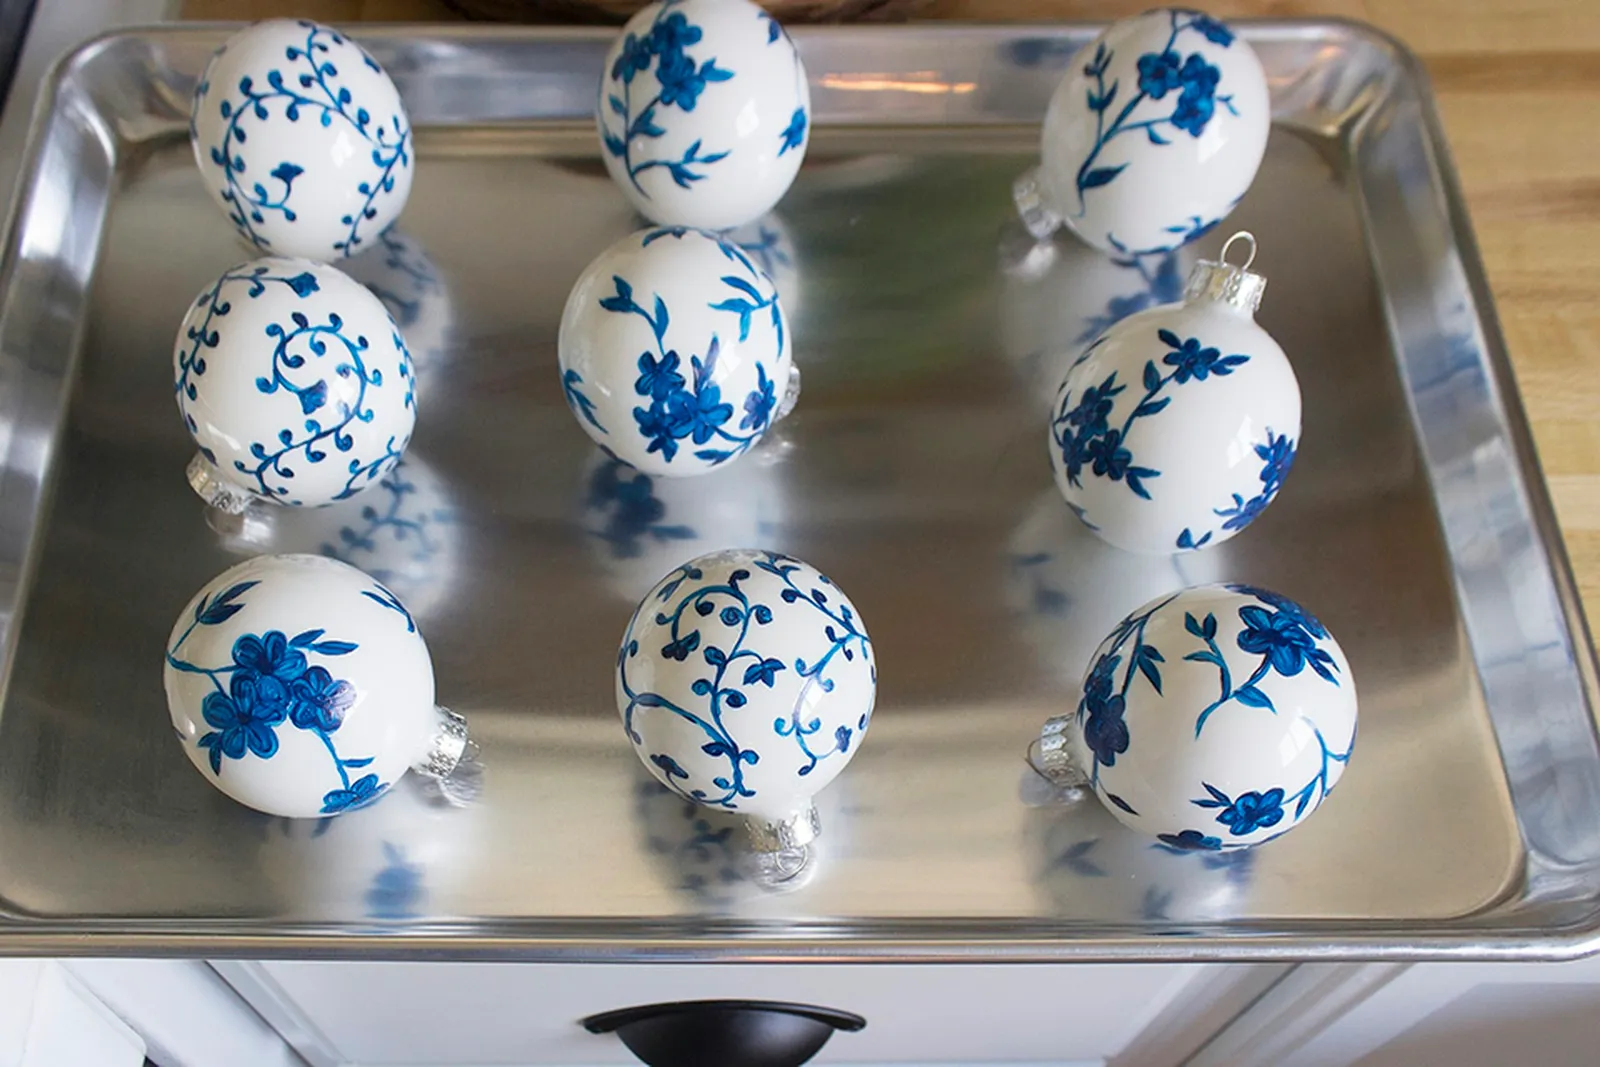
Once you've painted several ornaments, place them on a baking sheet and bake at 350 degrees for 30 minutes, or as directed on the multi-surface paint bottle.
How to Decorate With Chinoiserie
Now that you have your beautiful chinoiserie ornaments, you have several ways you can make use of them:
When the ornaments are cool, attach a wire hook to hang them on a tree or garland.
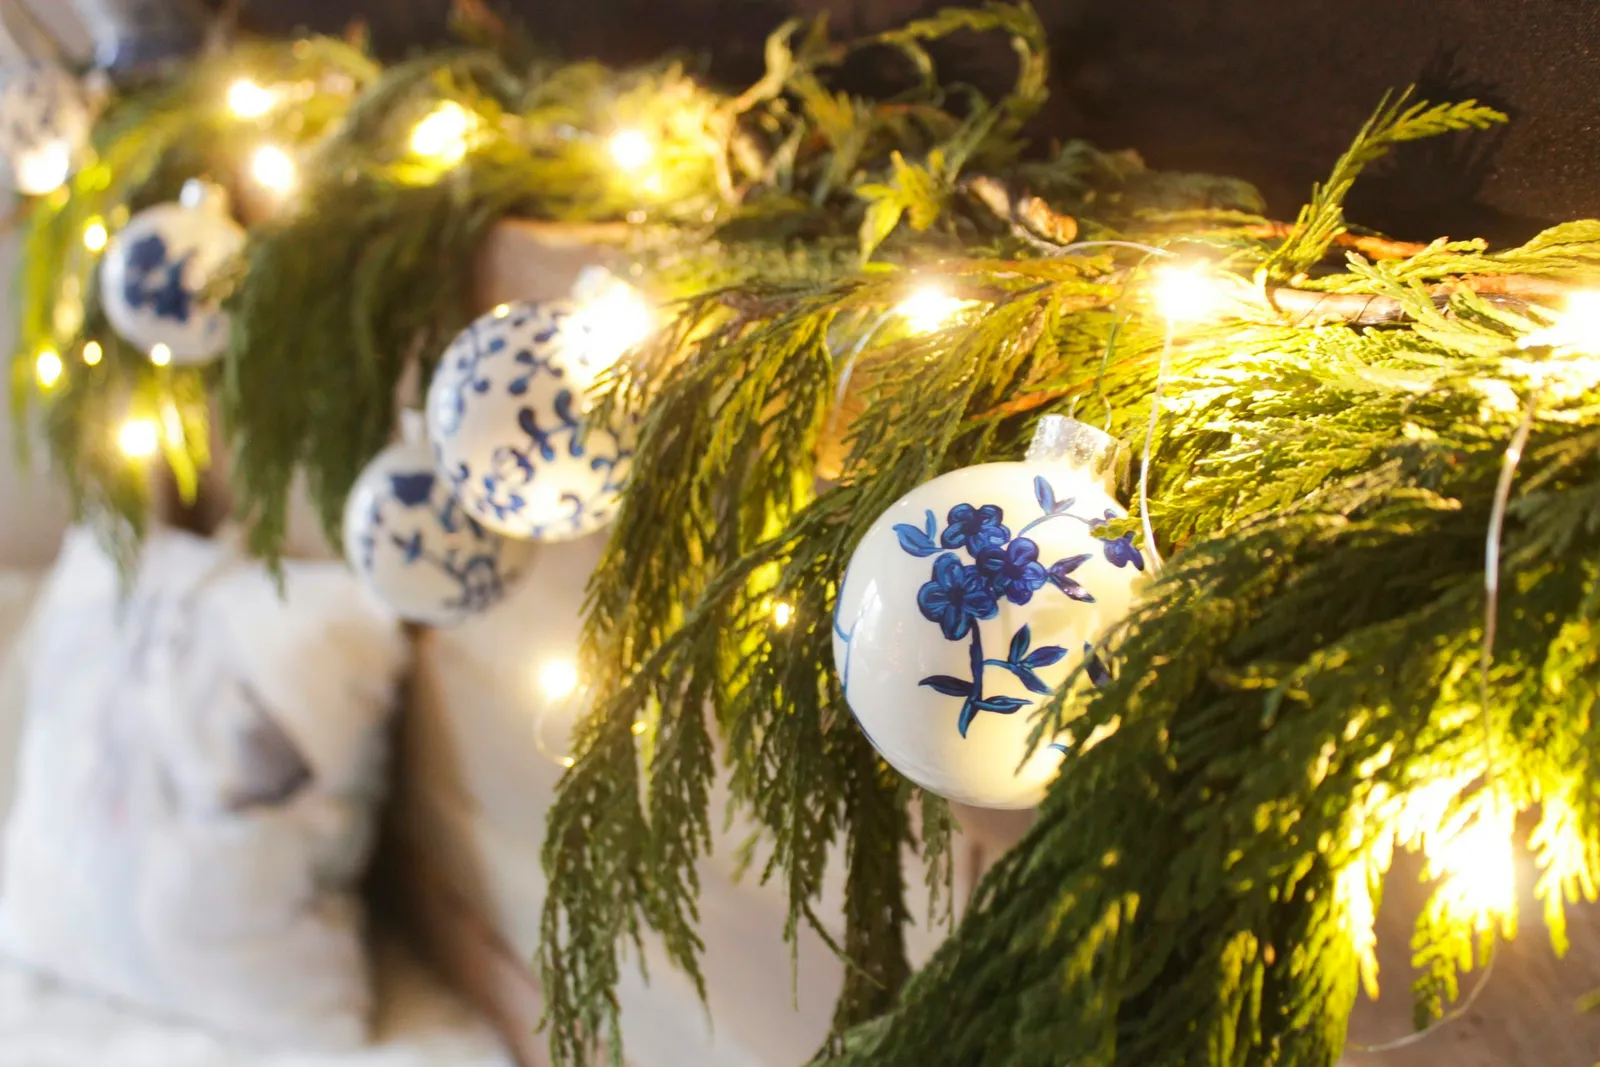
The Chinoiserie ornaments can also be arranged in a dish or bowl to be used as a festive centerpiece.
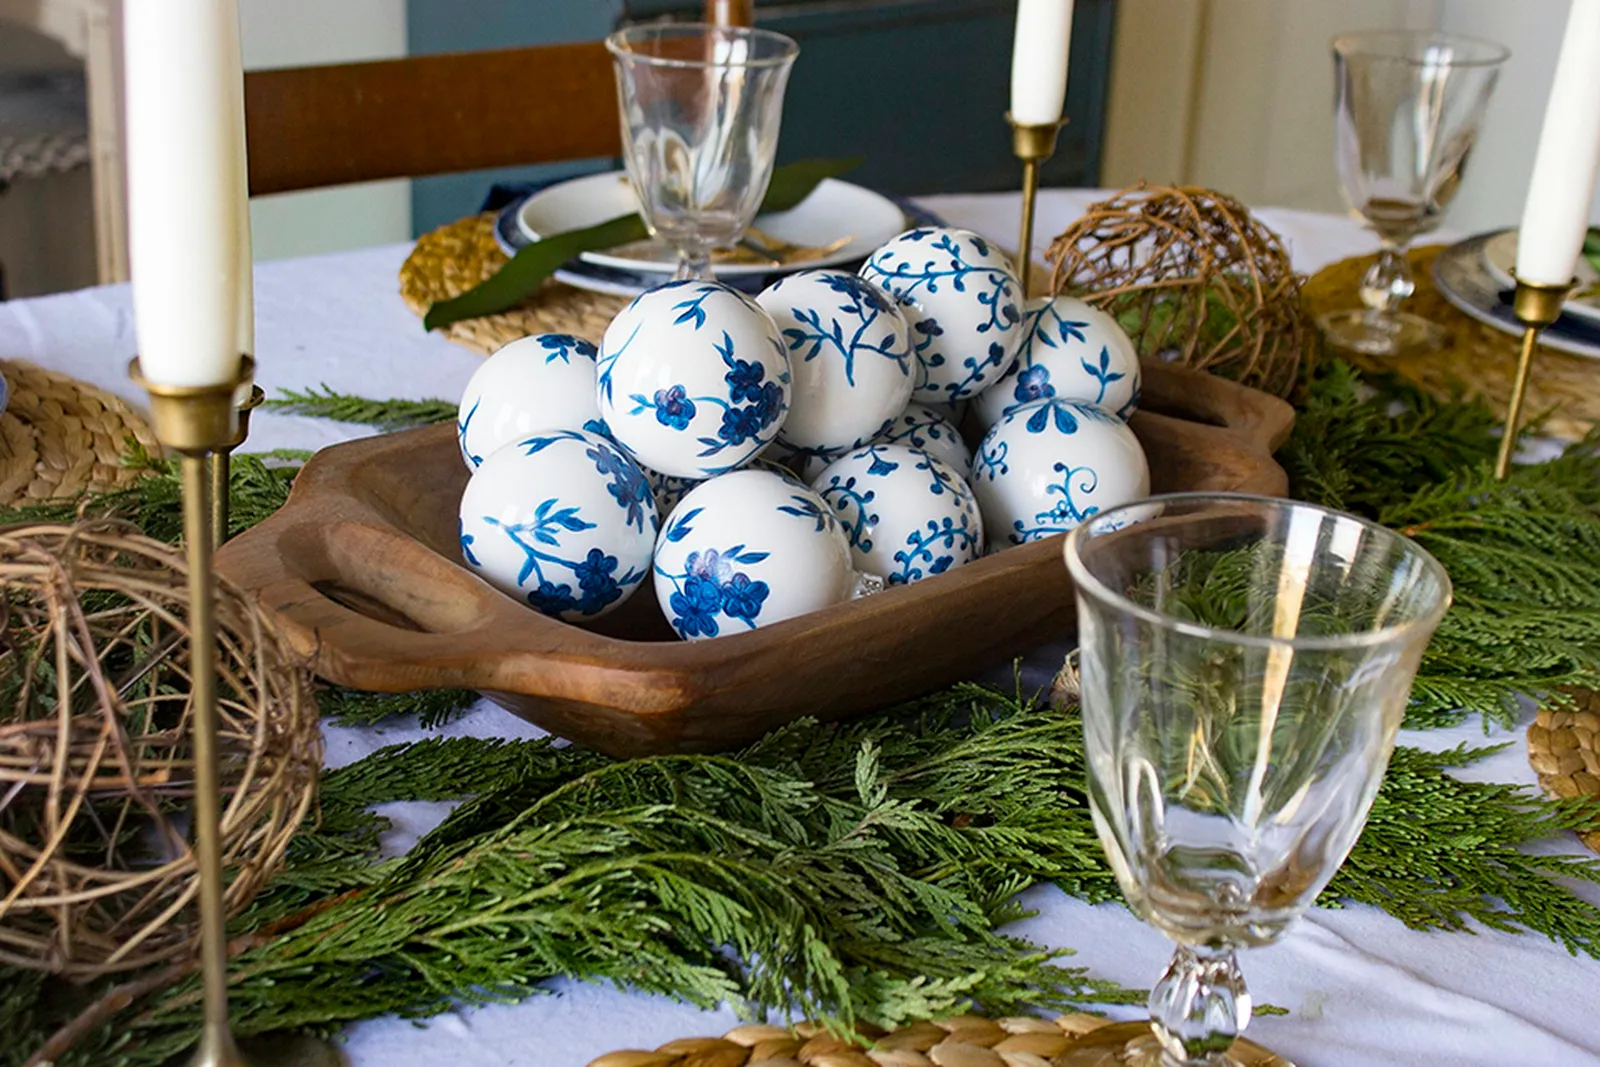
These gorgeous, hand-painted ornaments can be packaged and given as gifts, or kept and treasured for years to come.